25+ Painted Furniture Ideas for the Home -Before and After
Today I gathered up LOTS of painted furniture before and after pictures of projects I’ve completed in hopes of giving you some great inspiration to reinvent some outdated furniture pieces in your home.
Creating a new life with old furniture can save you lots of money if you are planning on redecorating your home. But most importantly for me, it’s so special to not be wasteful. I’m certain you’ll find something in this post you can apply with furniture you might have considered getting rid of and create your own painted furniture ideas before and after.

Get more furniture painting inspiration here.
By using chalk paint, as well as other types of paint, around my home I have been able to give some outdated pieces a more modern look. Most of my furniture updates were not vintage pieces, just outdated!
Whether you are hoping to update some of your old furniture or just give garage sale or thrift store purchases a facelift, I hope you find inspiration today!
Before painting any furniture be sure to give the piece a good cleaning and wipe it down really well. Prep can make all the difference for good coverage and the overall finished product.
Painted Furniture Makeovers – A Before and After
1. Master Bedroom Nightstands Makeover
I’ll kick off today’s before and after with my master bedroom furniture. My husband owned the set when we got married 20 years ago. Since then, styles and trends have changed a lot. The quality was great, but it definitely needed updated to match everything else in our room. So, of course I grabbed a paint brush and the rest is history.
This project was completed before I started my blog, so the picture quality of the before shots is not fabulous, but you get the idea. I did not capture a full before bed shot, but you can imagine it based on the nightstand and armoire.
Master Bedroom Nightstands BEFORE:
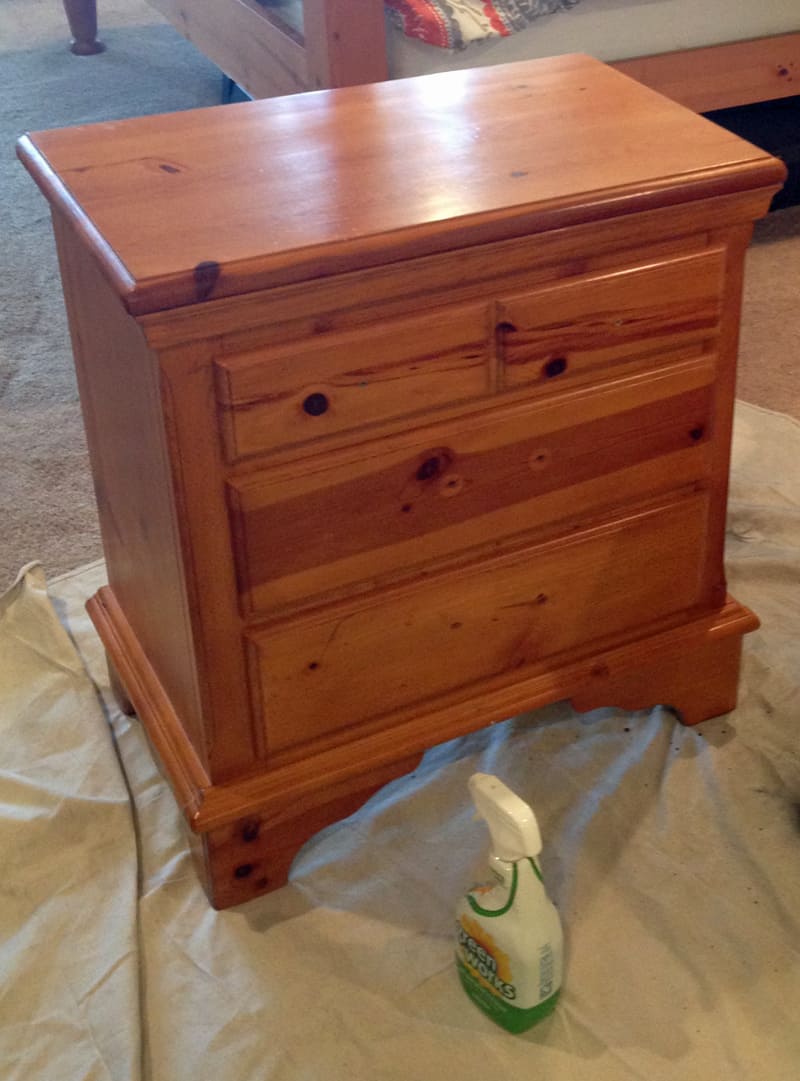
I had already taken all of the hardware / knobs off of the drawers.
Master Bedroom Nightstands AFTER:
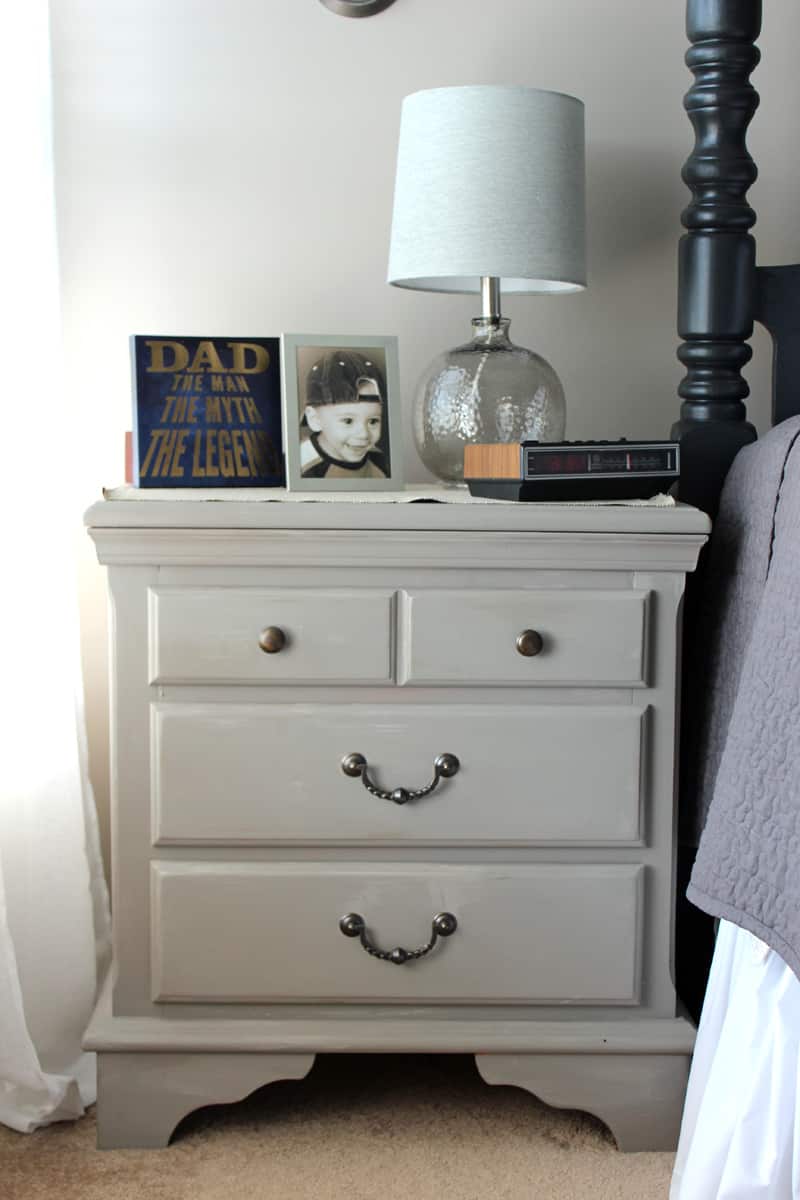
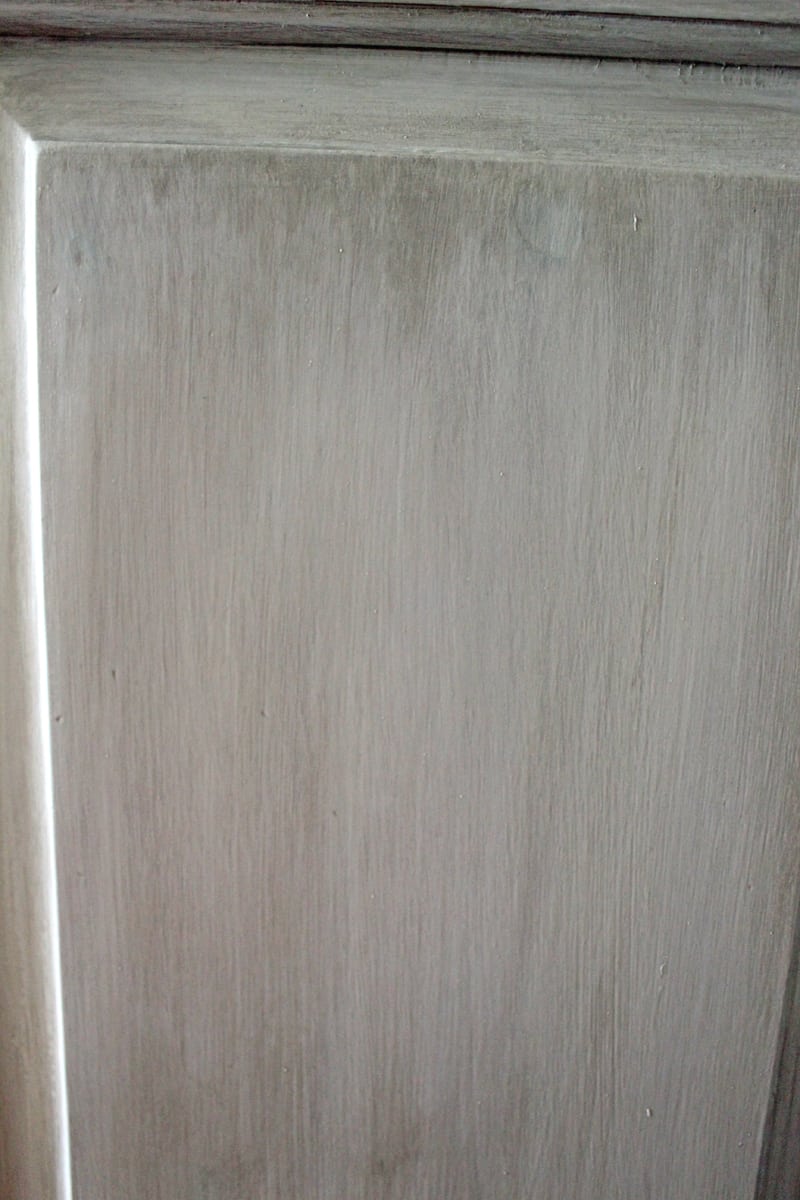
French Linen, an Annie Sloan chalk paint, was used on the night stands. The base of the armoire (below) is white chalk paint and I alternated using very diluted Annie Sloan French Linen and Coco to create a wash effect.
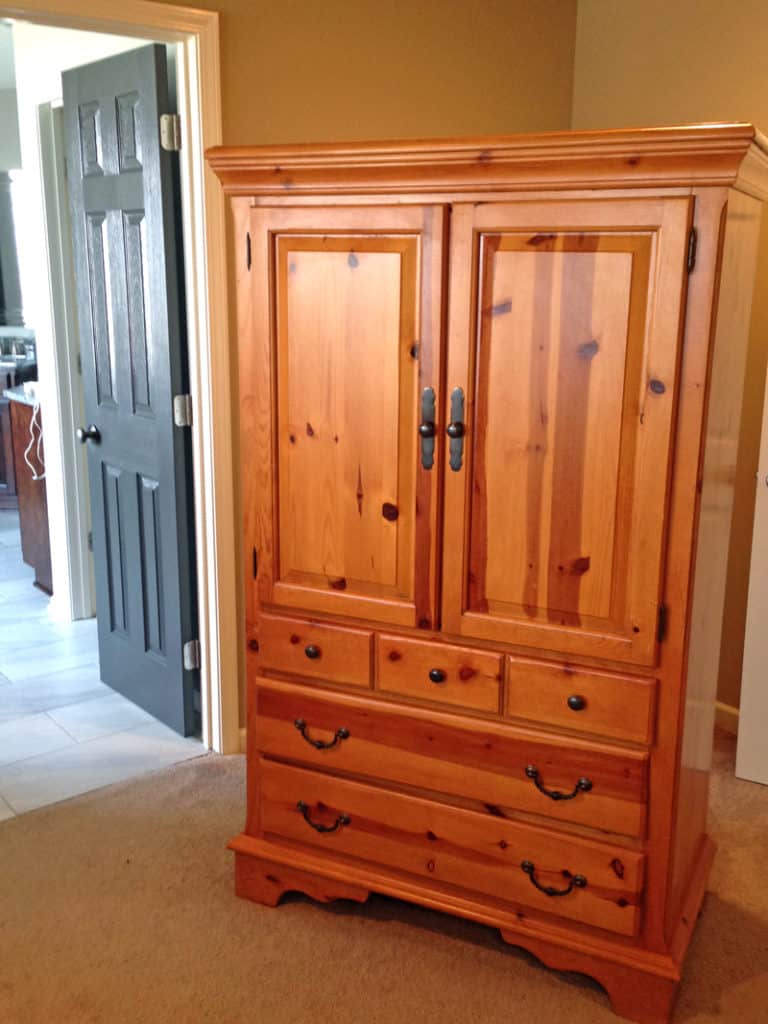
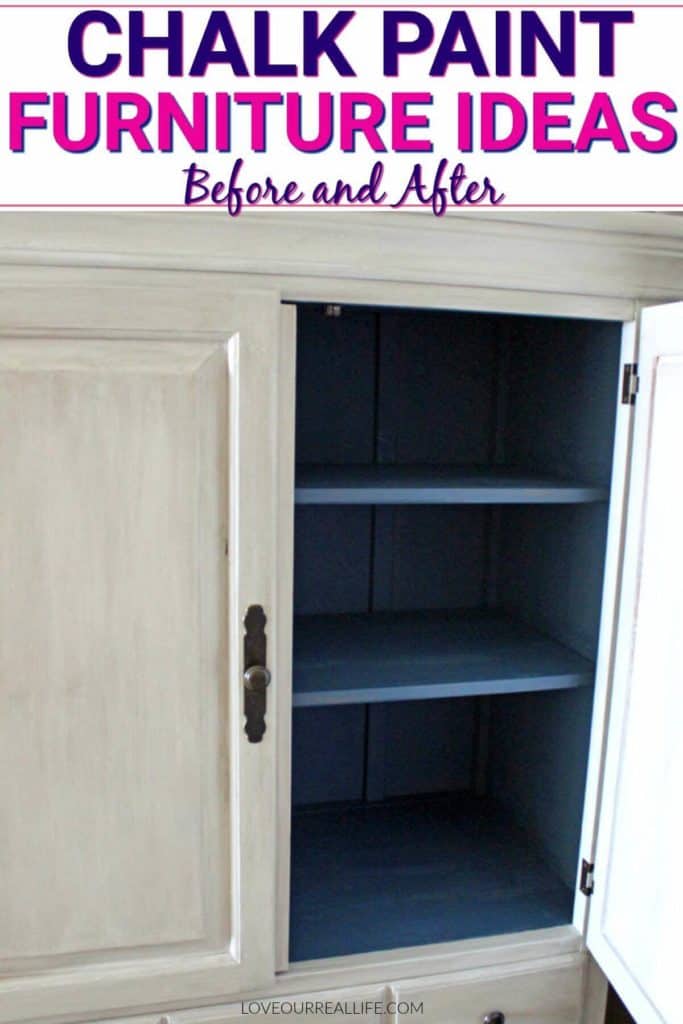
2. Master Bedroom Armoire Makeover
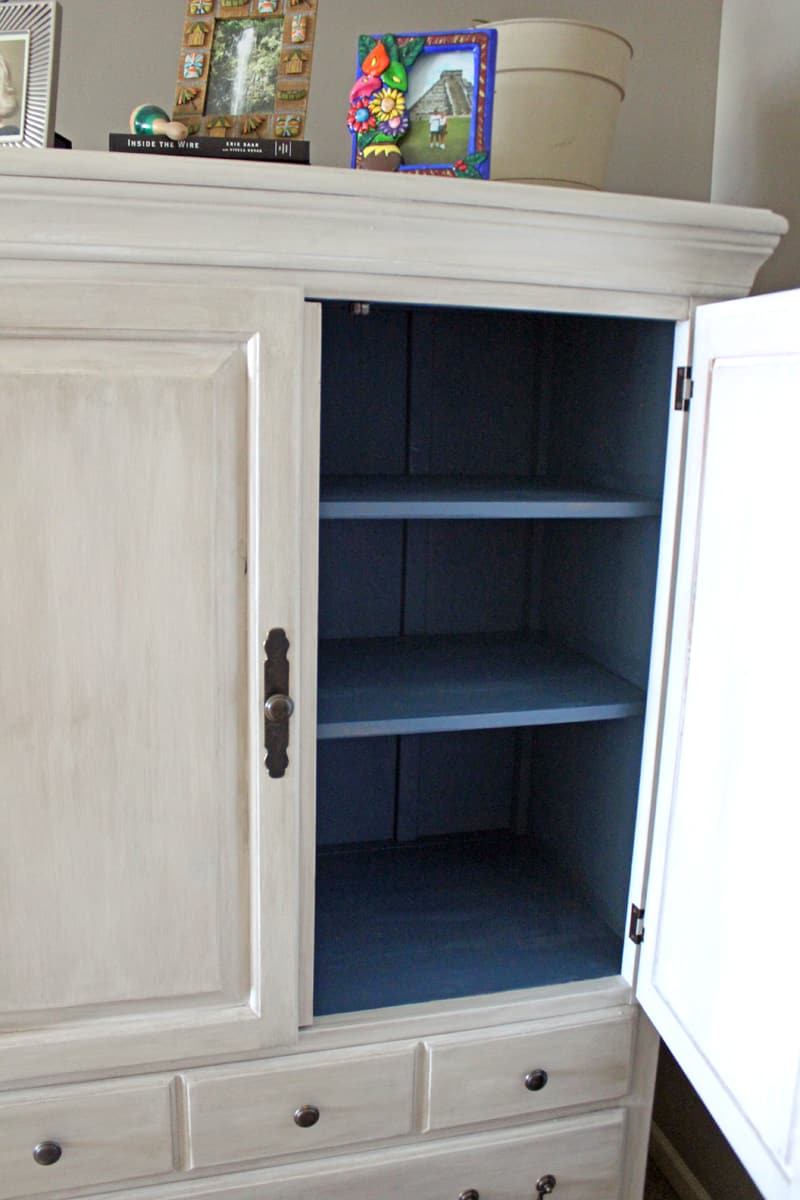
I painted the inside blue by mixing just a tiny bit of blue with white paint. I could not give you exact measurements as I did it on a whim and didn’t take notes.
By the way, I cook the same way! My husband has come to expect that a recipe I prepare is never the same twice. I love to experiment. He always tells me my food and projects turn out great…even if he’s not being fully honest, I appreciate it and it gives me the encouragement I need to keep trying new things.
Master Bedroom Armoire BEFORE:
Master Bedroom Armoire AFTER: 

What do you think about the blue shelves? If you haven’t tried something like this before, consider it. I love the little pop of color when the doors open!
Close up of the paint wash:
After looking at our bedroom set for so many years, I was ready for a change. As I mentioned, the quality was still great so painting them was a perfect option for me.
3. Master Bed Makeover:

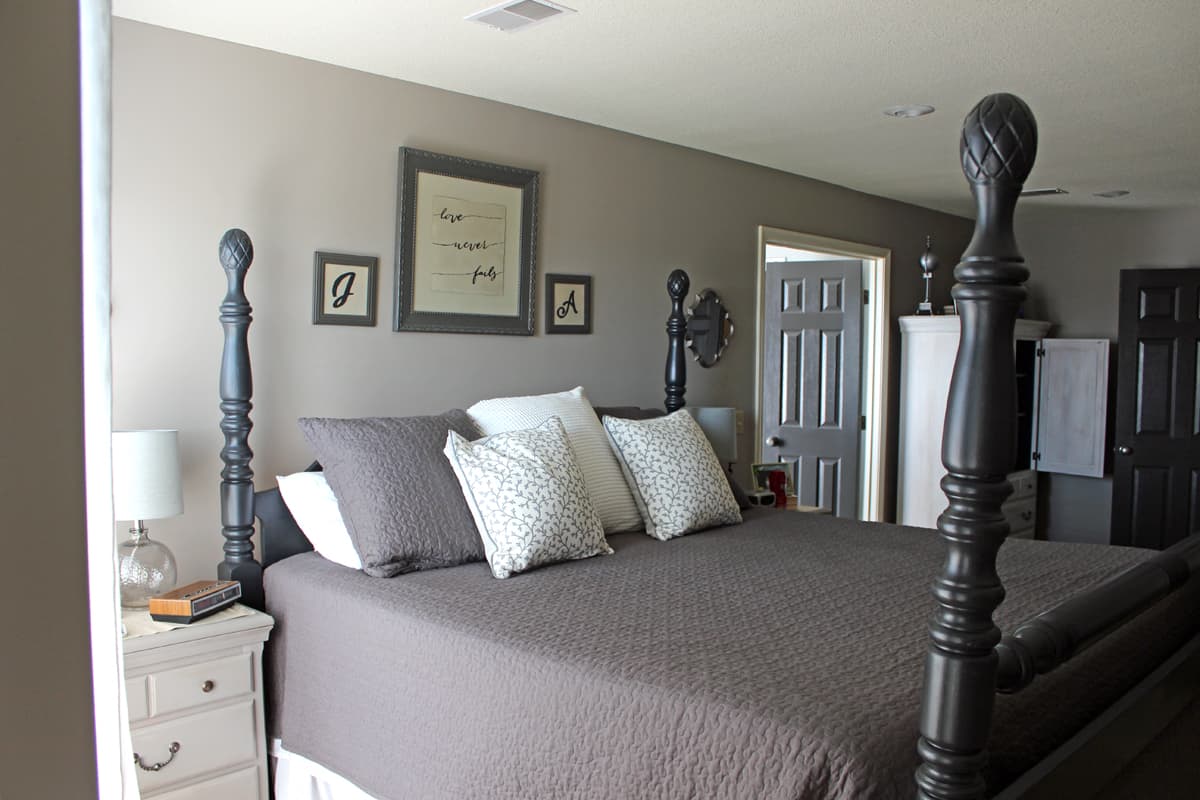
Amy Howard One Step paint in black was used for the bed. No more orange knotty pine! I used to love the look and I know some won’t love that I painted over them.
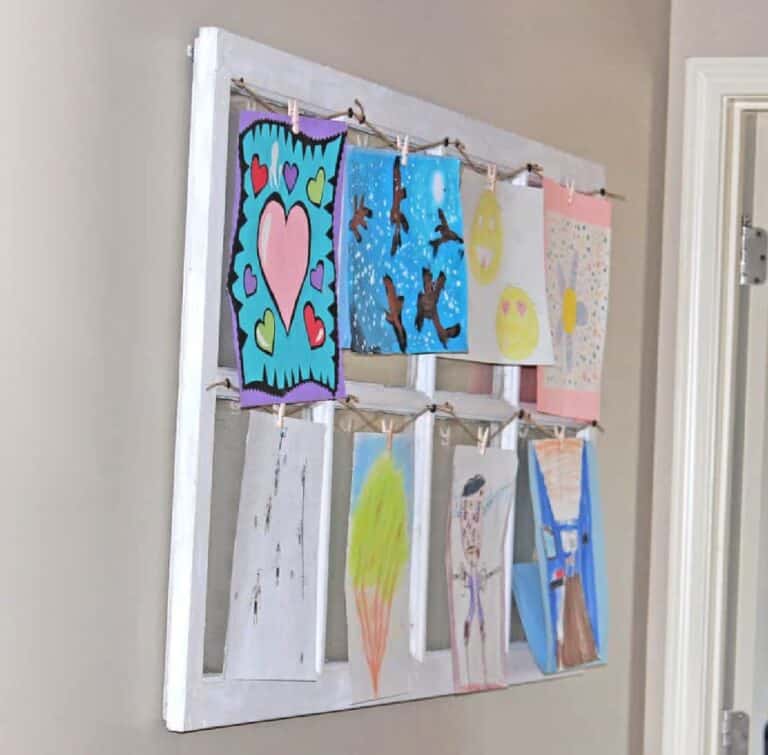
You can read about how I transformed the picture frames above my bed at my post: Paint Old Frames to Update Your Decor. I painted the frames as well as the prints inside. The pictures that were in the frames had various shades of orange, yellows and reds.
Obviously that didn’t match my new furniture, so I painted them too! I painted our initials in the small frames and used the Bible scripture “Love Never Fails” in the large frame. My husband had that engraved in my wedding ring, so it was perfect!
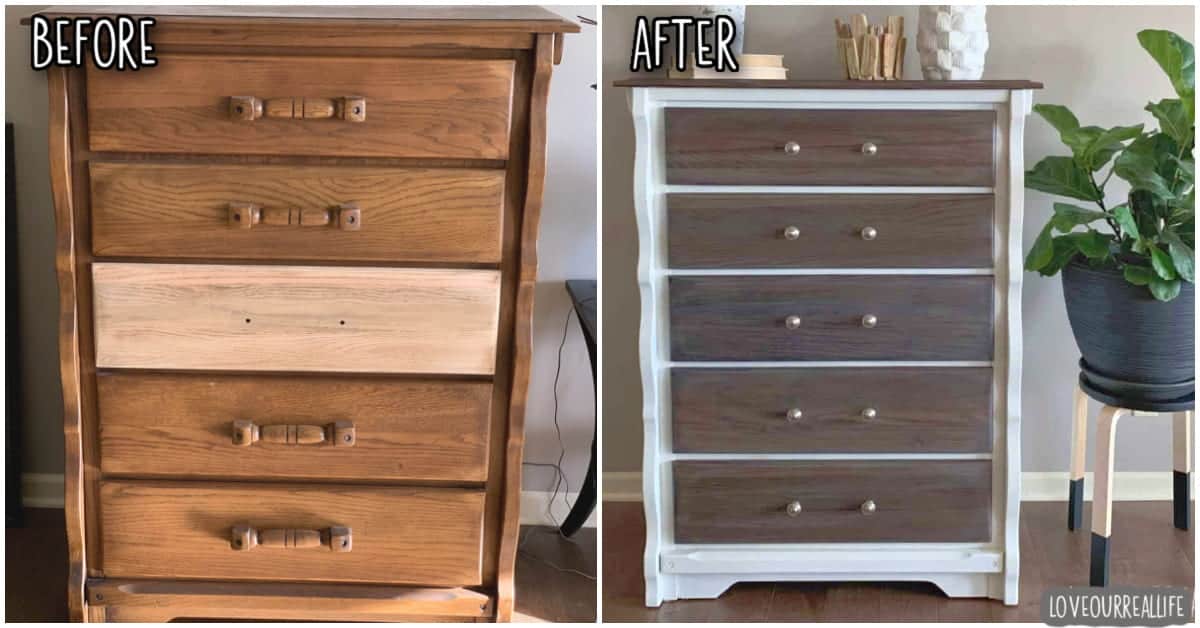
4. Dresser Makeover
For this dresser makeover, I used stain on the top and drawer fronts and painted the body white. When painting with white paint, make sure you use a primer, even if the brand of paint you use states no primer is needed.
It has been my experience that bleed-through of tannins or old, dark stains happens all too often when painting over wood with white paint. Apply a thin layer of primer and you should be set.
Dresser Before and After
Good quality paint brushes are helpful for reducing brush strokes, so make sure you grab a nice Purdy brush. It will last for years with proper care.
New hardware was added for a nice update.
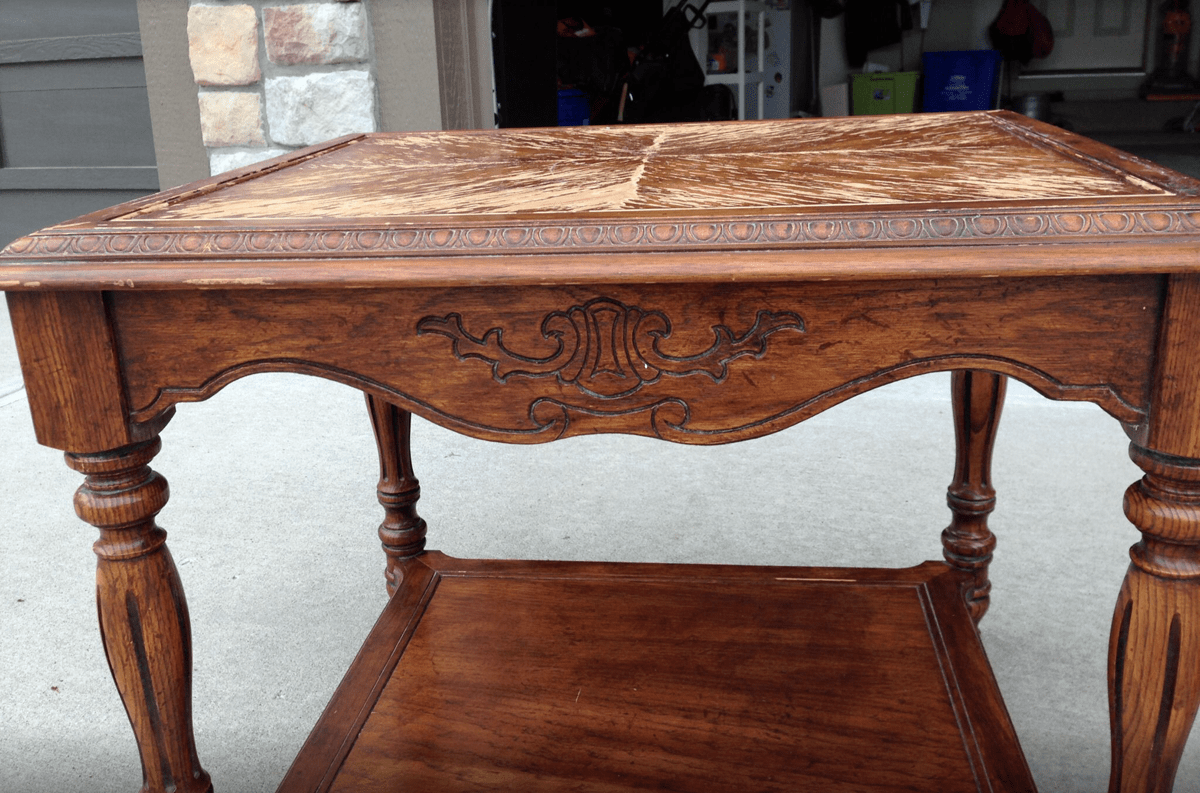
5. End tables Makeover
Next, I’ll show before and after shots of one of my very first furniture painting projects. My parents had some old side tables in their basement stacked in a corner. They were pretty beat up, but I really thought I could find a way to transform them.
With the help of my daughter, we cleaned them well, wiping away all the dirt, dust, and grime. Then we used some black chalk paint with a bit of distressing. What a difference!
End tables BEFORE:
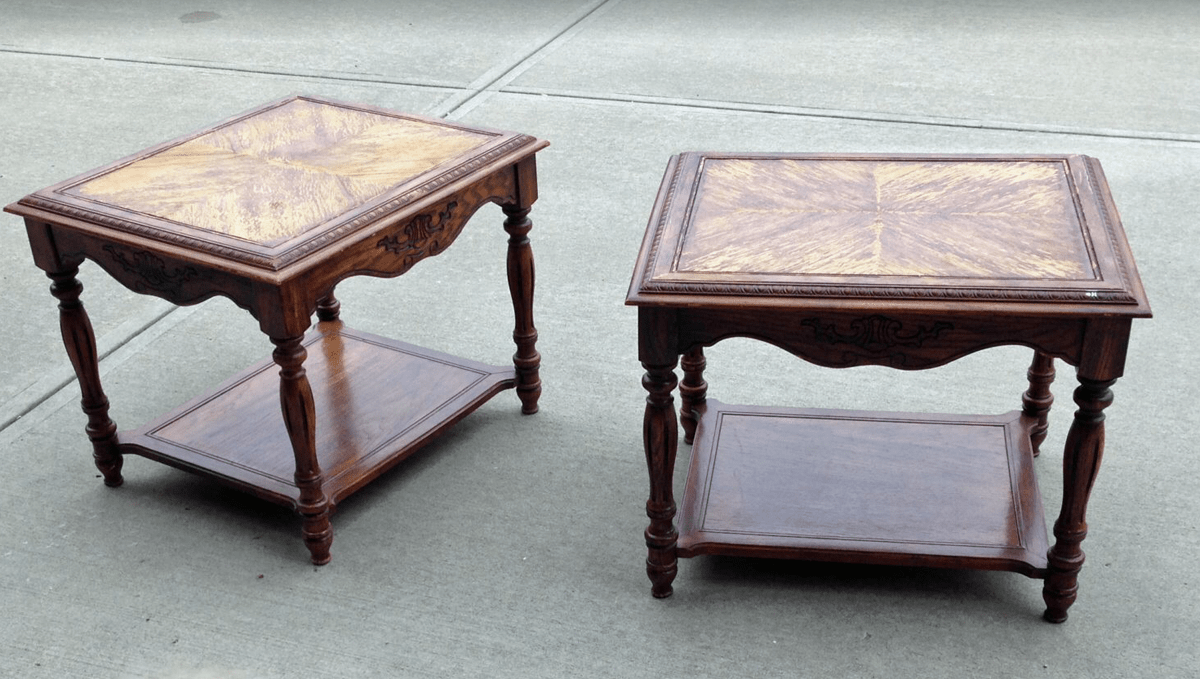
Check out those table tops. They definitely needed some TLC!
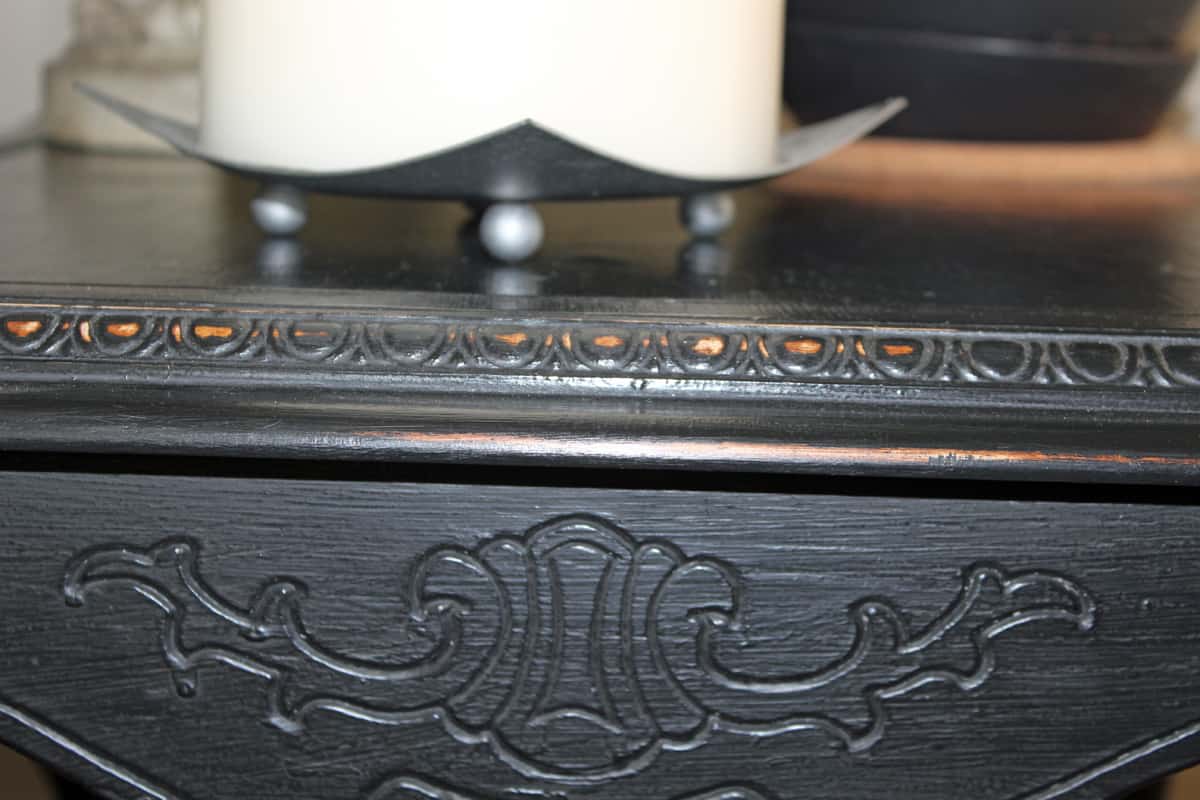
End tables AFTER:
The table tops were in pretty bad shape before. We did lightly sand them with fine grit sandpaper before applying the black chalk paint.

Looking back, I think I would have just removed the piece of laminate from the top as it was pretty warped. BUT, it’s still so much better.
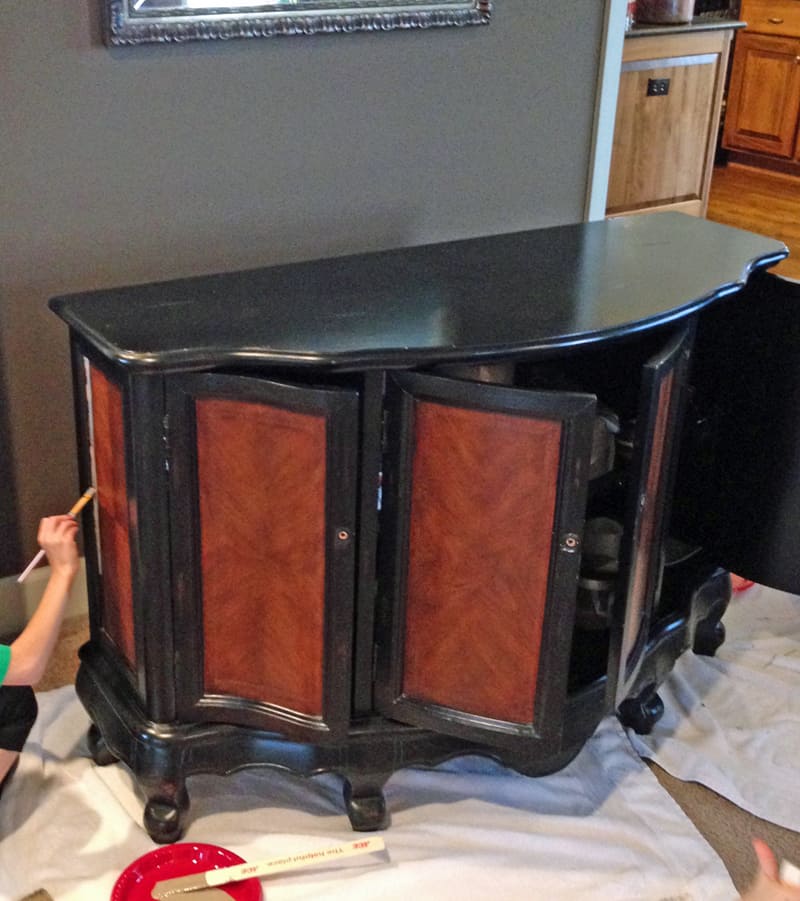
6. Charging Cabinet Makeover
The next project might be one of my favorite furniture transformations, mainly because we use it all of the time AND my kids helped me!
I painted an outdated cabinet and made it into a charging station for my kids to keep their electronics stored at night. You can get all of the details of my process at How to Create a Charging Station for Your Electronic Devices in a Cabinet.
Charging station BEFORE:
Charging station AFTER:
My mirror is super dirty! I didn’t see it until I was going through this post. Don’t forget, my blog is Love Our Real Life and dirty mirrors is certainly part of my real life;-)

If you are curious how we use this cabinet for a charging station, have a peek inside:

My husband cut a hole in the back of the cabinet to allow the power strip cord to fit through. I love closing the doors and having all of those cords and devices out of sight!
This cabinet was sealed with clear wax. To apply furniture wax, use a wax brush then use a lint free rag to remove any excess wax and to give it a light buff.
My prefered sheen is a matte finish. Chalk paint furniture gives me just that.
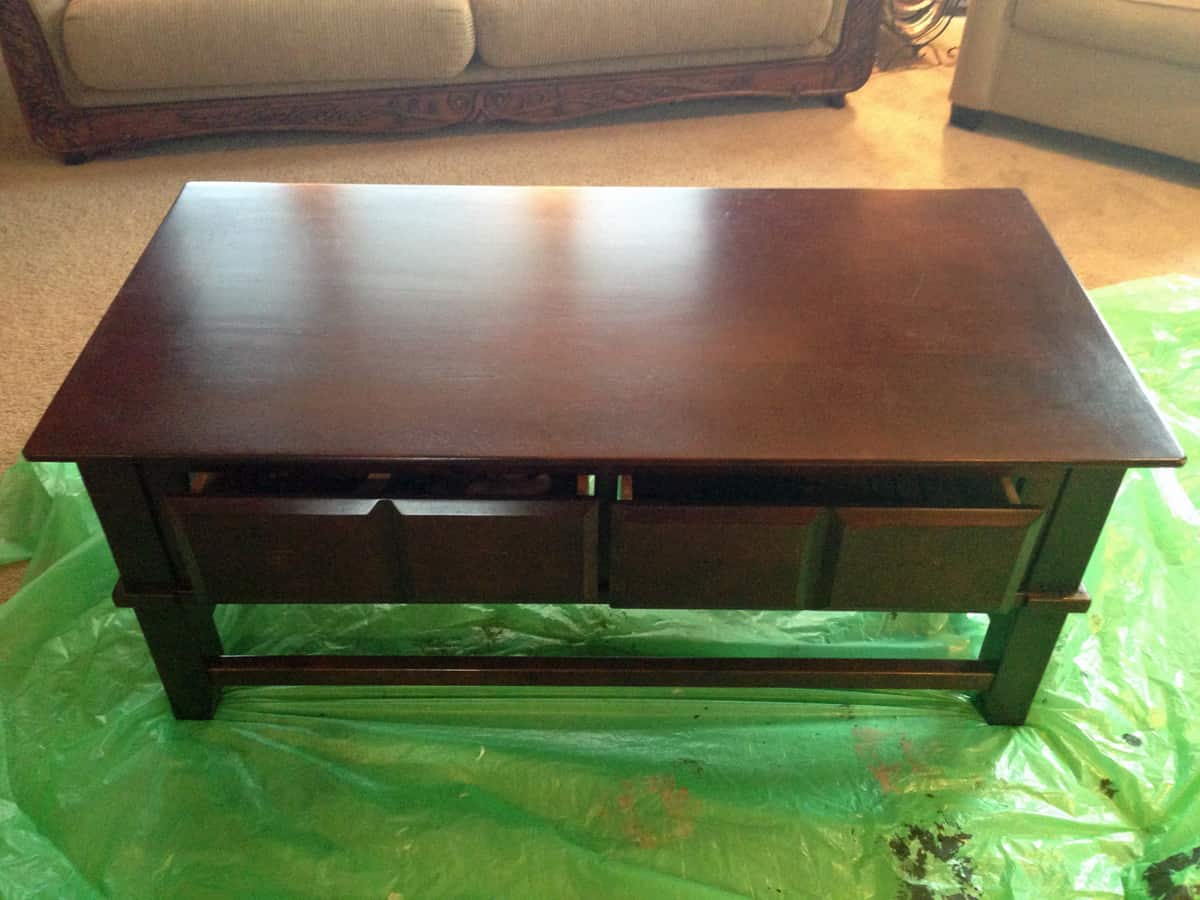
7. Coffee table makeover
Next, I’ll show you our living room coffee table. The finish had taken a beating through the years, so I didn’t think I had anything to lose by painting it as it looked pretty rough to begin with. It doesn’t look too bad in this photo, but trust me on this one.
Coffee table BEFORE:
I painted it Coco by Annie Sloan for the first coat of paint and used a French Linen wash. I also did a little dry brush application of Country Grey (Annie Sloan) as well as dry brushing of more Coco to add a little more depth. It was sealed with clear and dark wax.
As you can tell, I just keep adding a little bit at a time to get a look that works for me. Experiment! It really is fun and you’ll learn all sorts of tricks in the process!
Coffee table AFTER:
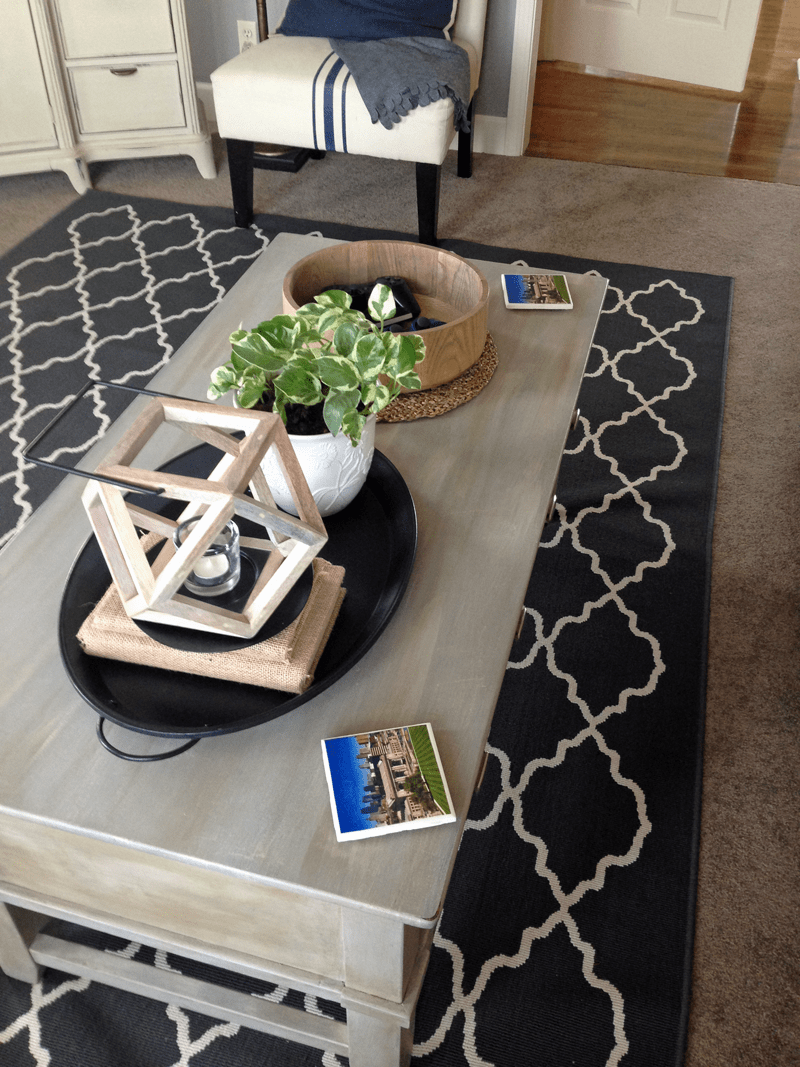
Take a look at the fun DIY coasters! They were an easy DIY using simple tiles, a photo, and mod podge.

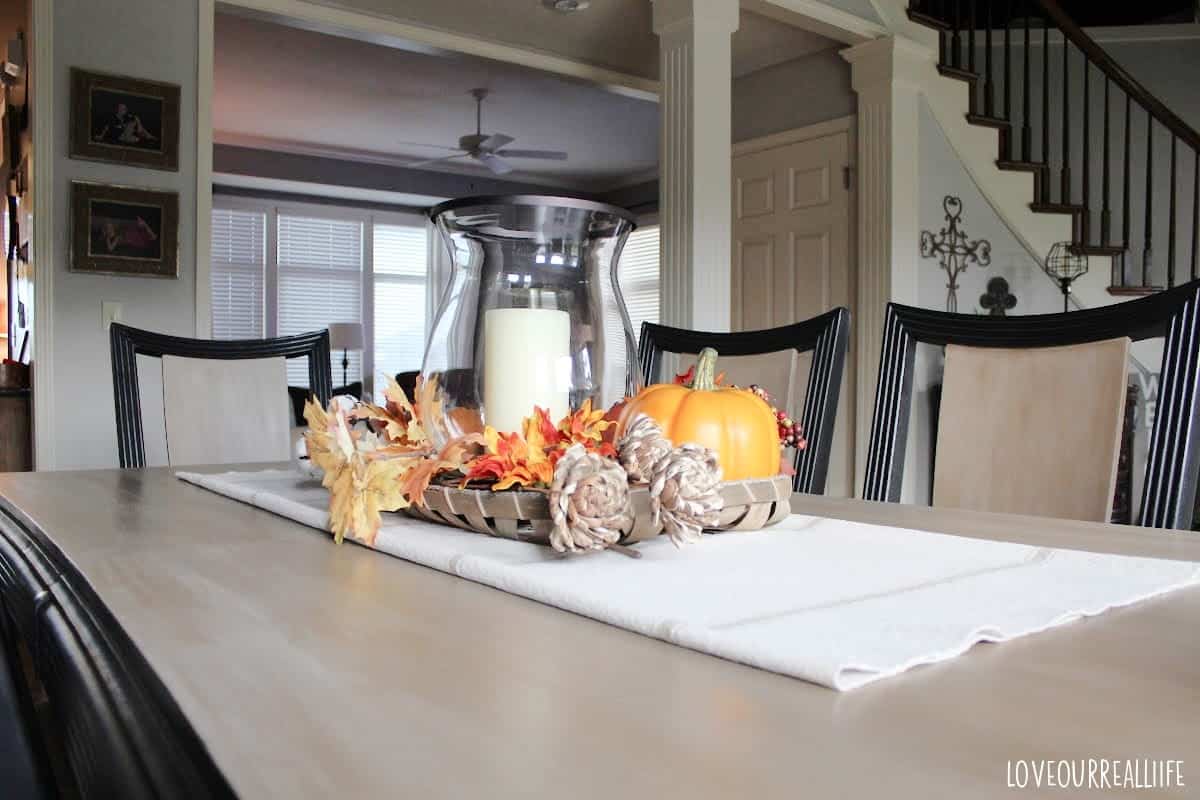
8. Dining Table Painted Makeover
At one time I strongly considered getting rid of my dining room furniture. It was very inexpensive when we got it many years ago…by inexpensive I mean cheap. We purchased it when we moved into our current home and at the time it’s all we were willing to spend.
The quality was fairly poor and the orange-based color no longer matched the rest of the home, so it was a prime target for one of my projects. The dining table/chairs and a buffet table were a matching set.
I say “were” because they are no longer used together. I’ve transformed both, but I’ve repurposed the buffet table into a media cabinet.
Dining room table BEFORE:

Dining room table AFTER:
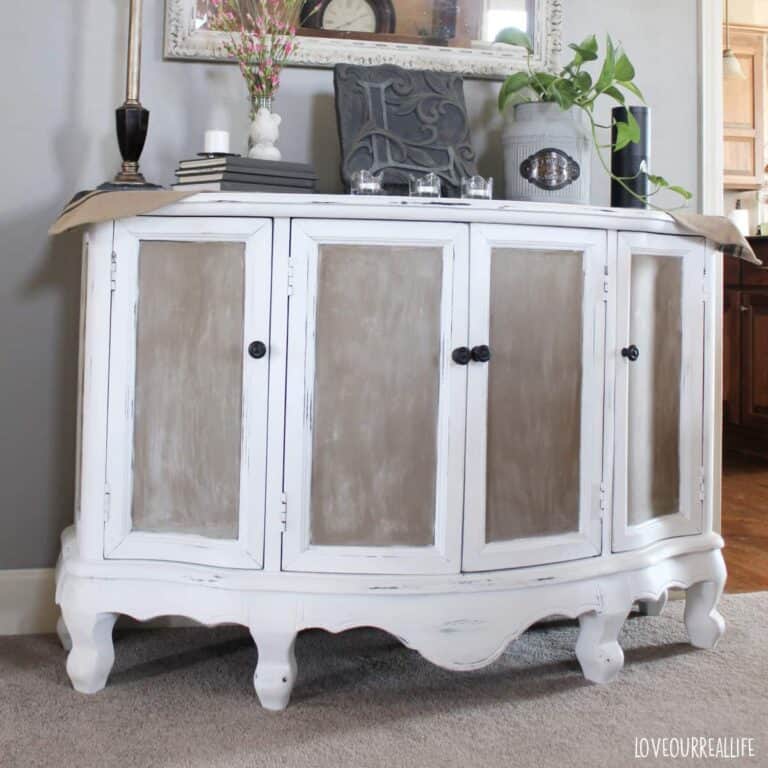
9. Buffet Makeover
Repurposing the buffet table into a media cabinet for our living area saved us from buying another piece of furniture in our living room. It worked great for the space. I do not have a before of the buffet. But, looking at the above dining table and chairs will show you the color.
The buffet was painted in Country Grey (which is really more of a cream color) chalk paint by Annie Sloan. A second coat was needed plus touch ups for good coverage. I did a bit of distressing around the edges to make it look like normal wear and tear.
Buffet table turned media cabinet AFTER:
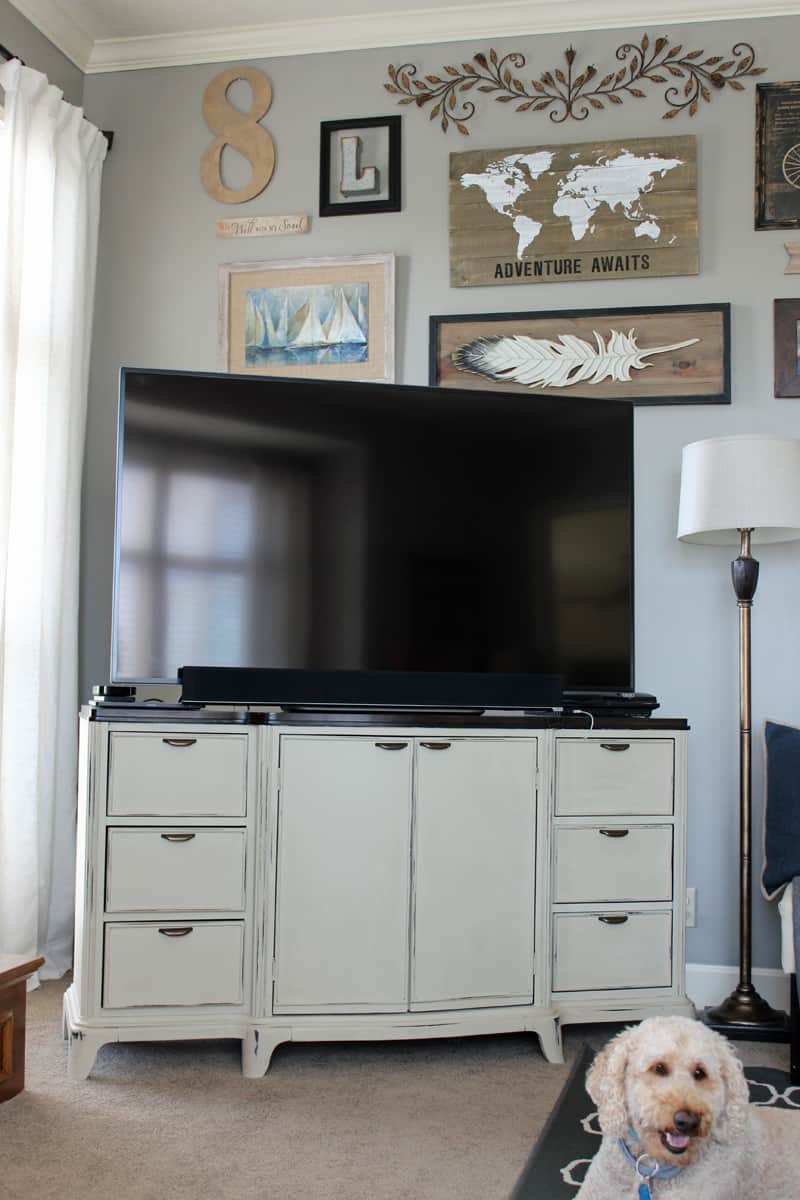
My goldendoodle, Bentley was posing for the camera. You can also get a peek at my gallery wall.
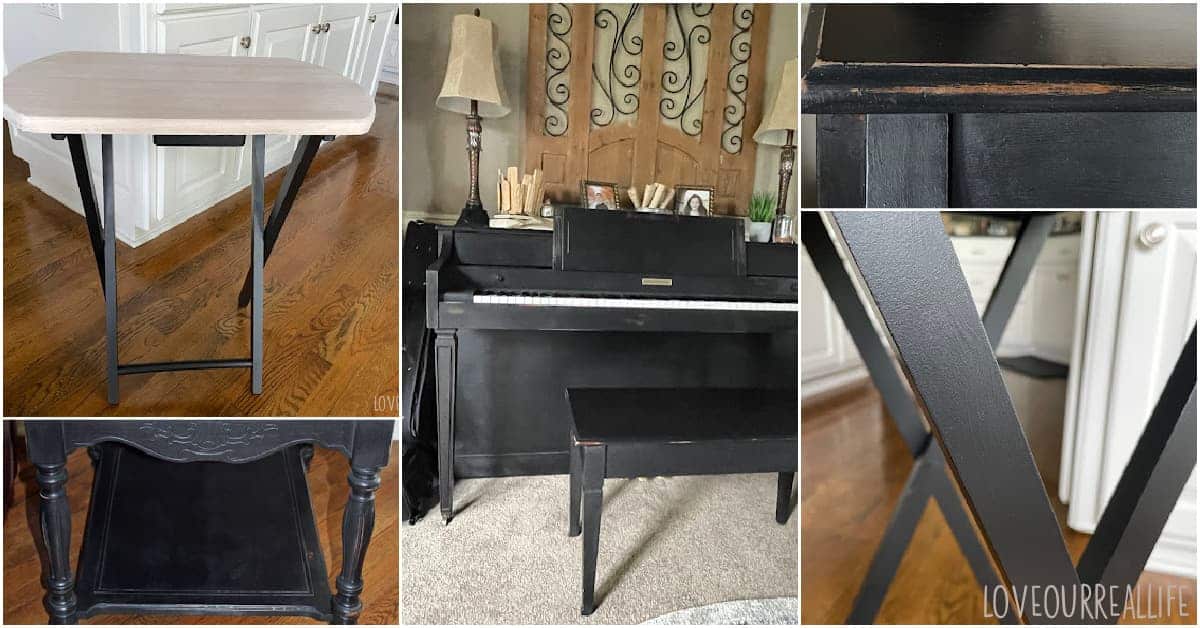
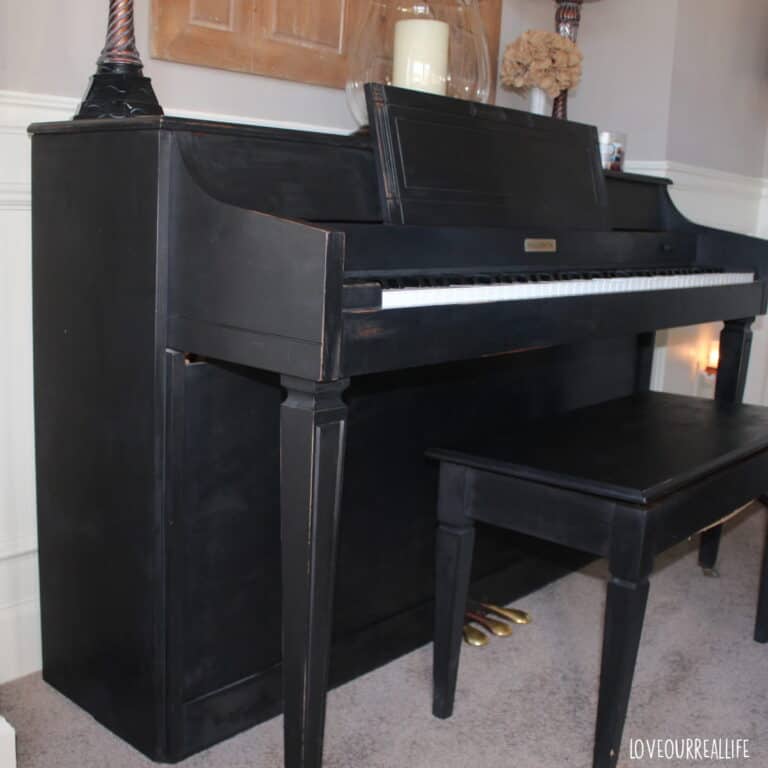
10. Piano Makeover
To replace the buffet table that was in the dining room, we put a piano in its place. This was a special gift from some friends of ours that gave it to us when they upgraded their piano.
I posted all about it at Piano Makeover with Chalk Paint. I used Amy Howard One Step paint (chalk paint) in black.
Piano BEFORE:

Piano AFTER:
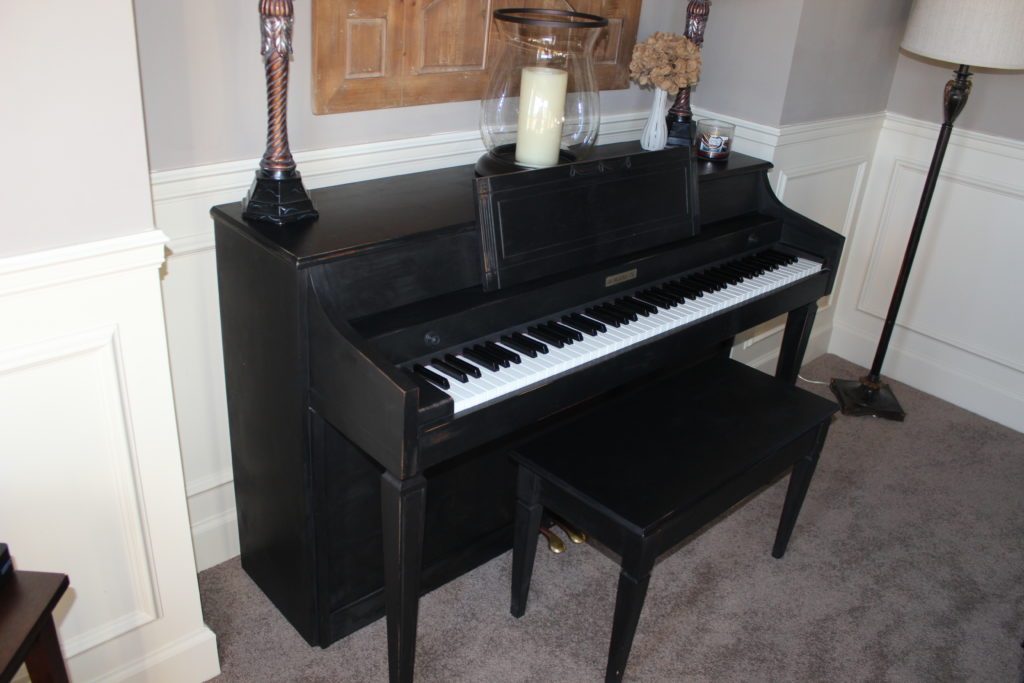
Although it might not look like it, the piano is actually sitting in the exact same location in both photos. The dining room walls were painted in a gray color I concocted.
I’m not certain of the exact color as I combined some left over old paint from previous projects.
I believe Tony Taupe by Sherwin Williams with a little bit of Nomadic Desert by Sherwin Williams is what I used.
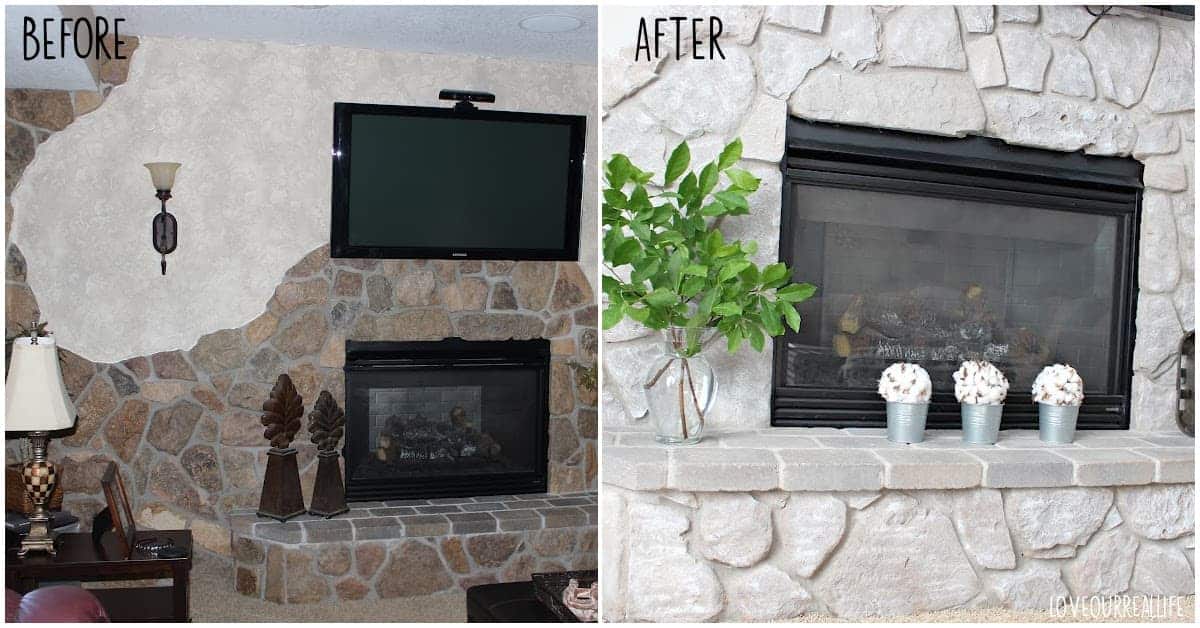
11. Fireplace Makeover
Our fireplace in our basement looked straight out of the 70’s. But it was no match for an afternoon with a little paint. Our pretty painted stone fireplace still not perfect, but a little paint made it much brighter with a more modern feel.
Fireplace Before and After
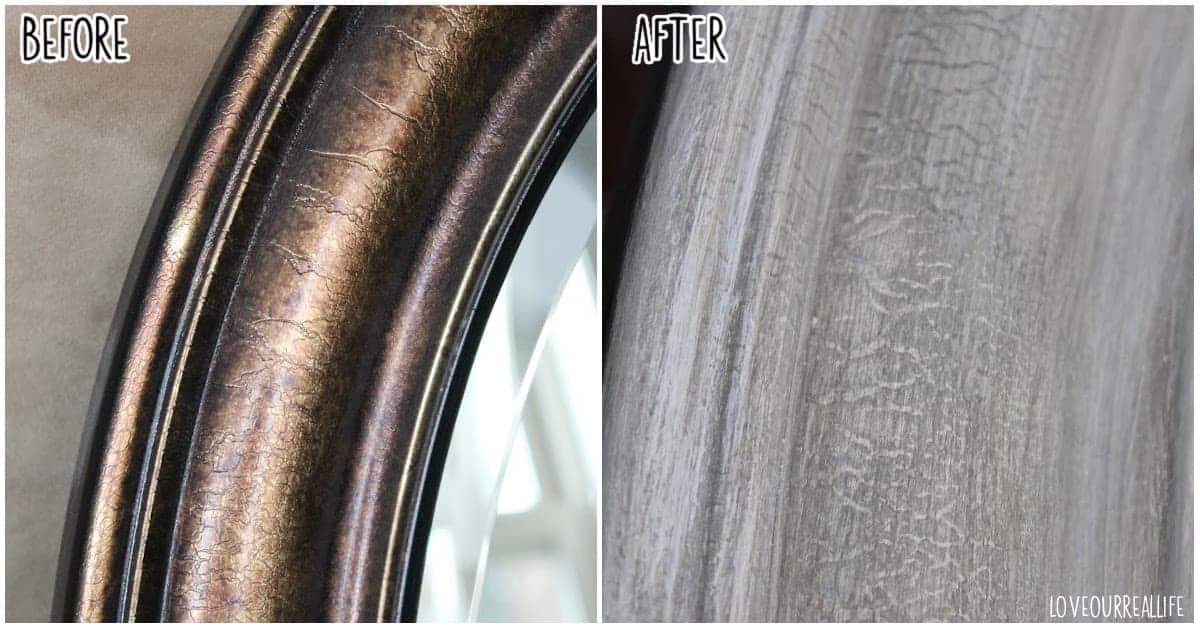
12. Mirror Frame Makeover
This old mirror had good bones, but the coloring of the frame just didn’t flow with our decor. Paint to the rescue.
Painted Mirror Frame Before and After
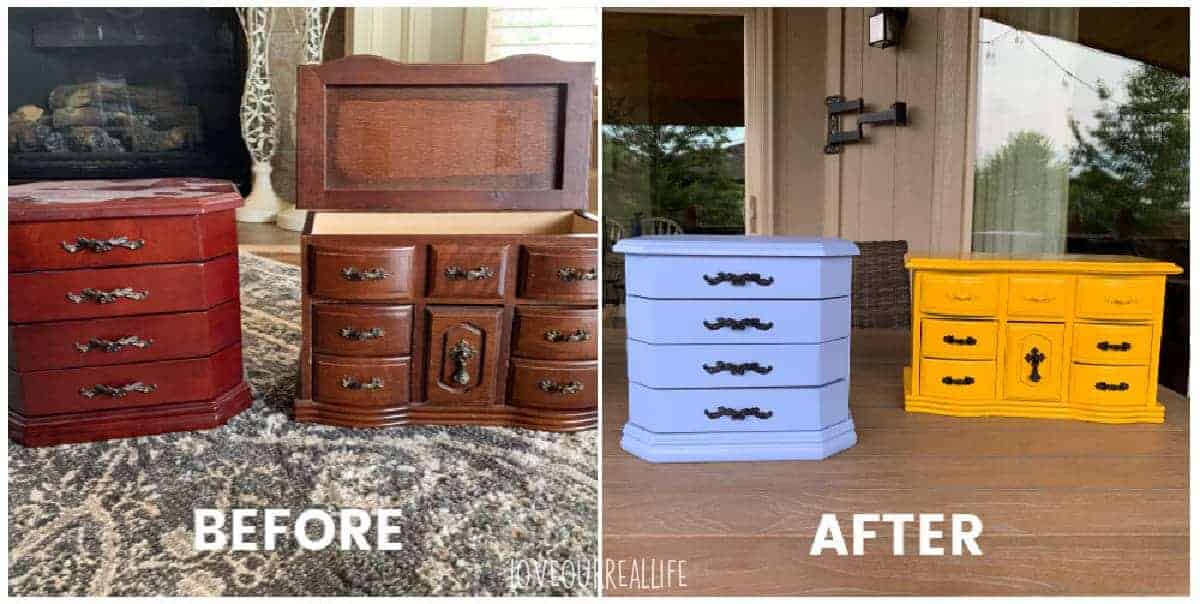
13. Jewelry Box Makeover
For whatever reason, I love old jewelry boxes! While I didn’t use chalk paint, I did transform these two jewelry boxes with spray paint on one and regular latex paint on the other. SO easy! I also put contact paper on the drawers to give them a little update too.
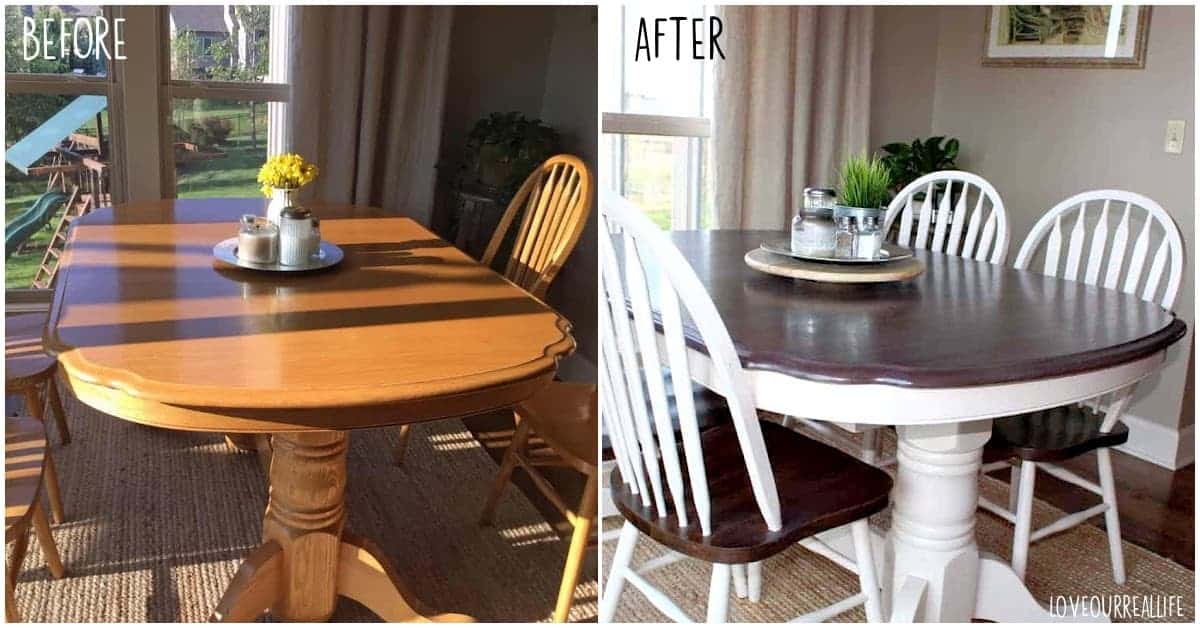
14. Kitchen Table Update
This kitchen table redo has been a long time reader favorite on my blog. I think it’s because nearly every home has had something similar at one time or another.
It was a wedding present from my in-laws and while I loved it, an update was needed.
Kitchen Table Before and After
I used white chalk paint on the table base and the majority of the chairs. Wood stain was used on the table top and the chair seats.
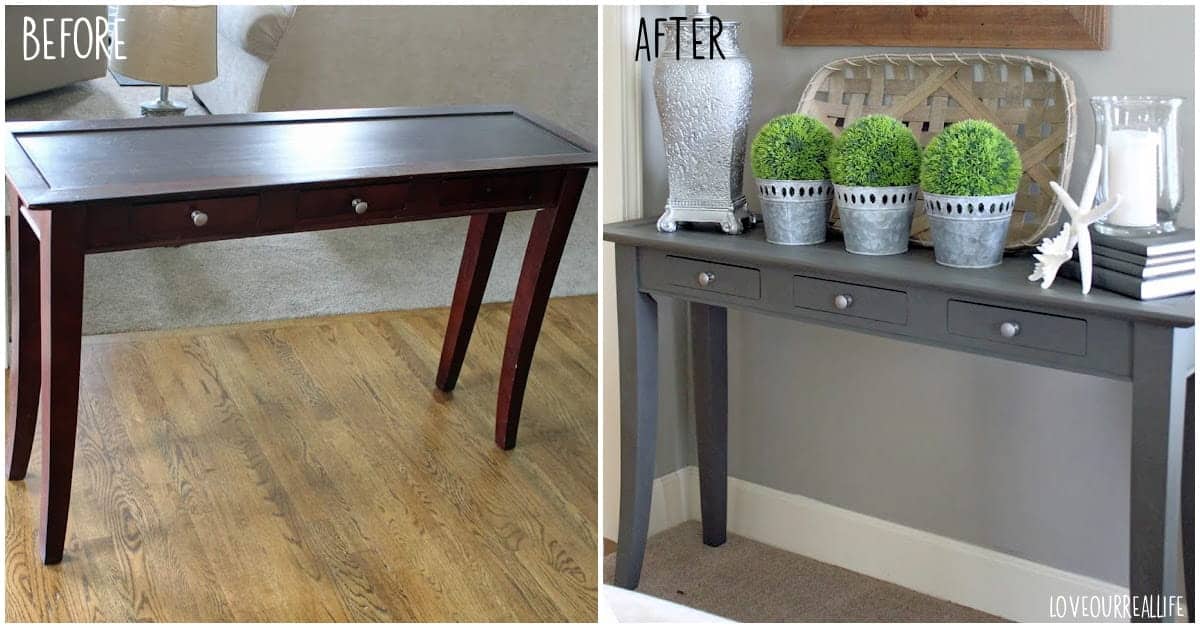
15. Sofa Table Makeover with DIY Chalk Paint
I created a DIY chalk paint recipe using calcium carbonate for this pretty table. It was a bit of a learning curve, but it’s nice to make your own chalk paint and not be limited to just a few color choices!
With this particular table, I used Sherwin Williams Urbane Bronze. The calcium carbonate did affect the paint color somewhat, but I still loved it. And SO much cheaper.
16. Hand Painted Bar Stools
Bar stools are expensive! Before we painted our kitchen cabinets white, our kitchen was dark brown everywhere you looked. I painted our bar stools with off-white chalk paint to brighten things up a bit.
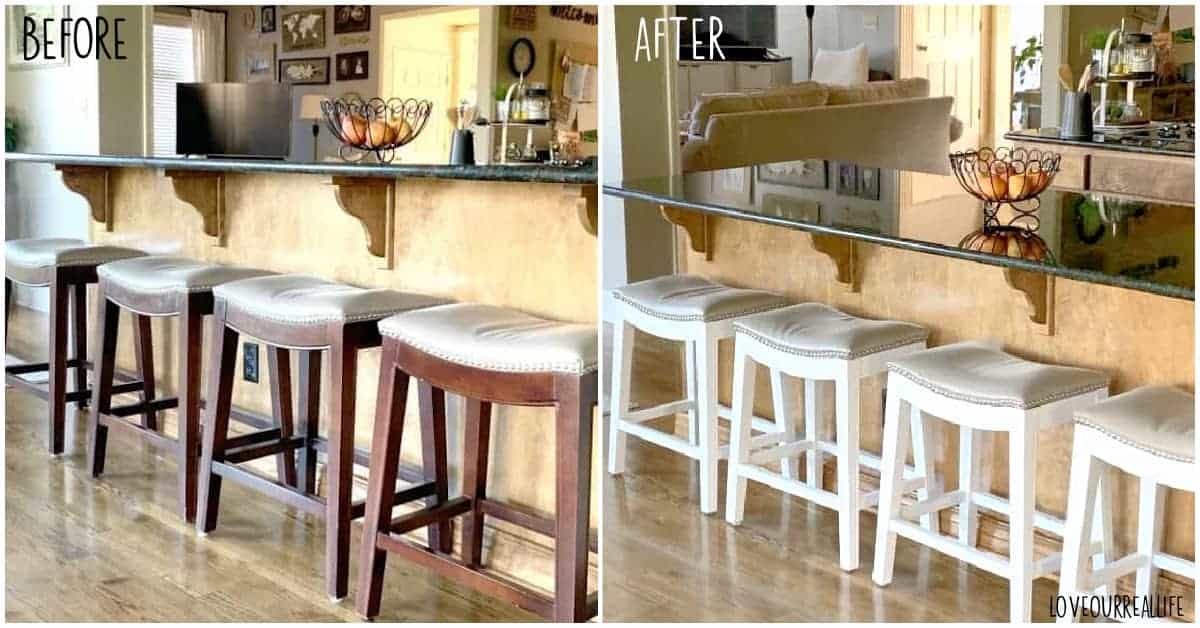
However, now that our kitchen is white, I will be changing them again soon! I’m considering painting them black, or stripping them with Citristrip then bleaching them. I’ll let you know!
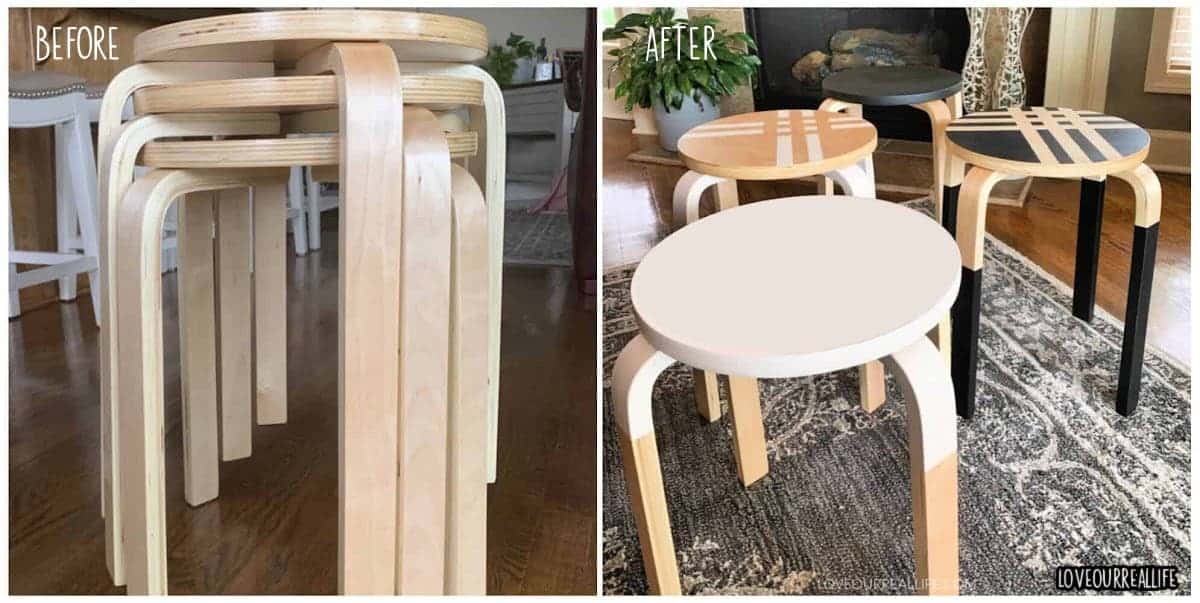
17. Paint Dipped Bar Stools
I found these cute stools online in a pack of four. With some painter’s tape and a little chalk paint, I was able to give them a fun personality and a look of dipped paint.
18. Patio Cushions Makeover with Paint
Painting fabric is a controversial subject. I’ve painted interior chairs and recently painted patio cushions. If I’m being honest, I would only paint fabric on furniture as a last resort. It changes the texture of the fabric and does make it feel a bit crunchy.
But, if your patio cushions are stained or very outdated, it can extend their life. Just know what to expect.

19. Painting Metal Outdoor Patio Furniture
Outdoor furniture is ridiculously expensive. A little bit of paint can give metal or plastic outdoor furniture a quick update that is well worth your efforts.
I’ve used spray paint, chalk paint, and Heirloom Traditions Paint with pretty good success. I’ve learned that proper cleaning and prep makes a big difference in how it hold up over time.

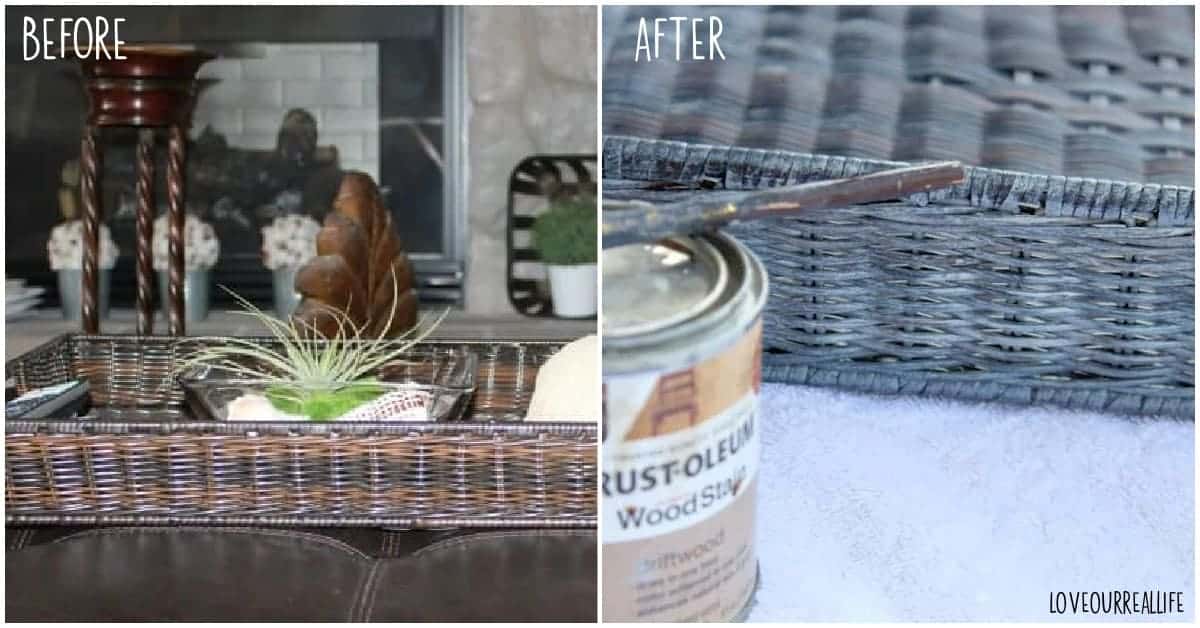
20. Wicker Basket Update with Paint
If you have an outdated wicker basket, grab some paint or wood stain and give that wicker basket a makeover. This is such a fast project that made my basket look SO much better.
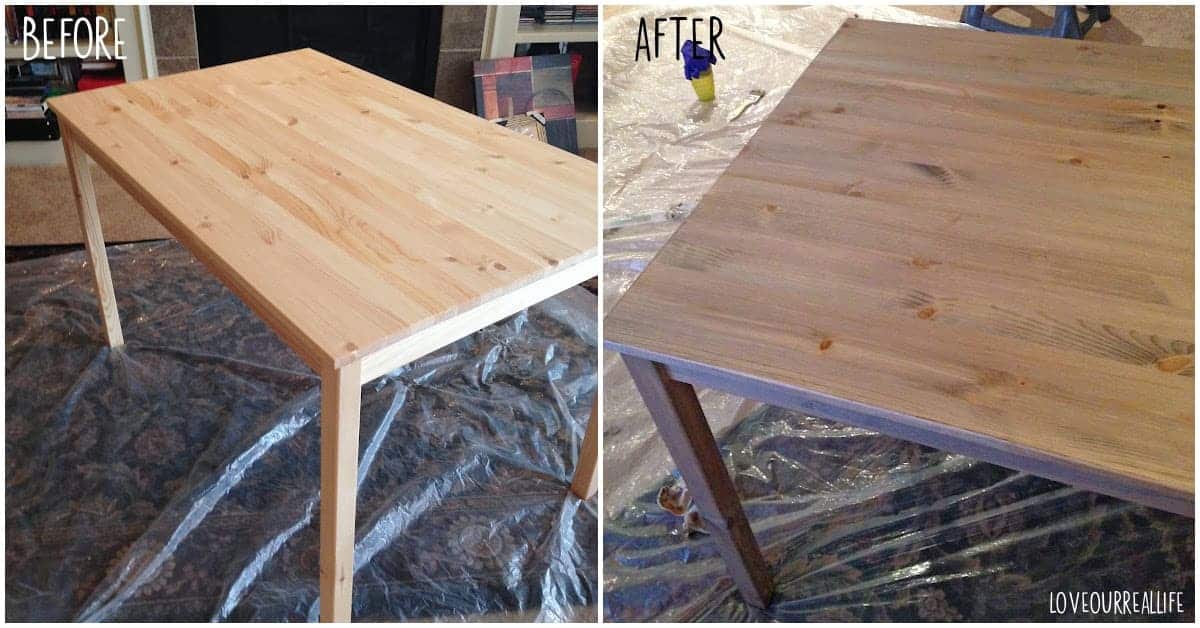
21. IKEA Table Makeover
While no paint was used on this project, it did require painting on the DIY wood stain. Create your own wood stain with steel wool and vinegar. It’s a fun chemistry project and the results are really pretty.
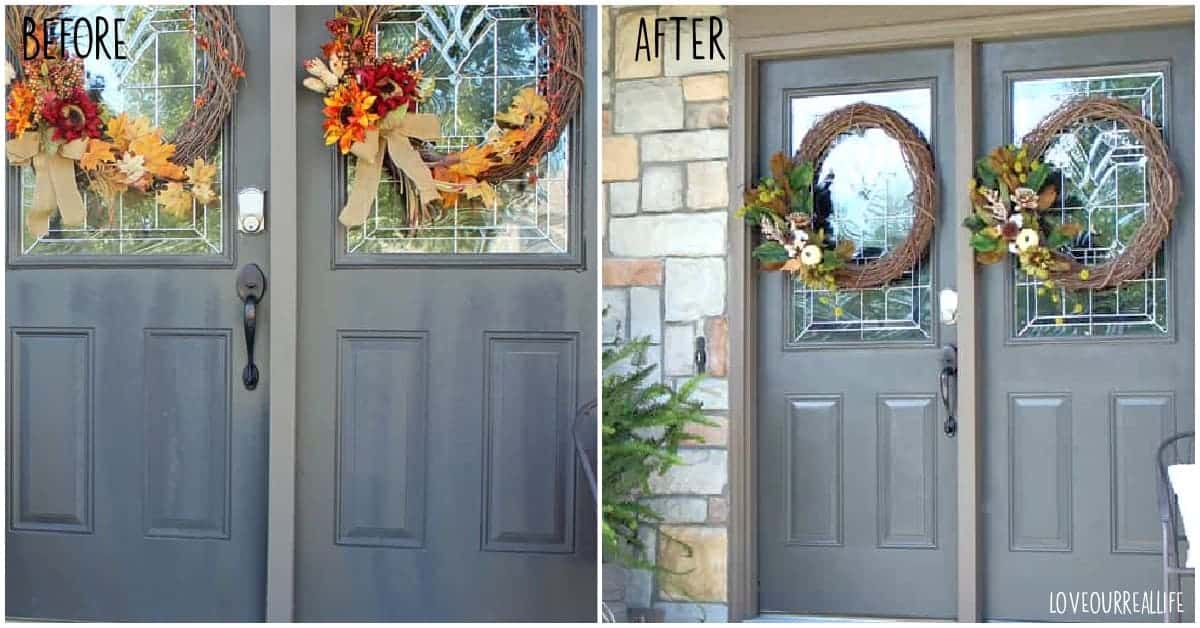
22. Painted Front Door
I’ve had quite the fiasco over the years getting my front door just the way I want it. Check out one of the painted front door before and after below.
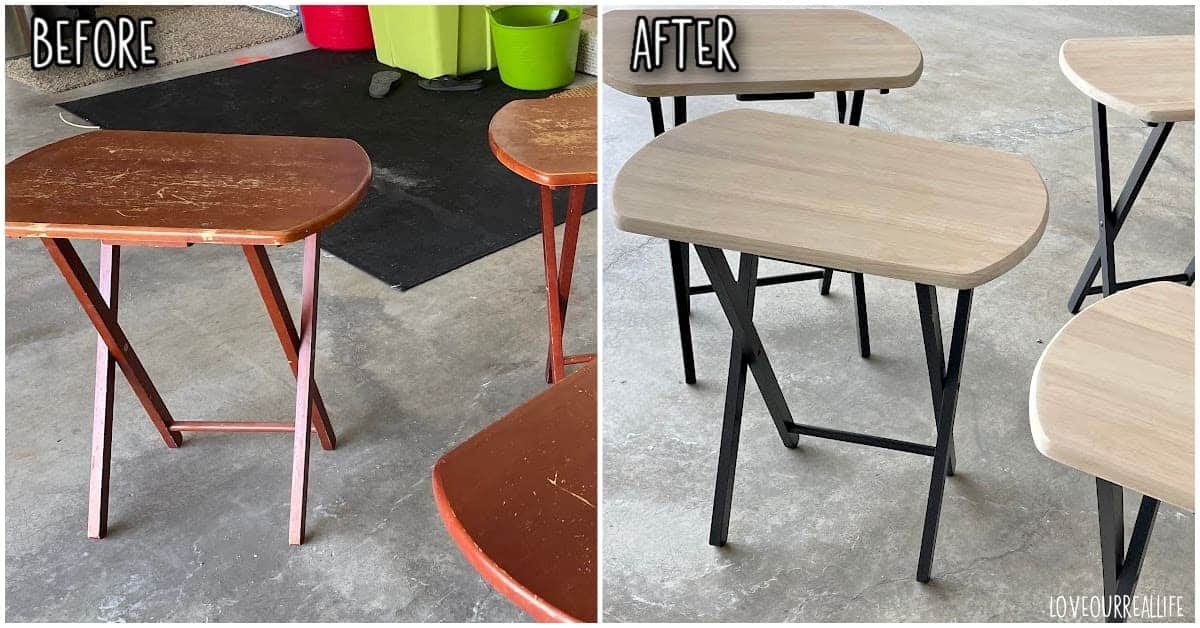
23. TV Trays Makeover
These tv trays were snagged on FaceBook Marketplace for a steal. I spent too much time with this makeover, but I was practicing bleaching wood as well us using a white wash technique on the tops. I LOVE how the final result. I now want to bleach every piece of wood in my home;-)
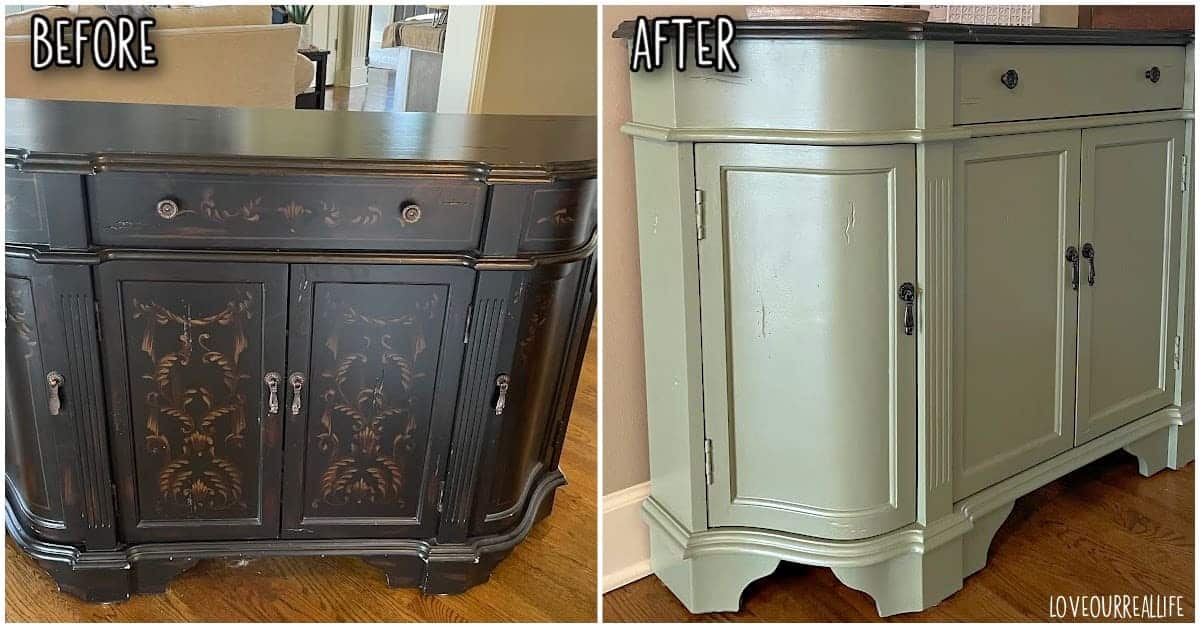
24. Green Painted Cabinet using Heirloom Traditions Paint
I’ve experimented with HTP line of paint on several projects and I’ve been very pleased. Heirloom Traditions Paint is an all-in-one paint that requires no primer or top coat.
This green color, Crete, is SO pretty. I did mix a tiny bit of London, from the same line, into the Crete to soften the green a bit. I thought it was perfect.
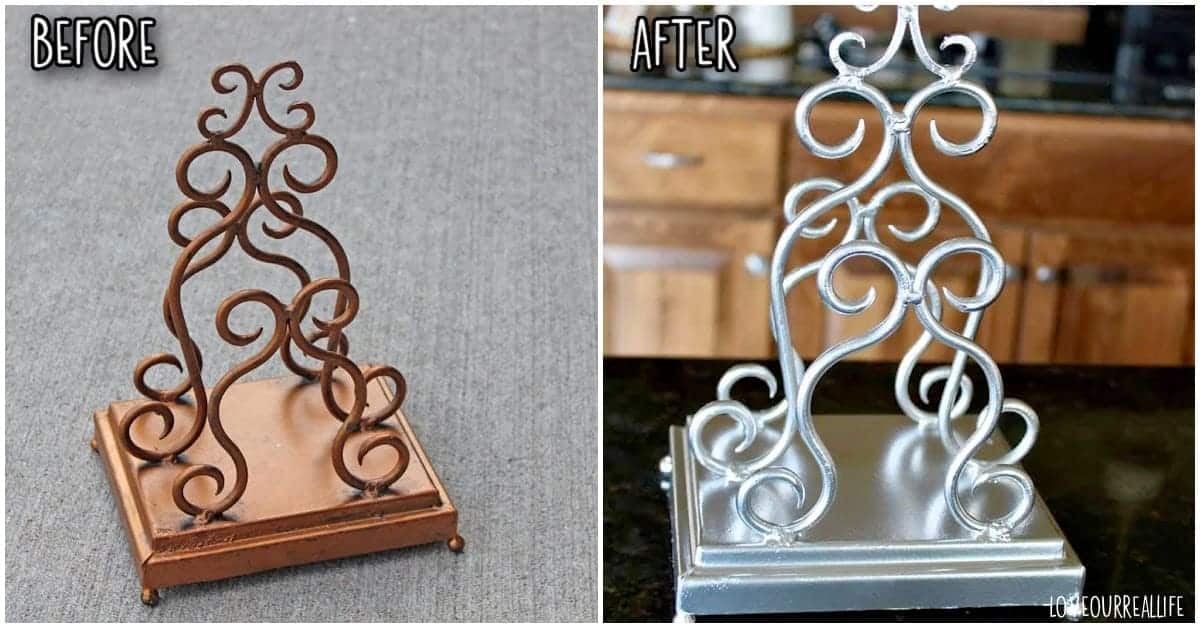
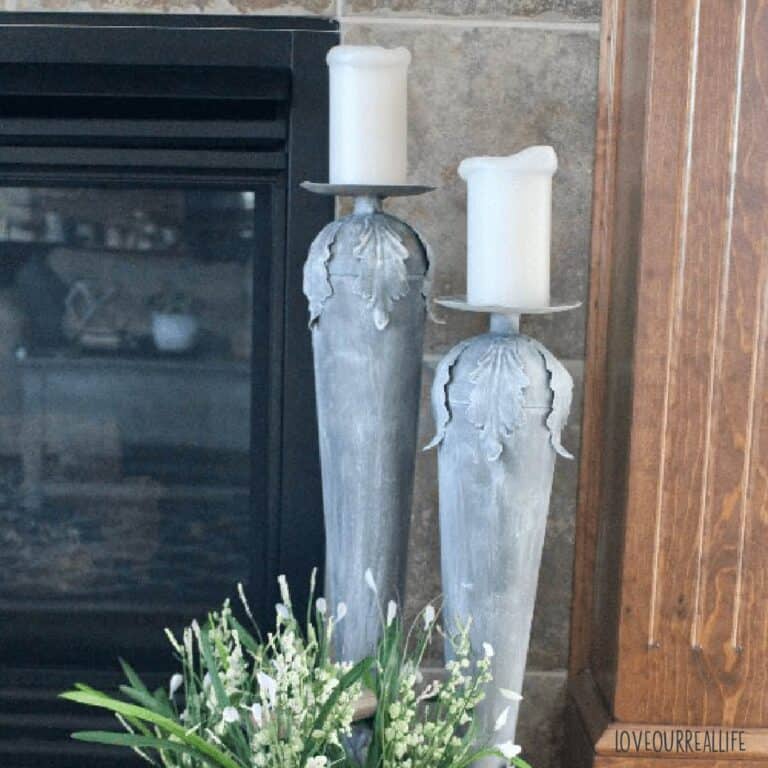
25. Painted Candlesticks and Other Household Items
As I’ve mentioned before, I despise waste. With a little paint you can transform nearly anything in your home without giving you the need to buy anything for an update OR throw something out. See how I painted various items around the home for a quick win.
26. How to Bleach Wood Furniture
See how I used two-part wood bleach to update some dark side tables. Bleaching wood furniture can completely transform an outdated piece of furniture! To even out some of the blotchy look from over-sanding, I used an brown furniture glaze. To see this click on the post!

27. How to Paint Furniture Black
If you love the look of black furniture but have questions on getting the best results, this post will walk you through all the details to ensure you have the perfect outcome.
28. Best Spray Paint for Outdoor Metal Furniture
Get my top three picks for an exterior grade spray paint that will make your outdoor furniture look as good as new!
Read: Best Spray Paint for Outdoor Metal Furniture
Latest Posts:
- Amazon Finds That Make Your Home Look Expensive on a Budget
- How to Cut Your Grocery Bill Without Couponing
- Monthly Home Maintenance Calendar (Free Printable!)
- Low Motivation Days: What to Do When You Don’t Feel Like Doing Anything
- Sunday Reset Checklist: The Simple Routine That Sets You Up for a Productive Week

Great projects. They really update the furniture. Great job!
Thank you, Stephanie!
It’s amazing what some paint can do!!!! My struggle is when a piece looks GOOD the way it is, it just doesn’t fit or would be more of a statement a different color;-) Then I have a hard time painting but usually always end up loving it in the end! hahaha
I hear you, Jillynn! As much as I love to paint furniture, there is a time to leave it in its natural state. Discernment is never easy;-). Have a great day and thanks for stopping by!
I love this! I re-paint almost every piece we find. I just bought a heavy wooden school house chair from Goodwill for $5 this morning to add to our set of painted chairs, 🙂 It’s always amazing to see the before and after photos and the feeling of accomplishment after finishing a project is extremely satisfying. I challenge myself with DIY projects to see how frugal I can be, I have a series I am working on called Budget DIY: Projects You Can Do for Under $20. 🙂
Grandi, this is wonderful! I also love that feeling of accomplishment after transforming an old piece of furniture. I’d love to see your before/after…let me know when you post it!
I am quite handy with tools but never with paint. Every time I attempt to re-paint anything, it just does not look right. If I would repaint some furniture in the house, I’d let my husband or sons to do it for me. Anyway, you did a good job with the repainting. I loved the dinner table the best.
I appreciate the comment, Annemarie! I am so NOT handy with tools, but would love to be! It sounds like you and your boys make a great team.
I love the idea of a charging station! Currently all our chargers are in the silverware drawer so we can charge them on the kitchen counter. It’s messy but it keeps them out of tiny hands. 😉 Something like this is way cuter!
I say whatever works for your home! Thanks for stopping by;-)
Do you have a how to post on these??
Some of the before/afters do have a tutorial. If they do, there is a link you can click to get to the tutorial post. Good luck and let me know if there is anything specific you have questions about!
I find these super inspiring. I have a few pieces I would love to update in our home. Just chicken about getting it done. Maybe I will scour your site and give it a go 😉
Thank you! Don’t be scared! If you aren’t loving the furniture, go for it! If your first attempt doesn’t turn out how you’d hoped, just paint over it. Please share with me if you give it a go!
Paint is such a great way to transform anything and everything! Great job!
Thanks, Linda! I couldn’t agree more!
Everything looks really nice.
Thanks, Judy! I always love to see your before and afters too. You have great ideas!