Easy Way to Whitewash Wood – The Best Technique
Whether you want to lighten up a pre-existing stain on a wood project or you want to white wash bare wood, using whitewashing techniques can make a project look absolutely beautiful.
To whitewash you will need white paint or a color wash layering color, rags, and a paintbrush to get started. It’s a simple process of applying the whitewash, letting it sit for approximately 2 minutes, then wiping it off.

Get more painting ideas and tips as well as furniture makeovers here.
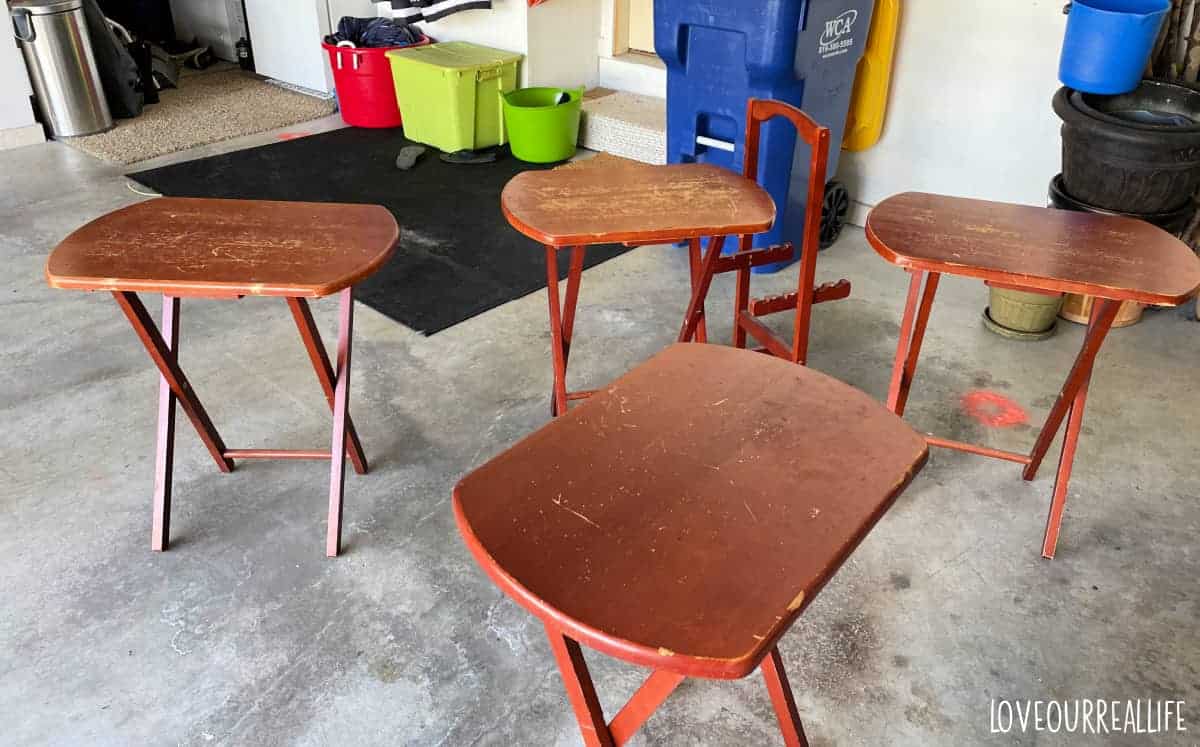
I purchased some old tv trays off FaceBook Marketplace and I gave them a complete makeover. My original intention was to bleach the tops to reduce the yellow look of the wood.
I LOVE the look of bleached wood.
But, the household bleach I used didn’t seem to make much of a difference. I’d ordered some of the Zinsser Wood Bleach, but I have another project I want to save that for. It’s sometimes really hard to get your hands on, so I didn’t want to use it just yet anyway.
See the before of the TV trays below when I first brought them home from my FaceBook Marketplace find. $15 for all four and the stand. The before is pretty rough, but TV trays are great to use as small tables around the house!
Ultimately, the whitewashed look was what I was going for, so that is where I took the project.
Let’s get to the tutorial.
Materials
- Minwax Color Wash in White Wash OR White latex paint
- Water
- Synthetic or foam brush or stain pad
- Rag
- Damp cloth and/or paper towel
- Gloves
- Drop cloths
This project should be completed with proper ventilation. Outdoors is best. I did not note much of an odor in the garage with the doors open, but anytime you work with chemicals of any kind you should protect yourself.
RELATED: Best Paint Brushes for Chalk Paint
How do You Get the Whitewashed Look on Wood?
There are a variety of ways to create a whitewash on wood. I’ll share a couple of different techniques, starting with how I got the final whitewash look on these pine wood tv trays using Minwax Color Wash.
Whitewashing can also be done quite easily using white paint (latex paint). More on that later.
How to whitewash wood?
Note you can apply a whitewash to bare wood or wood that has already been stained as long as the stain has not been sealed.
If the stained wood has been sealed, you will need to sand off the protective top coat or sealer.
Sand Surface
Prep is important to ensure the wash doesn’t look blotchy.
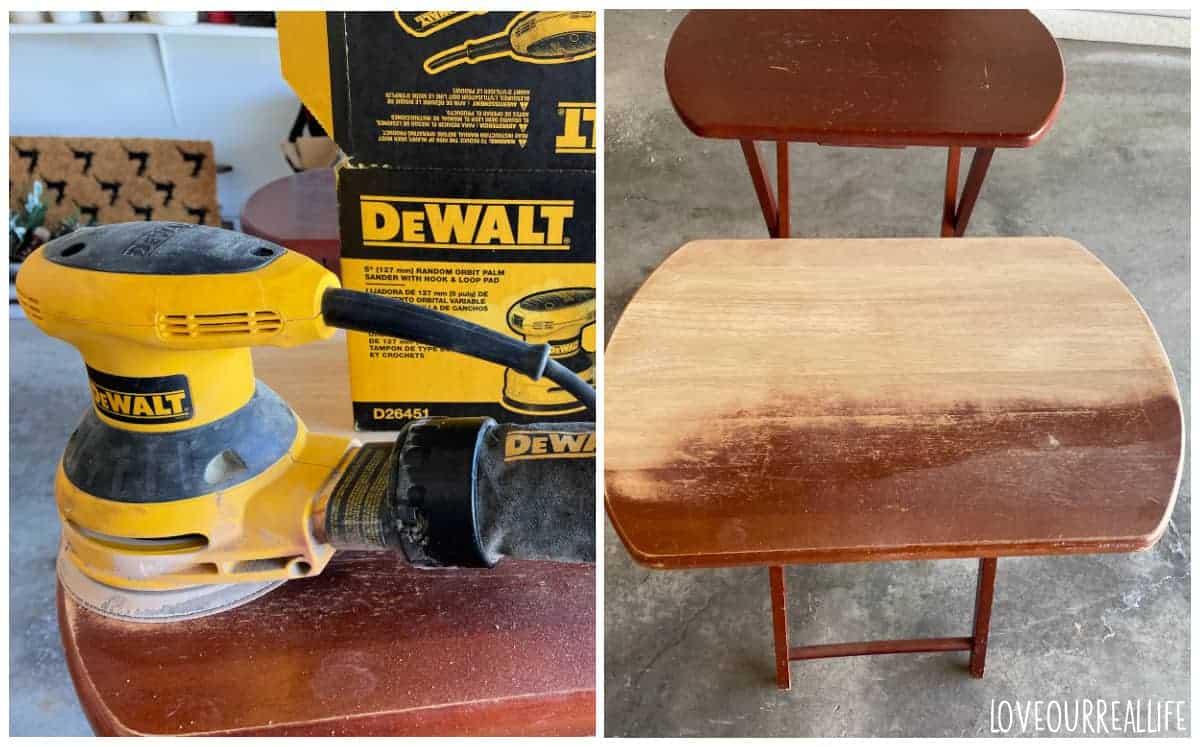
It is best to sand the surface of unfinished wood first. Once again, if there is a protective top coat, this will need to be removed.
Start with a medium grit sandpaper (I believe I started with 60 or 80 grit) and work your way to fine grit sandpaper, 220 grit.
Clean and Dry Wood Surface
Clean surface well, ensuring you wipe away all dust from sanding. Wood should be clean, free of lint from the rags, and dry prior to using colorwash.
At this point I attempted to bleach the tops to get rid of the yellow tint of the wood. I applied household Clorox bleach to the surface of the tv tray tops and sat them in the sun to dry and hopefully bleach.
Nothing.
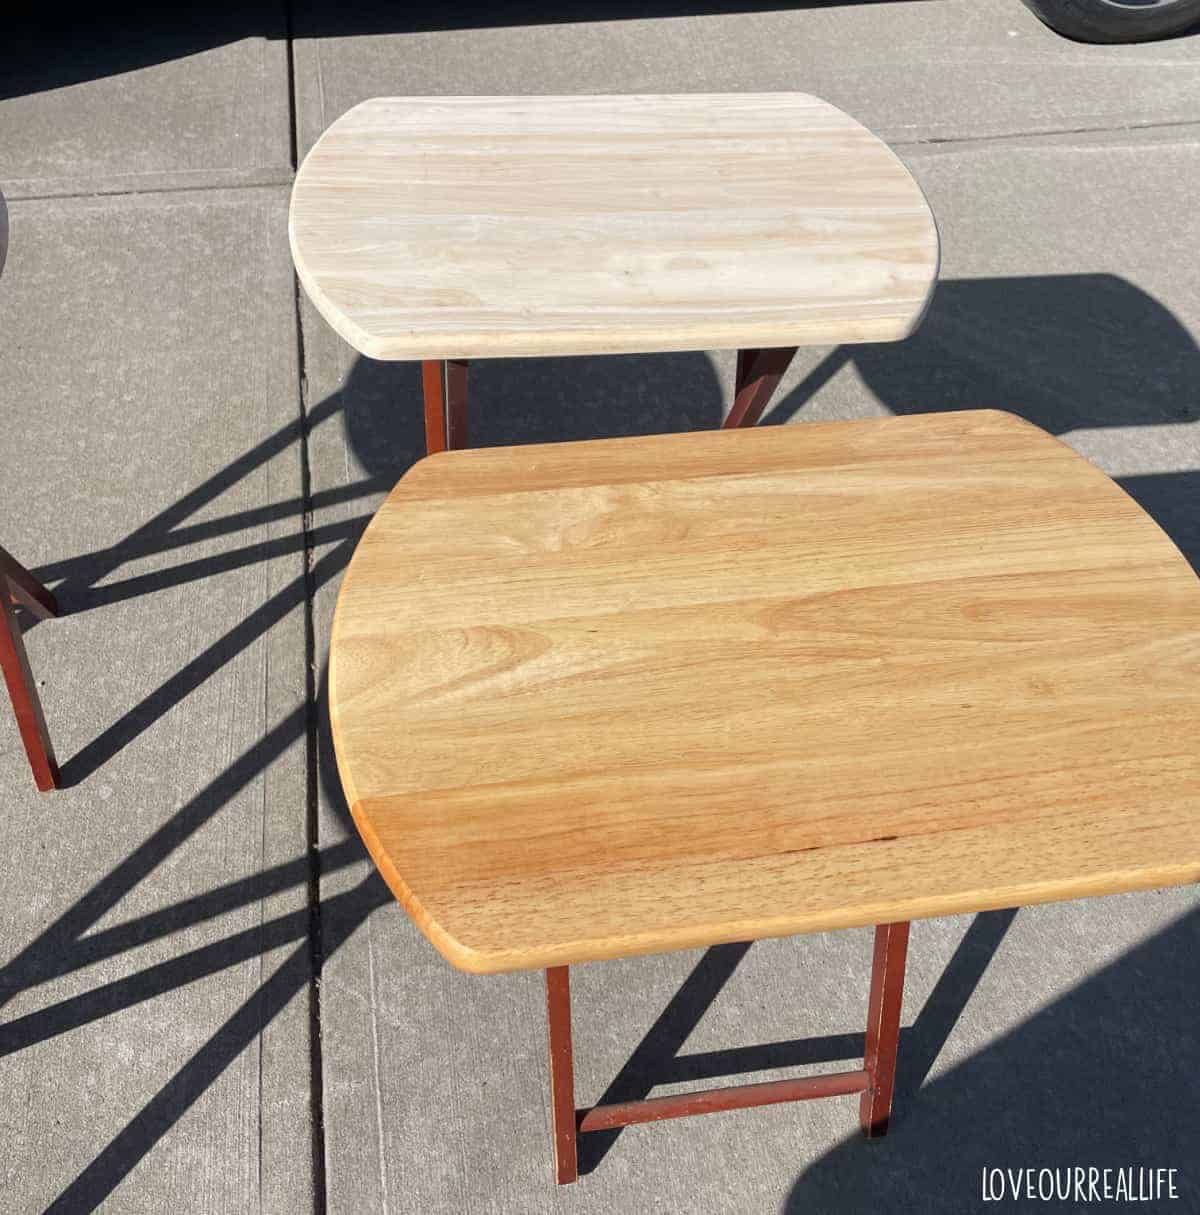
So, I repeated the bleach process again with little to no success. After letting them dry, I noticed no change in the way the color looked, so whitewashing was what I knew needed to happen to get the look I wanted.
Apply Whitewash
Optional: Some opt to use pre-stain conditioner prior to applying the Minwax Color Wash. I have not done so and have had good results. Different types of wood can have varying results, so it is always best to test on an inconspicuous area first.
Stir can well prior to use. If your diy project takes a while, you may need to use a stir stick occasionally as you complete the project.
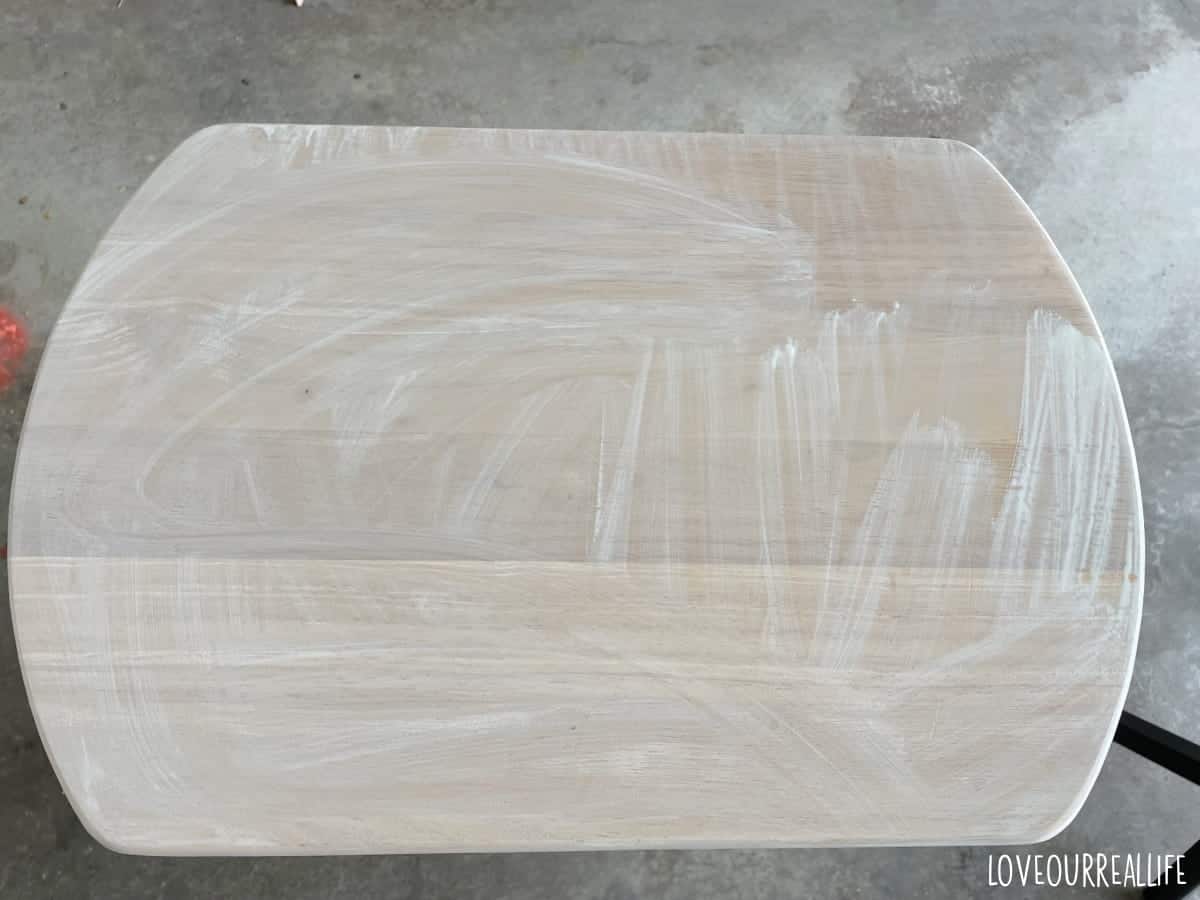
Apply the wash using a good quality synthetic paint brush or rag. Have a damp cloth ready just in case you need to wipe off

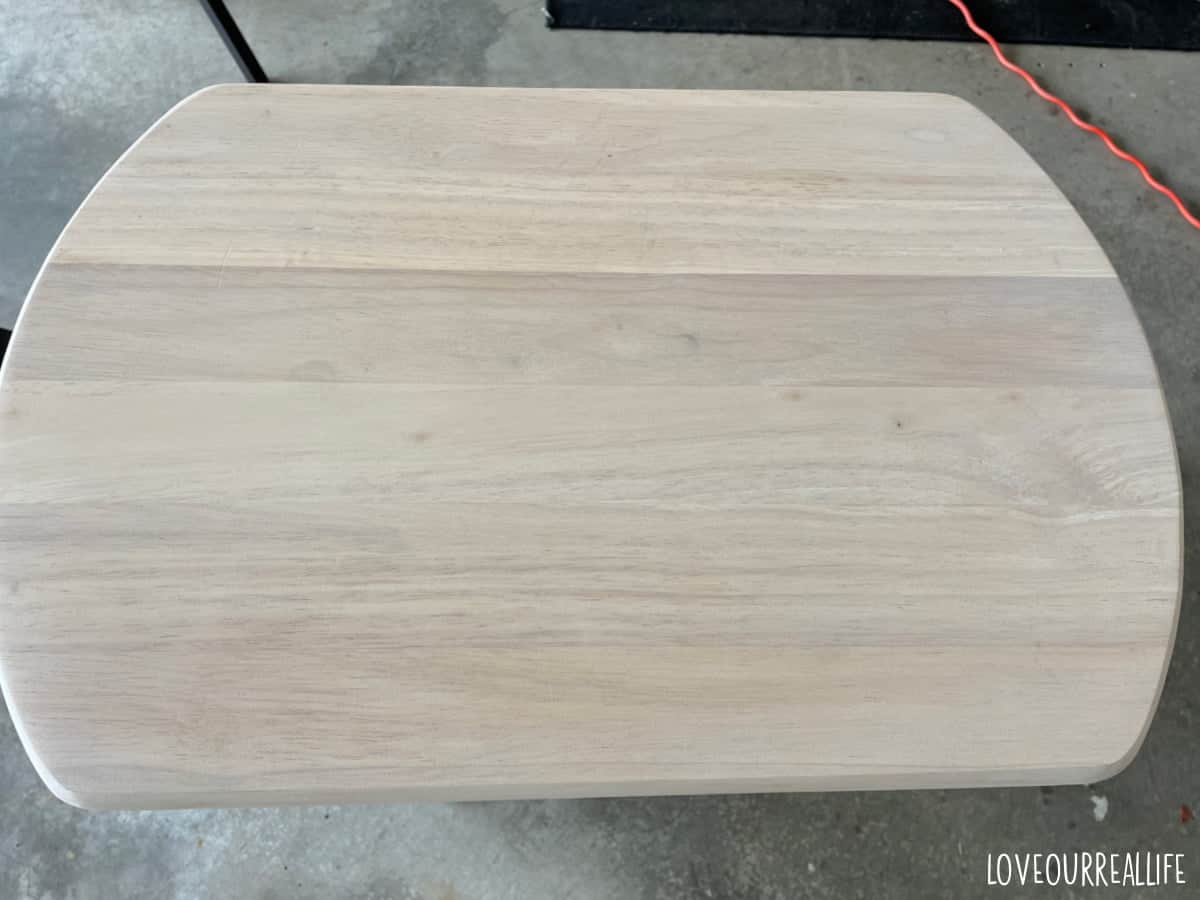
I opted to simply use an old rag and covered the entire top. Also note I did NOT go in the direction of the wood grain. My intention was to use very light layers and really work the whitewash into the wood to get the exact look I wanted.
This color wash does dry fast, so you have to work somewhat quickly (you wipe away any excess after 1-2 minutes). I would suggest working in small sections if possible.
For my project, I completed one tv tray top at a time. That allowed me plenty of time to apply the wash and remove it in a timely manner.
Wipe Off Immediately
After applying the wash, wait 1-2 minutes then wipe away any excess using a clean rag. For a consistent look, wipe evenly using a good amount of pressure.
Once again note that different varieties of wood (pine, oak, hardwoods of various types, etc.) will potentially have different outcomes. So experimenting on a small, inconspicuous area is key.
I’m a firm believer in the ‘less is more’ approach. It is very simple to add another light layer.
Let wood dry for 1 hour or longer prior to additional coats.
Apply Second Coat
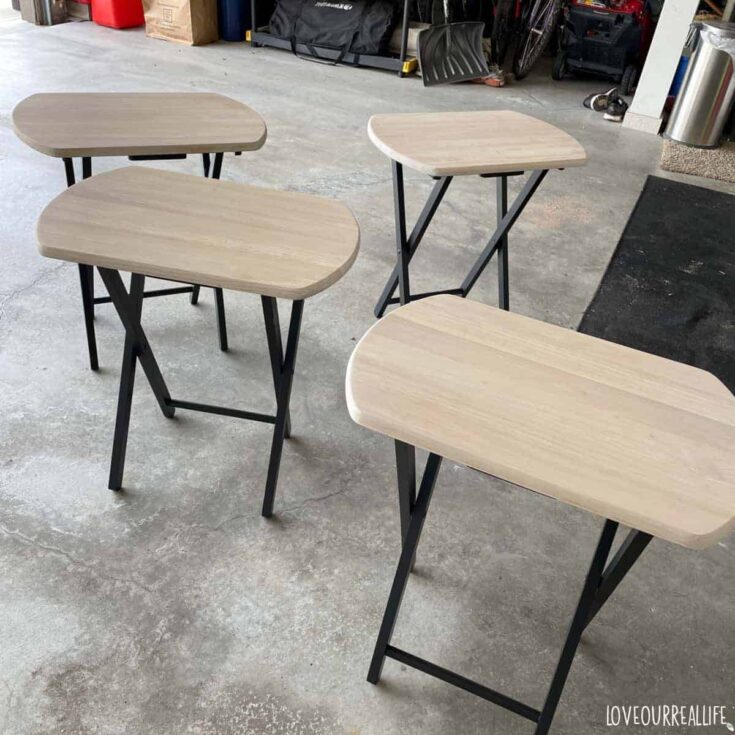
Since I used such a light coat of whitewash for my first layer, I opted for two coats using same process that was used for the first layer.
To me, this was perfect for a pretty, rustic look for these tv trays!
After allowing proper dry time prior to sealing with top coat, approximately 1 hour or longer.
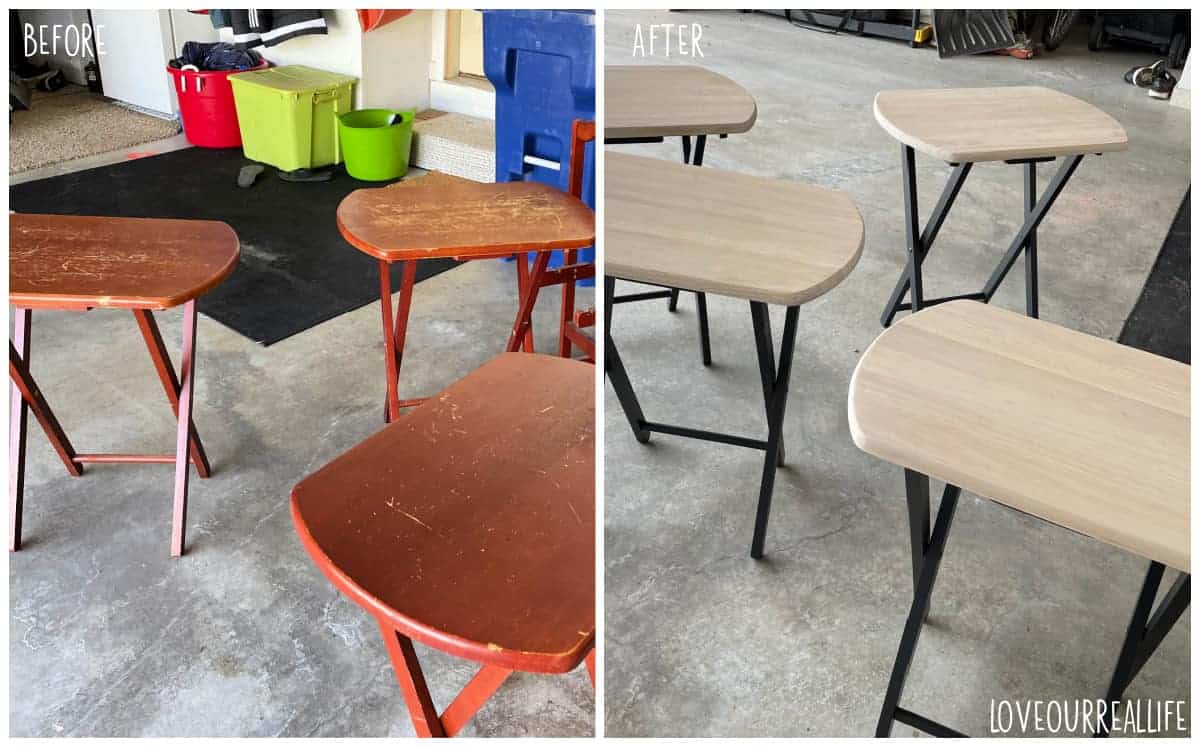
I used black paint (Heirloom Traditions Iron Gate) on the body of the trays. I love how they turned out!
Top Coat
Apply top coat / sealer to protect the surface, especially for high traffic pieces. My favorite top coat that is easy to use and quite durable is Varathane Waterbase Polyurethane.
It dries clear with no yellowing and is incredibly durable. SUPER important for the tops of these tv trays.
White wax is another sealing option if the wood you are finishing doesn’t get high traffic.
RELATED: How to Apply Glaze to Furniture
What kind of paint do you use to whitewash wood?
You can easily make a whitewashing solution using white latex paint.
Start with your whitewash mixture being a ratio of 1:1 equal parts water and paint (i.e., one part white paint to one part water.
This consistency is fairly runny, but if you want your paint mixture to be even more transparent, increase the water amount. Likewise, if you prefer your finished whitewash project to be very white with more solid coverage, add more paint than water.
To apply whitewash using this paint technique, I would suggest using a good quality paint brush. After applying, wipe away after ~2 minutes using a dry, lint-free rag.
I would avoid rollers for this paint technique.
Also note if using white paint, having a spray bottle filled with water nearby can help keep the area you are working with damp if needed so it doesn’t dry out too quickly.
What’s the best way to whitewash wood?
Using the Minwax Color Wash in White Wash is SO easy and gives a very consistent result. So, in my option, this is the best way to whitewash wood for good results every time.
How do you whitewash wood without sanding?
You can certainly whitewash without sanding, but you take more of a risk of splotchy results. If your goal is a very rustic look (like you would see on old barns), I think you could definitely get away without sanding first.
It is still important to clean and dry the surface well prior to whitewashing.
More Before and Afters
If you love Before and Afters, you need to check out my post 25+ Before and After Painted Furniture Ideas for the home.
It has several furniture pieces that I’ve updated with paint and/or stain.
Posts About Using Chalk Paint
- How to Restain Worn Leather Furniture with Rub and Restore
- How to Achieve a Faux Wood Finish with Paint- Step-by-Step Guide
- How To Remove Chalk Paint from Wood Furniture (3 Ways)
- What Is Chalk Paint for Furniture and How to Use It
- How To Seal Chalk Paint Furniture (3 Top Ways)
Best Way to Whitewash Wood - Easy Tutorial
Use this simple whitewash technique to add soften the look of wood. Whitewashing can be done on bare wood or prestained wood that is not sealed with a top coat.
Materials
- Minwax Color Wash in White Wash OR white paint (latex)
- Rags
- Water
Tools
- Sander
- Sandpaper (medium and fine grit)
- Paint brush
Instructions
- Sand surface. Use medium grit sandpaper (60-80 grit) to remove any old stain or top coat. Work your way to fine grit (220 grit) to give wood a smooth surface.
- Clean wood. Ensure wood is clean of dust from sanding, lint, etc.
- Apply whitewash. Use a clean, dry rag or paint brush to apply white wash. Work quickly as it will dry fast. Allow whitewash to sit on wood for 1-2 minutes.
- Wipe away excess. Use good amount of pressure to wipe away any excess whitewash for consistent look. Allow to dry 1-2 hours.
- Apply second coat of whitewash as needed. If you prefer, layer with an additional coat of whitewash. I applied two light coats and was very pleased with the outcome.
- Seal with topcoat. Use quality polyurethane, polycrylic, or white wax to seal the project.
Notes
My preference for a good outcome every time is to use the Minwax Color Wash White Wash for whitewashing wood.
But, I have also used a whitewash mixture of white paint and water mixed to a 1:1 ratio with very good success.