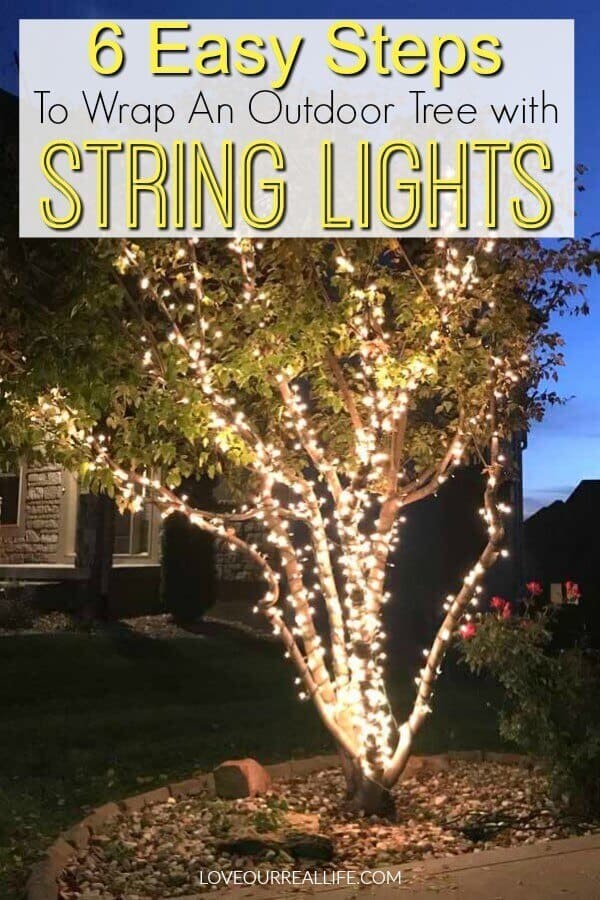
Wrap Lights on an Outdoor Tree in 6 Easy Steps
Lights on outdoor trees give a warm and cozy feeling! Whether it’s for outdoor Christmas decorations or simply to give an outdoor space better ambience.
Check out my 6 easy steps to wrap lights on an outdoor tree to decorate for Christmas or to dress up an outdoor patio!

Get more ideas for improving outdoor spaces here.
Outdoor tree lighting can add a beautiful focal point to your backyard. If your landscape lights are minimal, wrapping trunks of outdoor trees (as well as branches of the trees) with fairy lights is a fun and inexpensive way to illuminate your yard and outdoor space.
The warm glow of lights on trees doesn’t have to be reserved for Christmas! This is a great way to spotlight a beautiful tree in your backyard for summer enjoyment too.
We have a neighbor that beautifully wraps several trees in her yard each year for Christmas. When I say she wraps lights on her trees, I mean she carefully wraps the trunk and most of the branches for an amazing show!
I’ve intended to do the same for many years without success as I was no fool to how much work would be involved. However, this year I actually did it.
Well, kind of. I wrapped one small tree. BUT, I love it.
The key to this process is patience. Having just completed this little project myself, I do have some insight you might benefit from. I will not claim to be an expert, but I do have some tips you can use.
This post contains affiliate links. Please see my full disclosure policy for details.
MATERIALS NEEDED:
- Clear indoor /outdoor heavy duty lights
- Zip Ties (optional)
- Outdoor Extension cord (optional)
- a healthy dose of patience
Kind of kidding about requiring patience, kind of not!
This little tree took me around 2 1/2 hours to wrap. Keep in mind this was my first time doing anything more than just throwing lights up and calling it a day.
I typically love to live my life by the “good enough” motto, but I really wanted to make an exception with this little tree.
6 EASY STEPS TO WRAP LIGHTS ON AN OUTDOOR TREE:
1. Determine the tree(s) you want to have lights.
This particular project is not the same as putting lights on your Christmas tree as I selected a tree that as I selected a tree that would allow you to appreciate the shape of the tree branches.
We have this small, multi-stem trunked maple tree that I really wanted to use. My husband refers to it as our weed, because it is typically growing wildly unruly.
But, it is close to an outdoor electric outlet, small, and I like the general shape of the tree. It was the winner!
Tips for selecting a tree:
- If lights will be left on year round, avoid selecting a tree that is not mature.
- Be aware of how the base of the tree will appear once highlighted with lights.
- Is the tree convenient to a power source?
- Will you want lights to reach the top of the tree or just a portion of the way up? Larger trees require a LOT more lights plus can present a challenge when wrapping.
- Do you like the symmetry of the tree? Lights will highlight the shape of the tree, so be sure you appreciate how it will look once illuminated in your landscape design.
- Think about the types of trees, evergreens vs. deciduous? Deciduous trees will not have leaves during winter and will look much different with lights when they get their leaves in the spring.
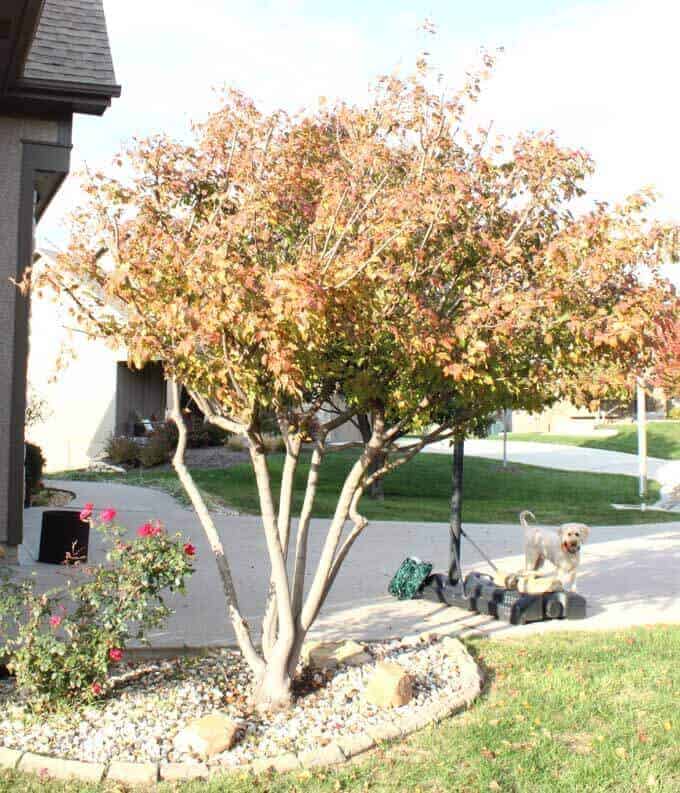
My golden doodle, Bentley photobombed the above picture! He loves a good project.
READ: When Can You Turn on Outdoor Christmas Lights?
2. Determine how many lights you will need.
I found two 400-light strands on clearance after Christmas last year. It required ALL of the lights (800) for my small tree.

My plan was to just wrap as much as I could.
The strand you get will let you know how many you can safely connect together.
The best outdoor lights to use for your trees, especially if you intend to leave up year-round are LED lights. These are more energy-efficient and can better withstand the outdoor elements.
Many of the outdoor LED lights are solar powered. They do have a battery pack as well.
PRO TIP: A quick tip is to pick a reasonably warm day. I was lucky enough to find a day that my hands didn’t get cold and no gloves would be needed. That would not have feen fun!
As I’m typing this post, we have at least a couple inches of snow on the ground. Brrrr!
3. Start wrapping from the bottom of the tree.
With the first strand of lights, ensure you have the male end (male plug) of the light strand accessible to plug into an outlet/power source.
My outlet is not super close, so I needed to use an outdoor extension cord to reach.

MORE TIPS
- Smaller strands will be easier to manage! My 400 strand of lights was really challenging to get through small branches/spaces on our little tree.
- It would be best to start with your lights wrapped in a ball shape to help you navigate around the tree trunk and branches more easily.
- Having a helper will make the process faster.

4. Go around the Circumference of the tree trunk / branches systematically, wrapping tightly.
I did not feel the need to use any zip ties, but you could certainly do so if you felt there were areas the lights weren’t as secure as you’d like.
The closer you space the lights, the more dramatic the end result will be! However, keep in mind this will mean using more lights!
If you will need to go back down a branch to connect with another, you will be able to space the lights further apart.
Also, try to pick limbs that you would consider the stronger branches so they can handle the weight of the mini lights.
Keep in mind, you do not need to go all the way to the top of each branch!
I would suggest finding a reasonable height to stop with your lights and stay consistent with each branch. You will have a much more uniform look in the end.
5. Check your lights
Every little bit throughout the process, I plugged in my lights to get a better perspective of how it would look. This allowed me to make a few adjustments along the way.
You could also just leave the lights while you wrap them to give you a good idea of how they look.
It was starting to get darker when I was wrapping my tree and this helped me see exactly how the string lights were looking!

6. Admire your work and stop coveting your neighbor!
I love my sweet neighbor and love that she inspired me to try this myself. With a few tweaks, I think I can shave some serious time off when I do it again next year.
That’s right. I said next year.
I’m a sucker for lights and I will definitely find time to do this again next season.

Get Access to the FREE Printables Library
When you join our newsletter!
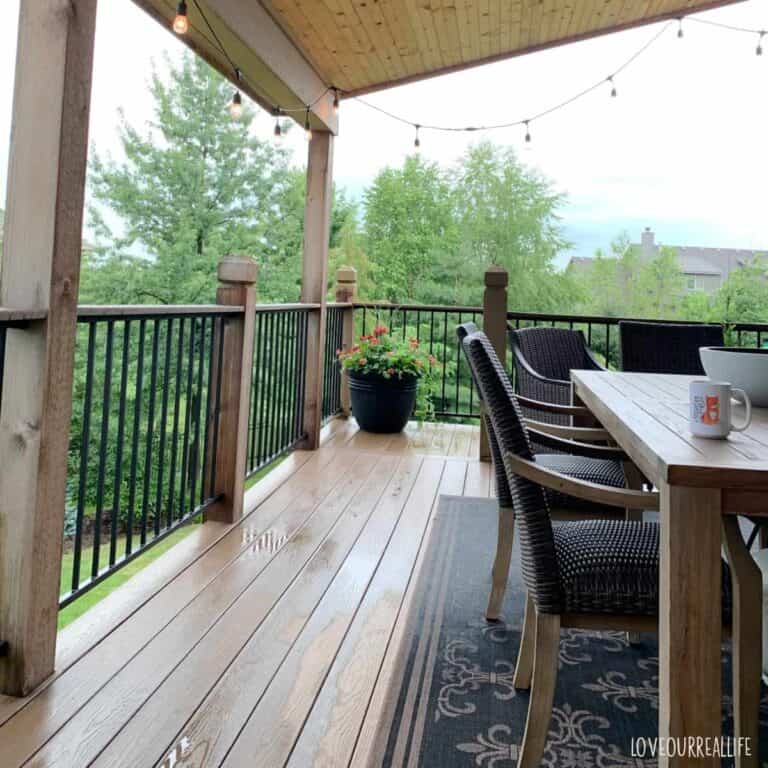
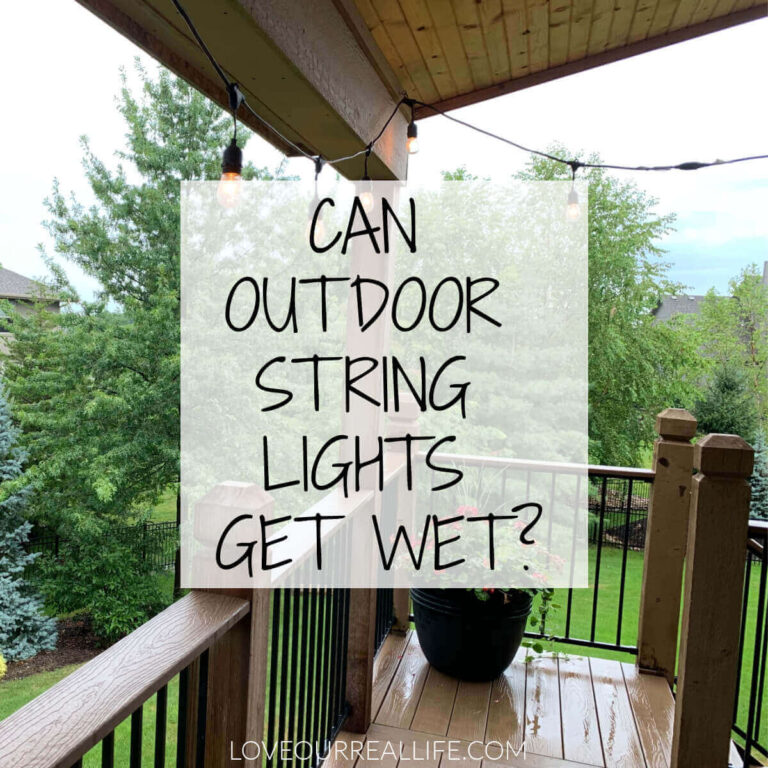
Did you see my post giving tips how to hang outdoor string lights? This post gives great tips for hanging hanging string lights on a deck, pergola, gazebo, fence, etc!
We love them and use them every chance we get. Lights add so much ambiance for outdoor dining or just hanging out on the patio without a big price tag. As does fire!
You also can see our fire pit in the below image. Here are some tips if you are searching for the perfect fire pit or fire bowl for your outdoor space.

Get the full deck and patio before and after makeover. It’s crazy what a change this project has made for how we use our home.
I’m on the lookout for a tree in my backyard that I can leave lights on year-round, too! I feel a bit like a tween with my string light obsession;-)
But, I bet you’ll love them too!
Thanks for stopping by Love Our Real Life today. I hope I’ve inspired you to add a little light to your life (pun intended!). Now, go wrap lights on an outdoor tree at your home!
Have a great week!
Be sure to save this post to Pinterest or share on FaceBook so you can find it later!


This looks fantastic! I do definitely cover my neighbor’s trees 😂, so I’ll give this a shot myself.
Thanks, Miranda! If I’m being honest, I still covet my neighbor’s Christmas lights, but at least I’m doing something about it;-) Merry Christmas to you!
I may switch up my outdoors and try this decorating this year. I live the inviting and warm look it adds!
Thanks so much, Jen! The lights are so festive. Give it a try!
I always covet the neighbour’s tree lights too!! I think my biggest fear with this is buying all the lights and then it only covers part of the tree, or I might just be hoping my husband will do this!! Either way, I’d love to give it a try this year as it’s just so pretty!
Glad I’m not the only one that covets;-) Several strands can be safely connected, so that helps make sure the tree gets a good coverage. Best of luck getting your husband on board with wrapping one of your trees!
Thanks for this post! I especially appreciate the tip about rolling the lights into a ball before you start wrapping it around the trunk, and also your honest time estimate of how long this can take! Makes me really appreciate how long it takes people to make all those twinkling trees!
It wasn’t a fast project. I do think it will be quicker next year (at least I hope!). But, either way it’s worth it!
Thanks for the idea, I have a tree in the front yard that I am always looking for ways to make useful during the holidays, I will try this one.
My pleasure, Denise! Go for it. I’m certain you’ll be glad you did.
Ohhhh! So pretty, April! There’s something about lights I find truly magical. Nicely done!
Awwww, thanks so much. I appreciate the inspiration, Laura!
Your tree looks so beautiful! I like how you did it! I totally would have done the reverse. But, I’m glad I read this because lighting the trunk too looks way better than just a puff of lights on the top!
Thanks, Brandi! I truly fell in love with how my neighbor has wrapped her trees the last few years. It’s a beautiful look!
Glad to know you wrap from the bottom. I never have done this. Maybe I’ll do it this year.
It’s the little things! The tree is super cozy – you should grab some lights and try it!