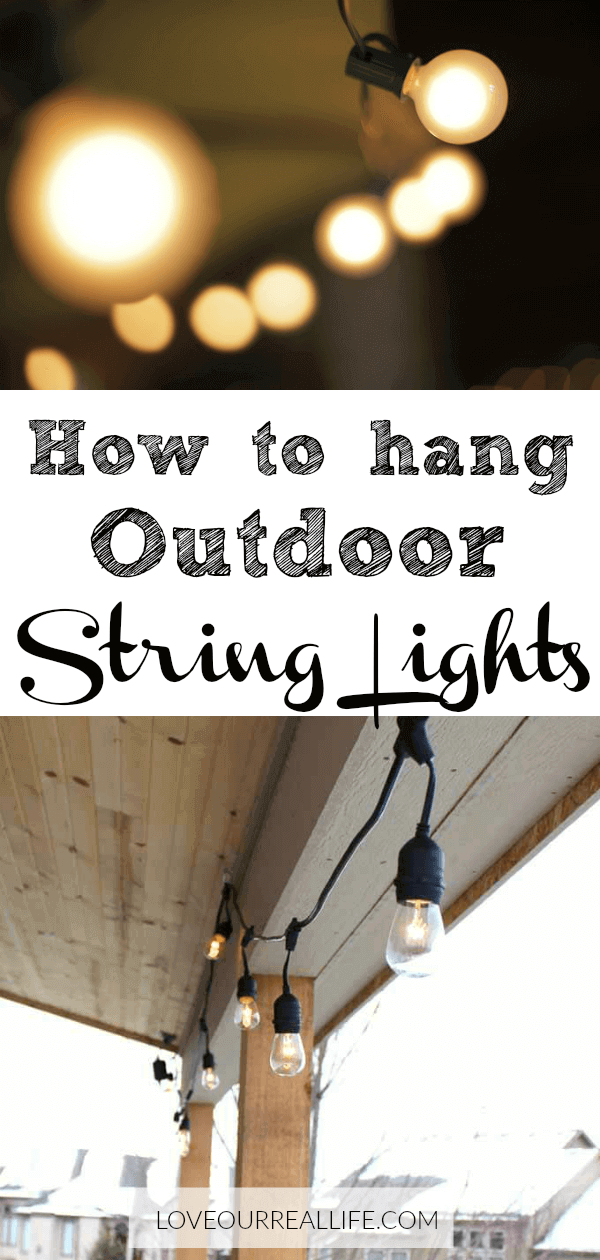
Learn How to Hang Outdoor String Lights
Learn how to hang heavy duty outdoor string lights with this simple to follow tutorial!
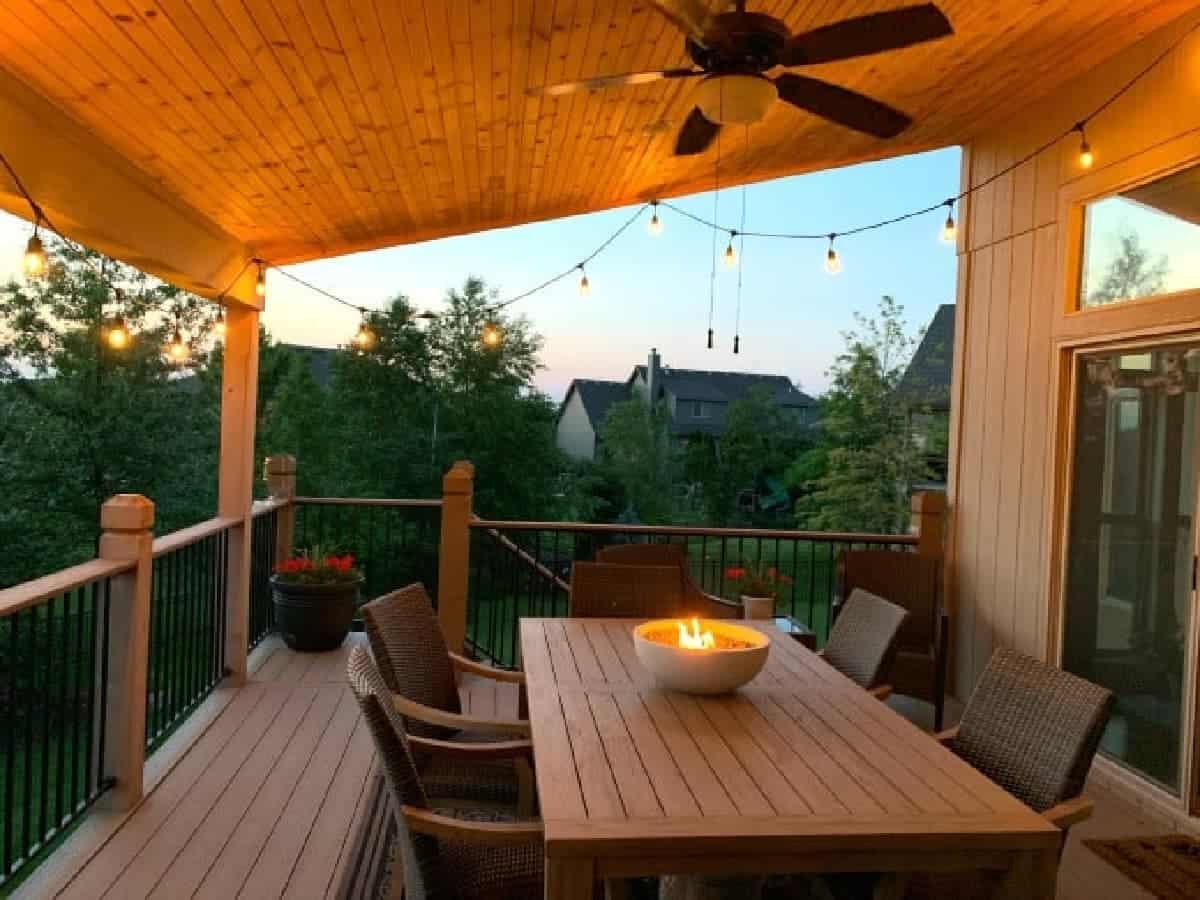
Outdoor string lights add that special touch to make a backyard or any outdoor space perfect for dinner parties, hanging out around a fire pit, or just enjoying a regular night at home with family. Learn the best way to hang outdoor string lights for your home!
It’s a simple DIY you definitely will not regret. Your outdoor space will be so inviting with your pretty string lights, you’ll never want to leave.

Get more ideas for outdoor spaces here.
Winter seemed to linger far too long in Missouri this year! My husband and I managed to hang outdoor string lights recently, but nearly froze doing so. Seriously, we could only stay out for a few minutes at a time and had to keep coming in to warm our hands.
BUT, they are up and when the weather decides to be kind, we are ready to enjoy our outdoor living space!
Outdoor light strands can get wet! SO our patio lights are safe year round!
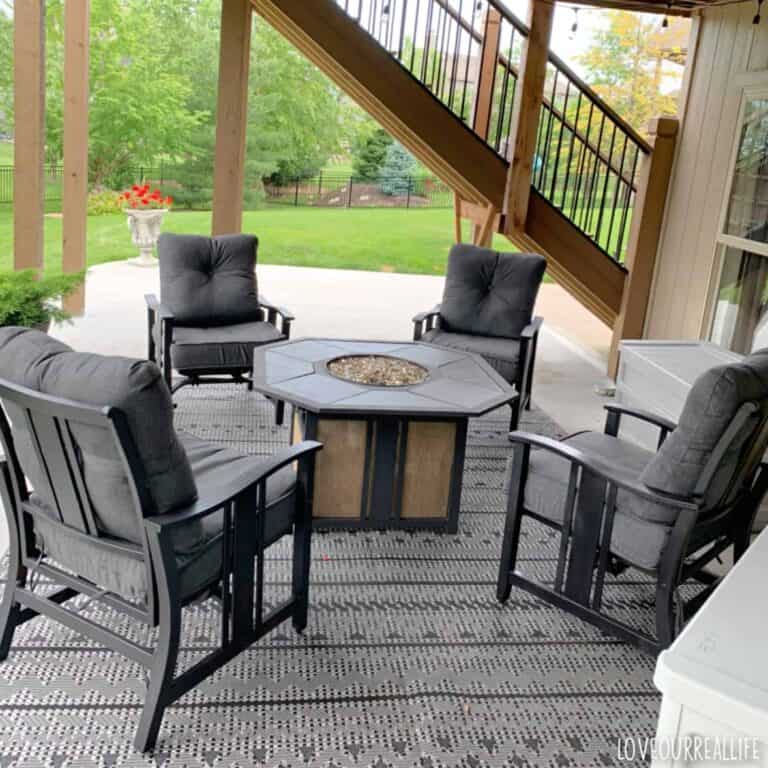
Nothing says “relaxing outdoor living space” light like the ambiance of cafe’ style string lights.
I’m much more inclined to pick a restaurant with a great patio on a nice day, aren’t you? Alfresco dining is even better on a nice evening when the outdoor dining area has beautiful lighting.
In hopes of dining at home more often, I’ve attempted to create an outdoor space that we love. Of course, string lights were at the top of the list for making our outdoor area more inviting.
Time to gather the right tools for this fun project. Keep in mind these outdoor patio string lights are meant to be a permanent installation, for you to enjoy year round.
RELATED READING…Can Outdoor String Lights Get Wet?
SUPPLIES TO HANG OUTDOOR STRING LIGHTS:
- Heavy Duty String Lights. My sister gave me the commercial grade lights I used, I believe from Home Depot or Lowe’s. I couldn’t find a link to this particular set, but I linked to commercial grade string lights that got fantastic reviews on Amazon.
- Screw Eyes / Hooks. We picked ours up at Lowe’s. But, I provided a link for your convenience. Just know you will have LOTS left over if you get the package I link to here. (You could also consider using cup hooks in lieu screw eyes and D ring clips. I just felt the D-ring clip made the patio lights seem more stable.)
- D Ring clips.
- Waterproof Outdoor Outlet with Remote. These are made for outdoor use and the easiest way to turn your lights on and off. (In my opinion this is a MUST as it makes using your lights so easy and convenient!)
- If using long strands of light strings in open spaces connected to wood poles, pvc pipe, tree branches, etc., you may need to consider using guide wire and zip ties to hold your lights strings in place although I did not use these with this particular project.
- Tape measure
- Replacement bulbs (for just in case!)
How to Hang Outdoor String Lights on a Deck or Pergola:
If you’re looking to create a warm glow and inviting ambiance for your outdoor space, string lights a great addition addition to your pergola, deck, patio, or other outdoor areas. Not only do they provide soft glow and cozy lighting, but they also add a touch of charm and elegance to any setting. However, hanging string lights can be a bit tricky if you don’t know where to start.
Luckily, we’ve got you covered with some helpful tips and tricks, whether you are dealing with pergola lights, deck lights or lights on any outdoor structure.
Before starting the installation process, make sure you have all the necessary materials. You’ll need string lights (preferably LED or even solar string lights for energy efficiency), hooks or clips to hang the lights from, an extension cord (if needed), and a ladder or step stool for reaching higher areas.
It’s also important to measure beforehand to ensure you have enough lights.
1. Measure the Space to Determine How Many Lights You Will Need
Get out your tape measure and determine the measurements of the space you are considering for your lights and see how that compares with how many feet of lights you have.
There are so many different options and different designs for the configurations of the string lights. Do what works for you and your space.
We changed our minds several times, but in the end, we just went with what made the most sense for our deck.
If you have a challenging layout, you might find criss crossing your lights, or using zig-zag patterns helps to pull the look together.
Straight lines with your strings of lights can be a more polished look and is also a great option!
Ultimately it comes down to personal preference.
In my opinion, draping the string lights with a little slack is a stylish look and always adds a pretty touch.
Since my sister gifted the lights to us, I knew we had a total of 48 feet of cord to work with (2 sets of 24 ft lights). In some ways, being “limited” made it easier as we knew exactly the length we were working with.

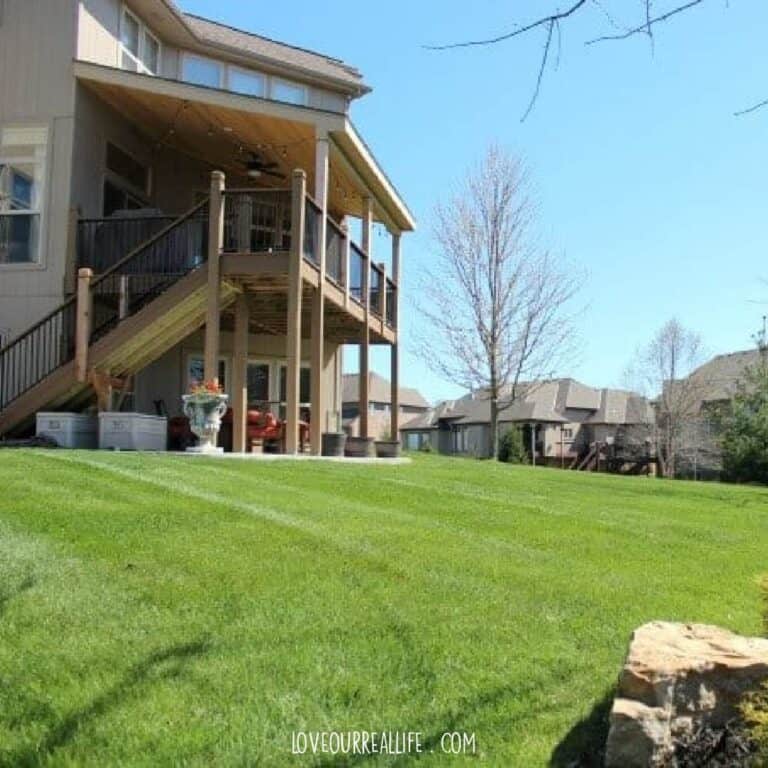
We had enough length to string them from the wooden posts and around the majority of the deck perimeter. We did the same configuration on our covered patio which is just below our deck.
Ensure a power source / electrical outlet is conveniently located to the starting point of your string lights when you are determining your configuration.
You could always use an outdoor extension cord if needed if you are struggling to start hanging your lights at the exact point of your power outlet.
The best option is to locate the power supply and start there.
2. Screw the Screw Eye hooks into Place.
Hanging string lights without the use of nails is my preference. Screw hooks are more durable!
We opted to put up screw hooks for the mounting points to fasten the lights into place every 4 to 5 bulbs. Our home sits up fairly high and gets A LOT of strong wind gusts. So, I was concerned the bulbs could potentially break if they were not secured well.
There have been several storms since we’ve put our lights up and this appears to work well for our location.
PRO TIP: Use a drill to start the hole (pilot hole) prior to screwing in the screw hooks. These small holes make the process a lot easier and keeps the wood from potentially cracking or splitting!

I highly recommend getting the heavy duty commercial grade lights. They are made to withstand the elements! With most commercial-grade string lights, the bulbs are spaced every 24 inches. At the top of every bulb there is a molded loop to making hanging easier.

Optional String Light Clips
If you are dealing with an existing structure that is metal such as a metal pergola, you may not be able to easily use a screw eye hook.
Another option to attach a set of string lights is using a heavy duty, outdoor string light clips or outdoor Command Hooks. I would suggest looking at different types of adhesive clips to ensure durable string lights.
For best results, follow the instructions well. Specifically, cleaning the surface before applying the Command Strips.
Note these come in many different sizes, so find what works for the lights you choose. Curtain lights are quite heavy, so you will need clips or Command strips that will support the weight of heavy lights.
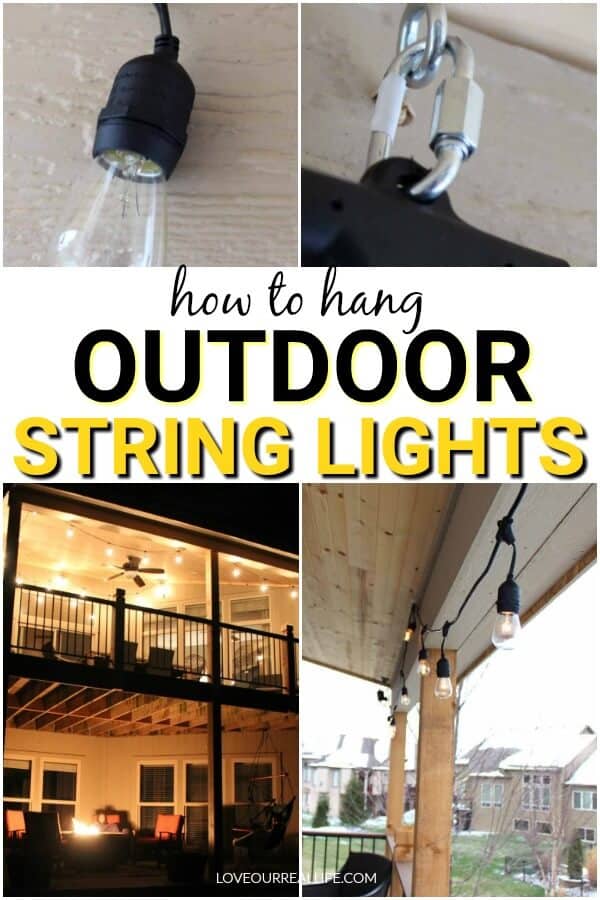
3. Connect the Molded Loop to the Screw Hook using a D-ring Clip.
Connecting the molded loop to a screw hook may seem like a daunting task, but with the help of a D-ring clip, it becomes a breeze.
A carabiner would also work great.
The D-ring clip is a small and versatile accessory that can be easily attached to both the molded loop and the screw hook. Its design allows for easy connection and disconnection, making it an ideal solution for hanging string lights.
To connect the molded loop to the screw hook using a D-ring clip, start by sliding one end of the D-ring clip through the opening in the molded loop. Make sure it is securely threaded through before moving on to the next step.
Next, attach the D-ring clip to the screw hook and tighten it. This will provide stability and support.

Thankfully the bulbs aren’t in during the hanging process, so that makes it much easier.
No worries about accidentally breaking a bulb!
4. Screw the Bulbs into Place
Make sure that your outdoor string lights are turned off and unplugged before attempting to screw the bulbs into place.
This will ensure your safety throughout the process.
Next, carefully inspect each light bulb for any signs of damage or wear and tear.
If you notice any cracks or loose parts on the light fixtures, it is important to address these issues before proceeding with the light bulbs.
Then, screw them in.

5. Attach Lights to Outdoor Wireless Remote Control Weatherproof Outlet
This may be one of my favorite things about the outdoor lights!

If you are going through the trouble to hang outdoor string lights you will definitely want to add an outdoor remote control outlet so you have the convenience of turning your lights on from inside your home.
This great way to help you use your cafe lights any time you’d like, even if the weather doesn’t allow you to go out on the back patio or deck space.
We hang our remote controls by our deck door. It makes it super easy to turn on the lights when we are looking for a little ambiance. If something is convenient, you are sure to use it more!

Other tips for hanging string lights
- Take the glass bulbs out BEFORE hanging. You don’t want to deal with broken bulbs!
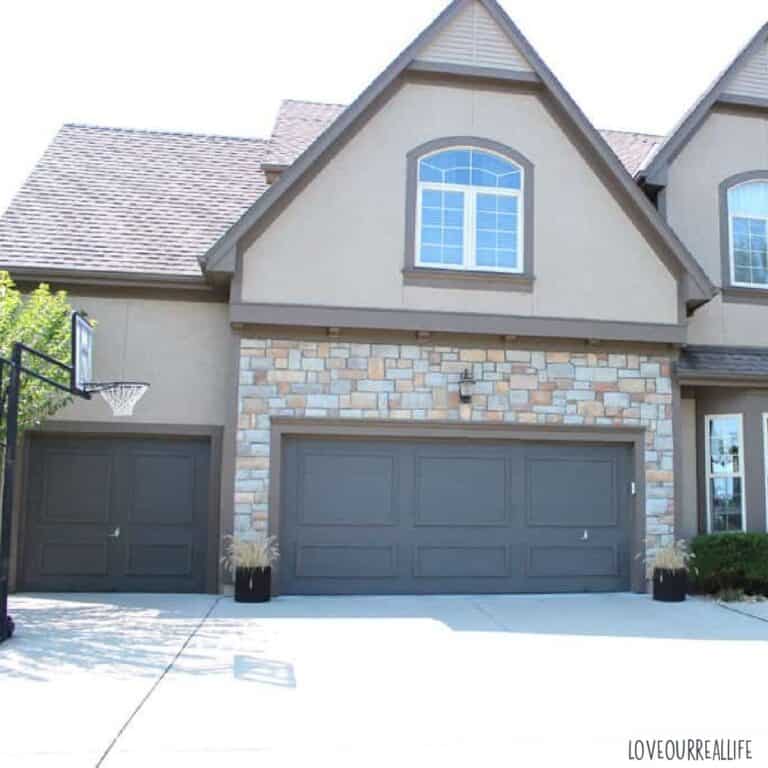
- If hanging your string lights on stucco, you will need to use wall anchors specific to stucco.
- Get an assistant to help. Even having one of your kiddos help out by handing you items can make this process go a lot quicker!
- Avoid incandescent bulbs or cheap fairy lights.
- Edison-style bulbs are great for outdoor ambiance.
- Solar-powered string lights are a great option. Just make sure the solar panel has access to several hours of sun each day.
There are a wide range of lighting options, including budget-friendly string lights.
You can find good quality, but inexpensive string lights that will quickly make the overall look of your outdoor space more high end.
Outdoor spaces that are perfect for string lights
When it comes to enhancing the ambiance of your outdoor space, outdoor string lights are a perfect choice. These versatile light fixtures can instantly transform any area into a magical and inviting place.
So, where are the best places to hang these enchanting light fixtures?
- Deck
- Patio or patio cover
- Pergola
- Gazebo
- Connected from a tree to a house
- Free standing poles with attached string lights in the backyard
- Fence rope lighting
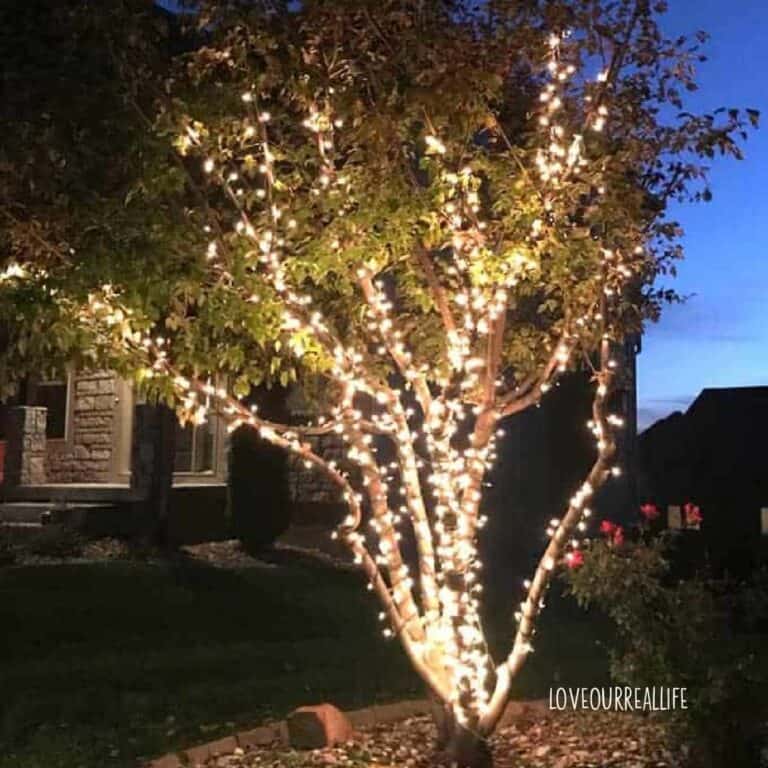
- Lights wrapped around an outdoor tree for beautiful dinner ambiance in your outdoor space.
- Above a fire pit
- Light poles
- Deck railing
- Support beams
- Tree trunks of mature trees
I hope you have enjoyed this simple, but comprehensive guide for hanging string lights without nails.
Regardless of where you decide to install your lights, it will soon become one of the best places for your family to spend their evenings. You will soon find creative ways to add other outdoor lighting ideas to your home. Ask me how I know;-)
As you can see, there are several different ways to hang string lights. My method is the easiest method, in my personal opinion. So, get started!
Frequently asked questions
What are festoon lights and how do you hang festoon lights outside?
- Festoon lights are simply cafe style or party lights just as I’ve described above! You hang them following the tips outlined above!
What is the best way to hang outdoor string lights?
- In my opinion, the steps I included above are simple, safe, and sturdy. So, sounds like the best way to me! Keep in mind the space you are considering hanging lights will determine the exact approach you will take.
How do you hang outdoor string lights without nails?
- As per above, using screw eye hooks is perfect for hanging lights to make them hold up to outdoor elements.
I hope I’ve answered your questions so you can get started with your lights!
You guys should have seen our west-facing deck before it got a major makeover. We went from avoiding it completely, to being outside any chance we get!
It’s the perfect time to give your home a little curb appeal! Get ideas for front yard landscaping as well as what to avoid with your landscaping project!
What projects are you working on currently? I’d love to hear about them!
Latest Outdoor Posts:
How to Hang Outdoor String Lights on a Deck, Patio, or Pergola

Illuminate your evenings with string lights. Hang beautiful outdoor string lights and turn any ordinary space into a charming oasis. This method works great for a deck, pergola, patio, mature trees, or other outdoor structure.
Materials
- Heavy duty string lights (commercial grade meant for outdoor use)
- Screw eye hooks
- D-ring clips
- Waterproof outdoor outlet with remote
- Replacement bulbs (just in case)
Tools
- Tape Measure
- Screw driver
Instructions
- Measure your space to determine how many lights or light strands you will need.
- Determine pattern or configuration of lights.
- Create pilot hole with drill for screw eye hook.
- Screw screw eye hooks into place.
- Connect molded loop on string light strand with screw eye hook using a D-ring clip.
- Screw bulbs into place (ensure lights are unplugged).
- Attach wireless remote.
Notes
Tips:
- Having a helper makes the process go a lot faster.
- Solar lights are a great option, just ensure the solar panel gets several hours of sunlight daily.
- Avoid glass bulbs if possible.
- The remote control isn't crucial, but it is incredibly handy to turn your string lights on/off from indoors.
- Our string lights stay up year round without any difficulty.
I love this lights and your garden looks beautiful.
Thank you! We are SO ready for outside time! Enjoy your week!
Your outdoor lights look great in your backyard patio area. I’m very excited to spend some time in our backyard this summer.
I think we are all going to appreciate so much more after such a harsh winter!
I love the look of these lights! Very inviting!!
Thanks, Charissa! Now I just need to clean up our fire pit!
I am ready for winter to be over here as well. Love these lights! I want to do something like this in my backyard.
Lights add so much to an outdoor space at night. Thanks for stopping by;-)
These look great! Thanks for the tips!
My pleasure! Have a great week!
We live in Europe so I’m going to have to do a little research on where to find lights like these here….but I think I NEED to hang some like this on our balcony!!
Best of luck finding lights in your neck of the woods. I know you’ll be glad to have them!
We still have snow in April. What I wouldn’t give to sit outside under those lights. Looks awesome!
Snow is still on the ground here in Missouri, too. Spring will come! We’ll all just appreciate warmer weather that much more!
I will!
Looks great! Now if it would only warm up enough to go outside! Our major projects right now are having the hardwood stripped and restained and redoing our master bathroom.
I hear you regarding warmer weather, Jenifer! Wow, your projects sound ambitious. I’d love to redo our hardwood floors, but I’m afraid my sweet dog would just scratch them up again. Keep me posted;-)