DIY Easter Bunny Gnome: How to Make No Sew Sock Gnomes
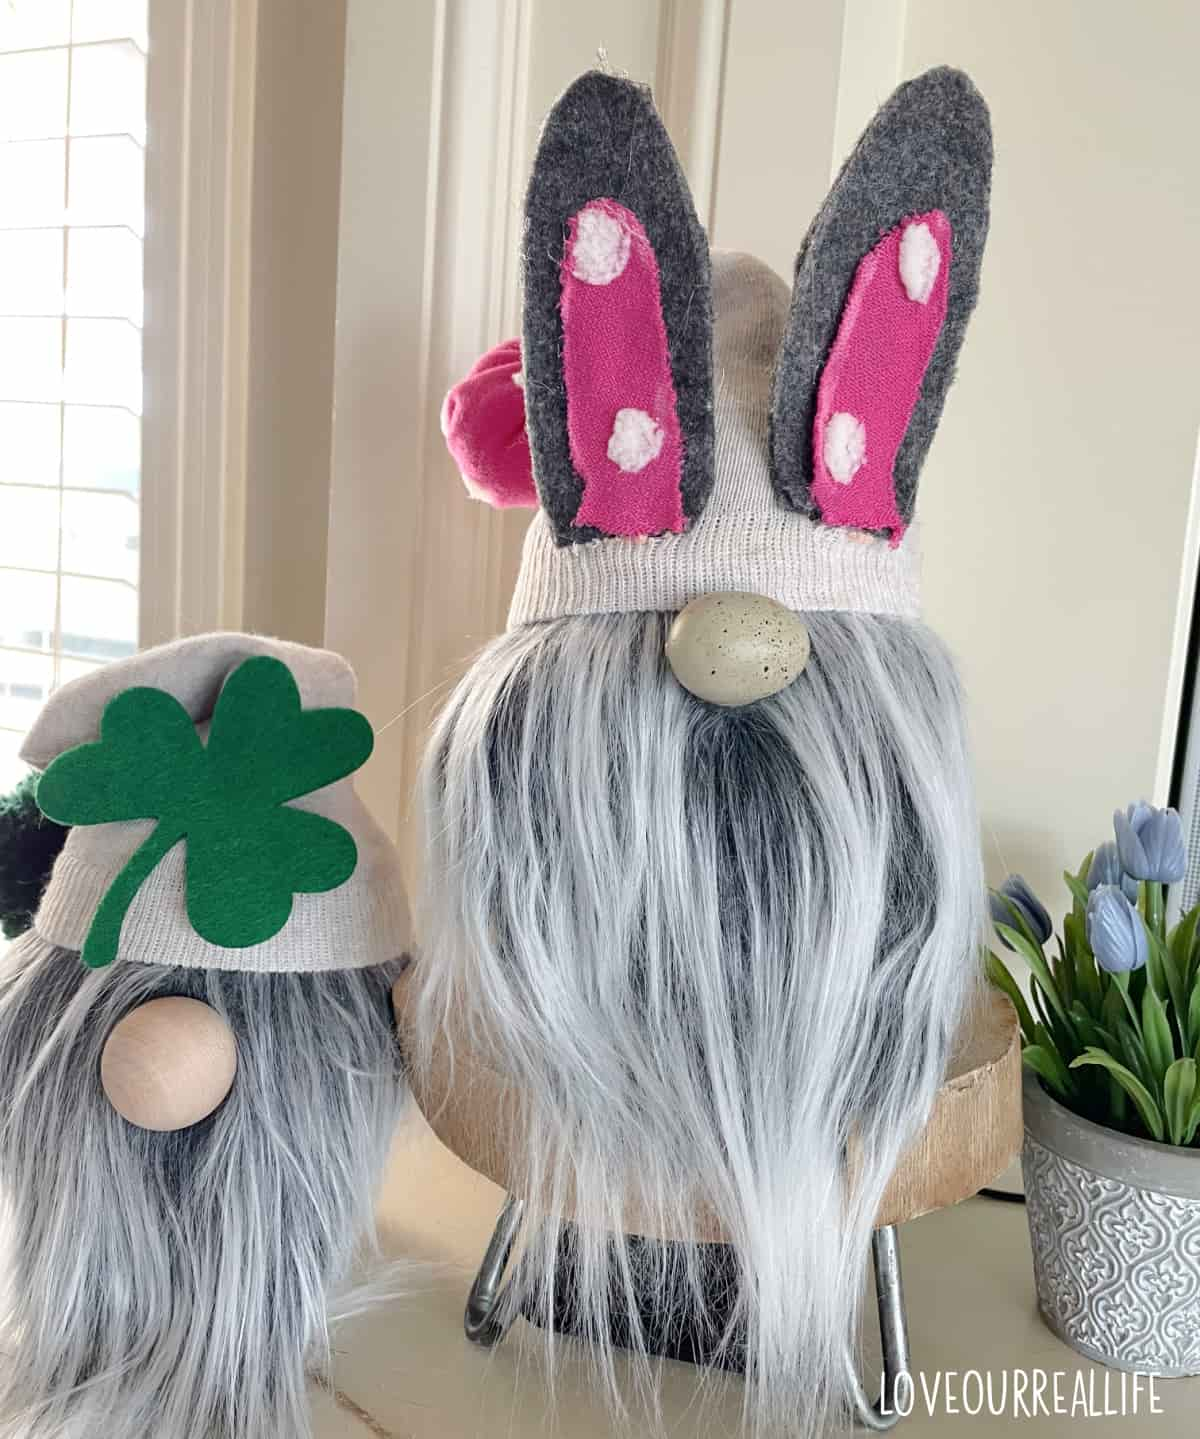
I love a fun gnome craft and these Easter bunny gnomes are no exception. These little guys are SO cute with the perfect addition of their fun bunny ears. They will most certainly add a fun element to your Easter decorations.
Grab your hot glue and faux fur and let’s make an adorable Easter gnome!

Get more fun spring craft ideas here.
Supplies:
Two Socks (one plain white sock, one pretty)
Rice
Rubber bands
Hot glue gun
Scissors
Wooden bead or decorative plastic egg for nose
Felt (gray and pink)
Easter bunny ears template
Two pieces of wire (I used pipe cleaner)
Fiber fill (optional)
Pom Pom (optional to add to end of gnome hat)
Get creative with your diy bunny gnome! Add lots of fun color to your spring decor and make several diy Easter gnomes using a different color for each.
Make Gnome Body
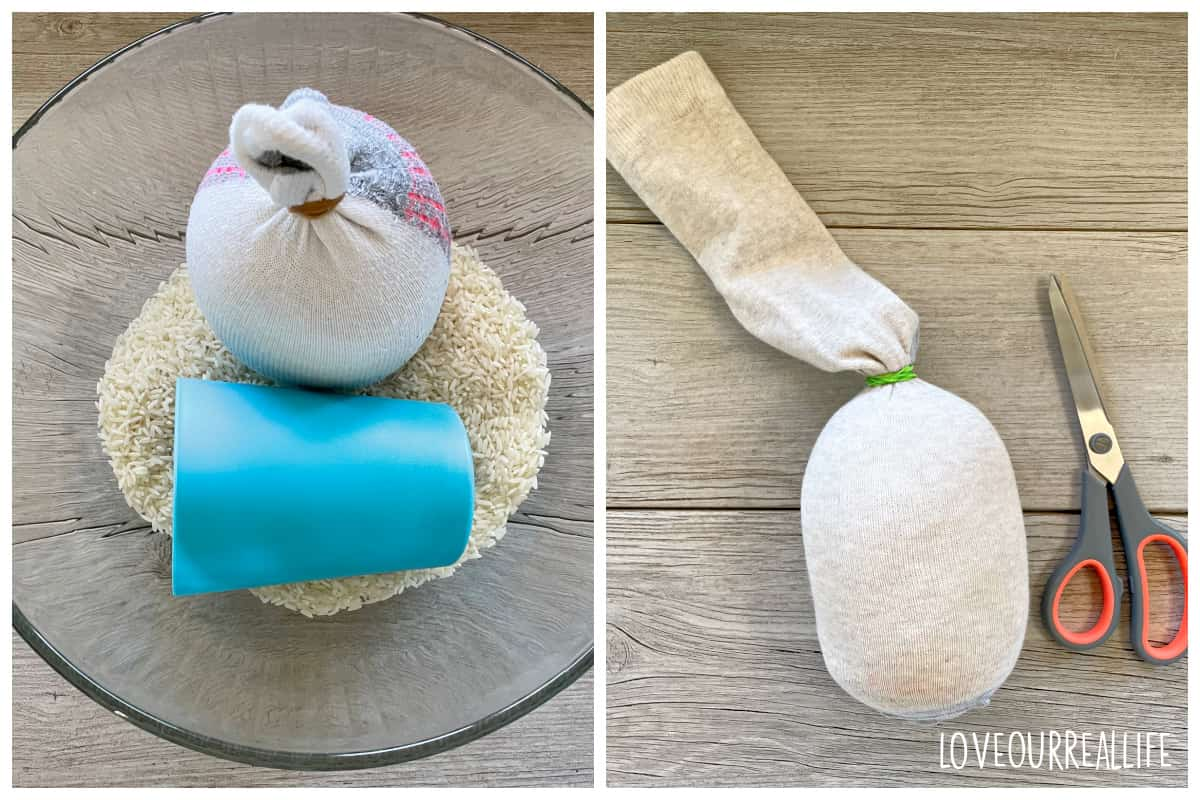
Fill a plain white sock with rice. Put rice in a bowl so there is less mess. Use a cup to scoop the rice and pour directly into the sock. Shake it so it settles, then continue to add rice until it is full.
Seal the top with a rubber band. When it is secure, put the plain white sick into the fancier/ pretty sock.
Once again, secure the top of the sock with a rubber band. Cut edges of the remaining top of the sock and save remaining fabric to make hat at a later time.
Gnome Beard
Cut a small triangle out of the faux fur. Alternatively you can create a beard from a mop head at the Dollar Store.
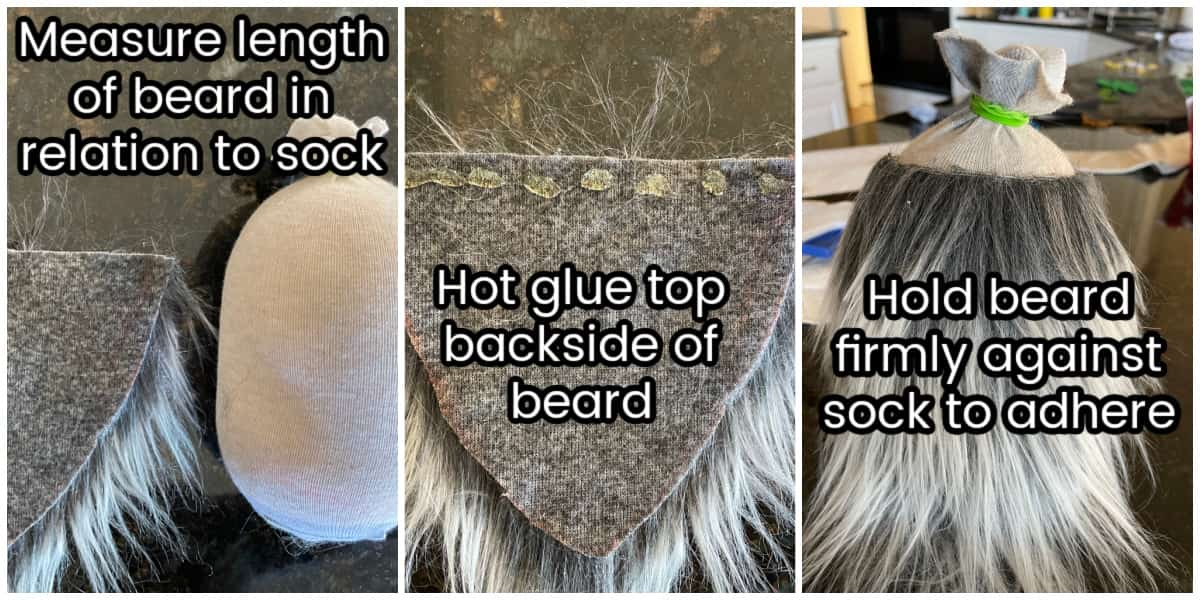
I did not use a pattern for this. On the backside of the craft fur, free hand a triangle that will measure close to the top of the sock body all the way to the ground.
Just draw a diagonal line on the left and an equal line on the right side so the beard is even.
Cut out beard carefully to avoid cutting the actual fur that will be around the edges of the gnome. You do not want him to look too trimmed and neat. A box cutter or scissors will work fine to cut the craft fur.
Use a little bit of hot glue on the top / backside of the craft fur and apply to the sock body.
Hold in place for ~30 seconds to ensure it adheres.
Make the Bunny Ears and Place Hat on Sock Gnome
Use the free pattern of bunny ears below should you want a template for making the bunny ears.
Gray felt works nicely for the main body of the ears. Trace two copies of each ear (four ear cutouts needed in all for main portion of ears). Cut out bunny ears.
Hot glue some wire or pipe cleaner between two fabric pieces to ensure the ear stands upright.
The best way to cut the wire is with wire cutters, but if you use pipe cleaners as I did for the center of the ears, scissors work just fine for cutting pieces the size you need them.
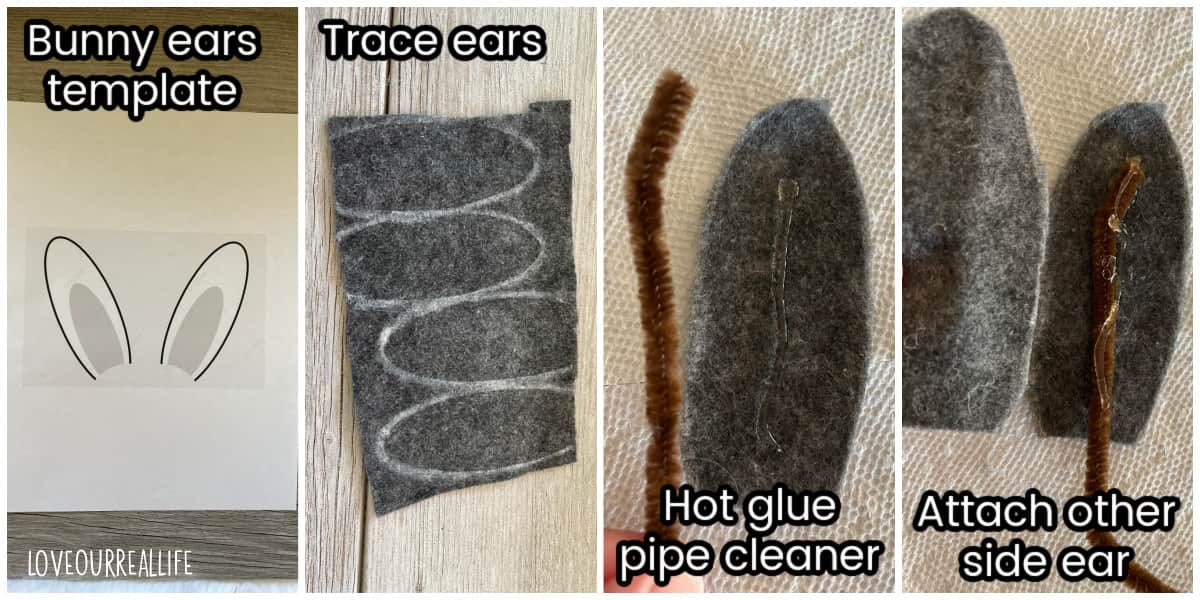
I used extra fabric from a previous project for the pink portion of the ears. But, pink felt or any pretty pink fabric would work great for the center of the ears.
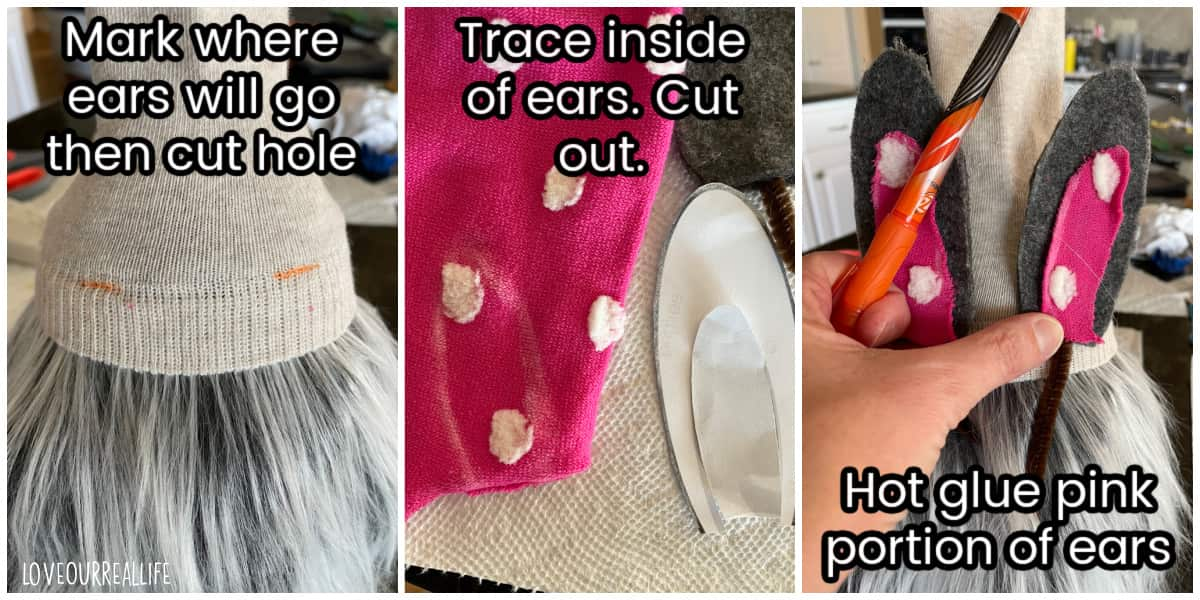
Cut out the pink portion of the bunny ear template and use this to trace onto pink fabric. Cut out pink fabric and hot glue to gray felt ears.
Grab the top of the sock you cut off earlier when making the gnome body. Use the elastic side to place over the gnome body to make the little guy’s hat.
Lightly mark where bunny ears should go and make a small slit with scissors. Poke the bunny ears through hole and secure in place with a little hot glue.
To finish the top of the hat you have a few choices:
• You can simply hot glue the excess loose pieces together.
• or add a yarn pom pom to the top of the hat (see how I made the pom pom in this post).
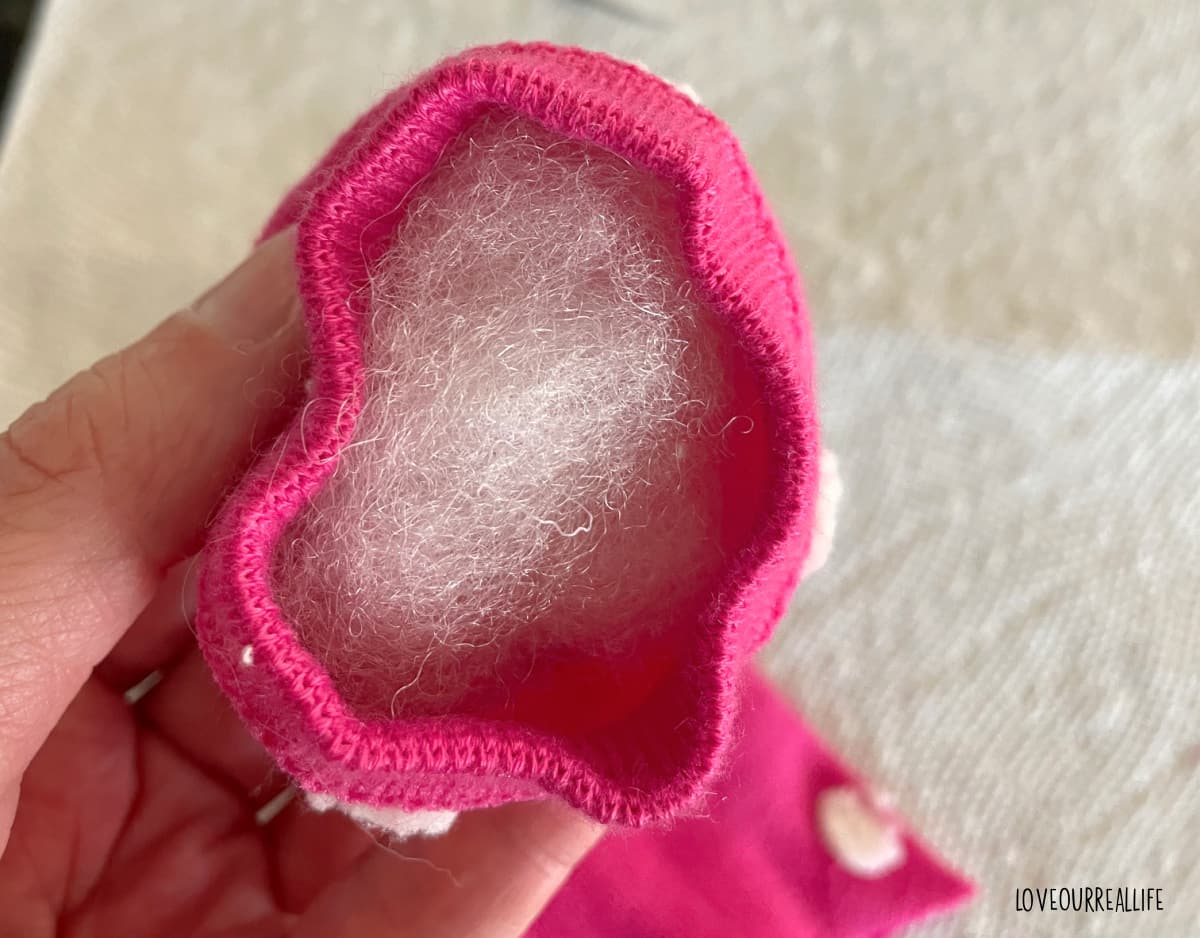
• or use pink material to create your own fabric pom pom (that is what I did).
I stuffed the pink fabric with stuffing and used hot glue to secure it shut and attach the pom pom to the top of the sock.
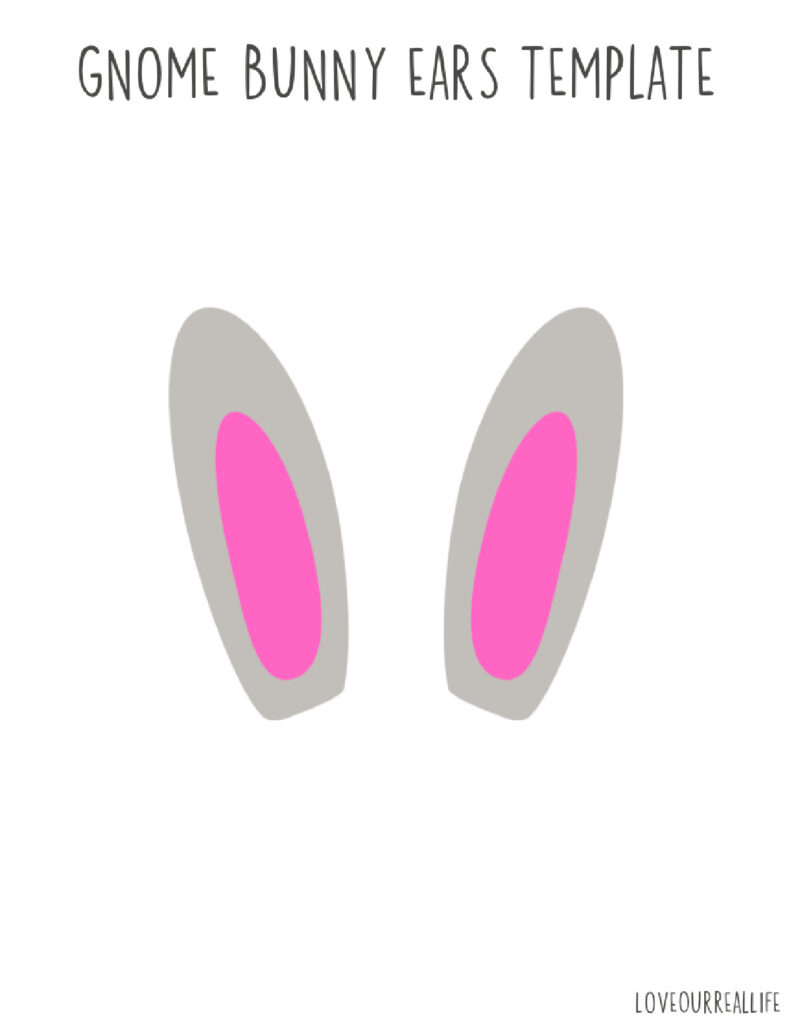
FREE Gnome Bunny Ears Template
If you need a template for making the bunny ears, I’ve got you covered. Click on the button that says “get it here” and you can download and/or print gnome bunny ears template free. It is set to open in a new tab in your web browser so you can take a peek.
Glue Nose onto Gnome
The last step is to attach the nose. Use a wooden ball or decorative Easter egg as the nose. Use hot glue to secure it in place.
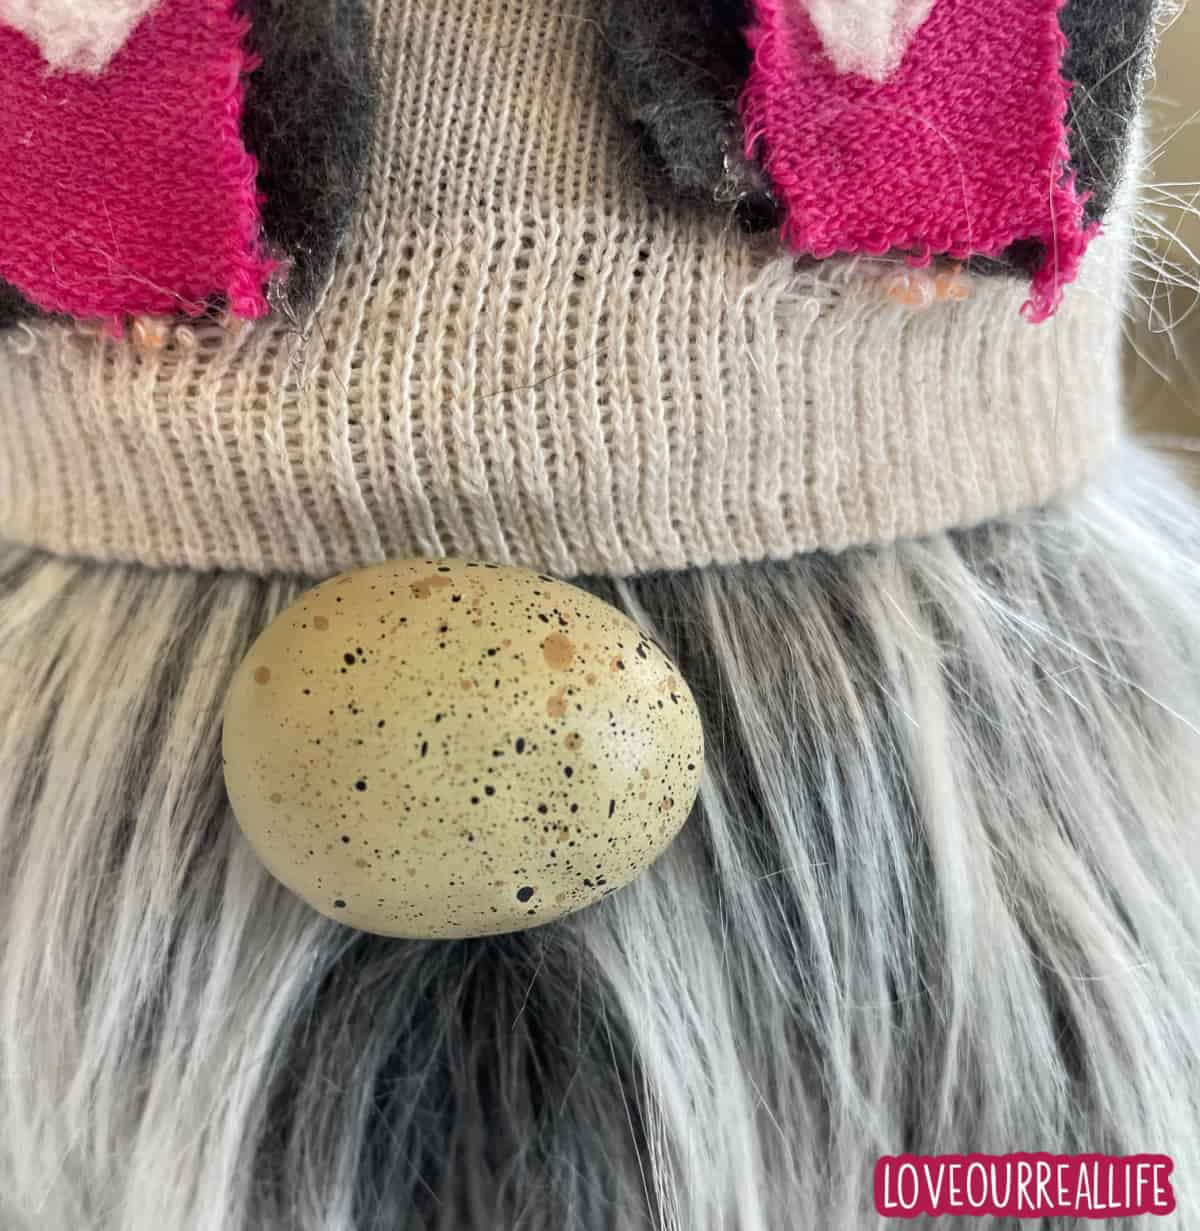
There you have it. A super cute Easter bunny sock gnome! So cute!
DIY gnomes are so fun you will definitely want to make more. For Christmas, I made several sock gnomes then one gnome that required a little bit of sewing. The no sew (sock gnome) options are definitely the easiest!
DIY Easter Bunny Gnome: How to Make No Sew Sock Gnomes
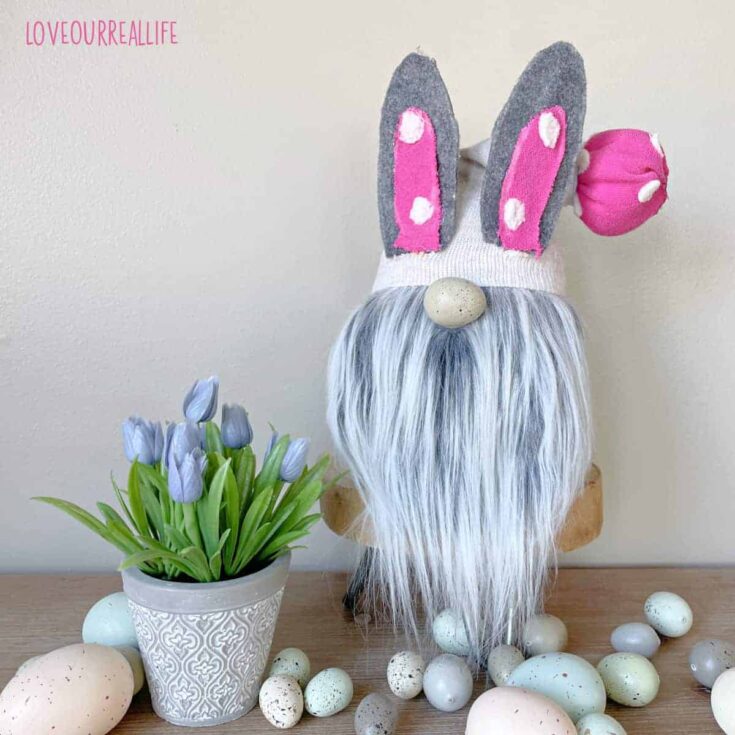
Add bunny ears to create the perfect Easter sock gnome. You will have so much fun making these little guys that you'll want to make more spring gnomes to add a fun touch to your Easter decorations.
Materials
- Rice
- 2 socks (one plain white sock and one pretty sock)
- Rubber bands
- Faux fur
- Gray and pink felt
- Pipe cleaner
- Wooden bead or decorative egg for nose
Tools
- Hot glue gun
- Scissors
Instructions
- Make sock body
Use rice to fill white sock, secure with rubber band. Put plain sock inside pretty sock and secure with another rubber band. Cut off excess portion of pretty sock (use for hat later).
- Make gnome beard
Cut faux fur in triangular shape. Carefully cut out and hot glue to sock.
- Make and attach ears to gnome hat
Use template (see notes) to make gnome bunny ears. Hot glue pipe cleaner in between two pieces of felt ear cutouts (for main portion of ear).
Cut out pink portion of ears and hot glue to gray felt. Place remaining part of sock from step one over gnome body. Mark where ears will go. Cut small slit and slide ears through hole. Secure in place with hot glue. - Hot glue nose onto bunny. Use wooden ball or decorative egg as gnome bunny nose. Add dab of hot glue and hold into place for 30 seconds to secure.

Notes
Get the gnome bunny ears template here: https://www.loveourreallife.com/wp-content/uploads/2022/01/Gnome-bunny-ears-template.pdf