Basement Guest Bathroom Makeover Reveal
It’s done! We finished the basement guest bathroom makeover!
Our basement has been going through some pretty big changes in the last several months and the bathroom was towards the top of the list of things that needed to change!
It wasn’t horrible by any stretch, just a boring bathroom that didn’t have a real welcoming feel for company. The biggest change was made with one of my favorite things. Paint.

See more room makeovers here.
Guest Bathroom Makeover:
I have managed to make some pretty major changes to our basement with very little expense primarily by being creative with paint! More to come in a moment about all of the other changes.
For now, let’s dive into the guest bathroom reveal. Lots of painting and DIYs!
1. The builder grade mirror update:

Jason, my husband, was unhappy with this mirror from day one. It was a simple builder grade mirror, but what drove him crazy was the asymmetrical mirror clips.
Take a look:
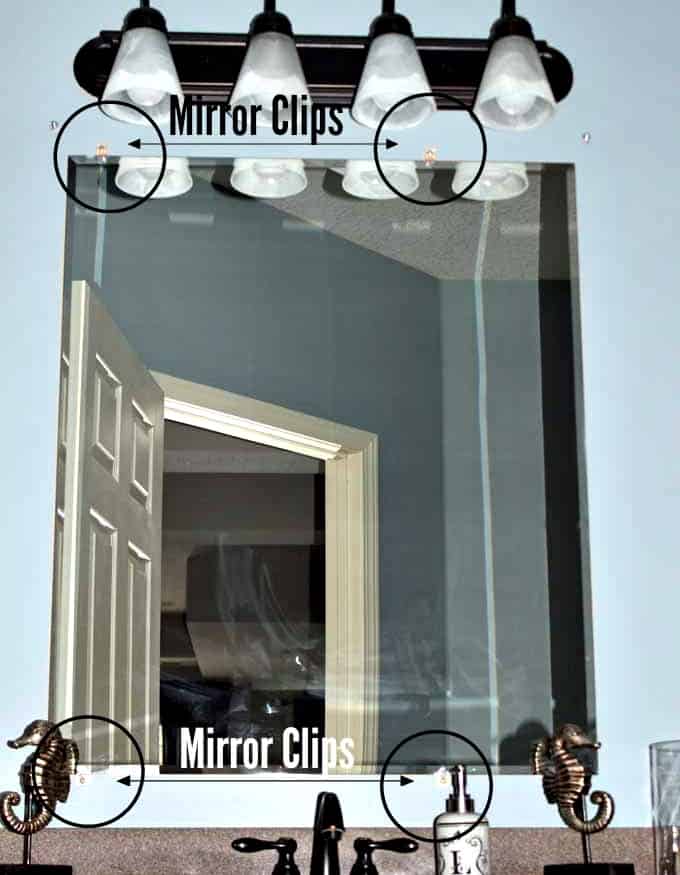
For some reason, we allowed this mirror to drive us crazy for the last eight years.
BUT, with a simple DIY wood frame, the mirror looked so much fancier. Seriously, I think it cost me less than $10 to make this frame!
Read all about how to make a DIY frame for a bathroom mirror!

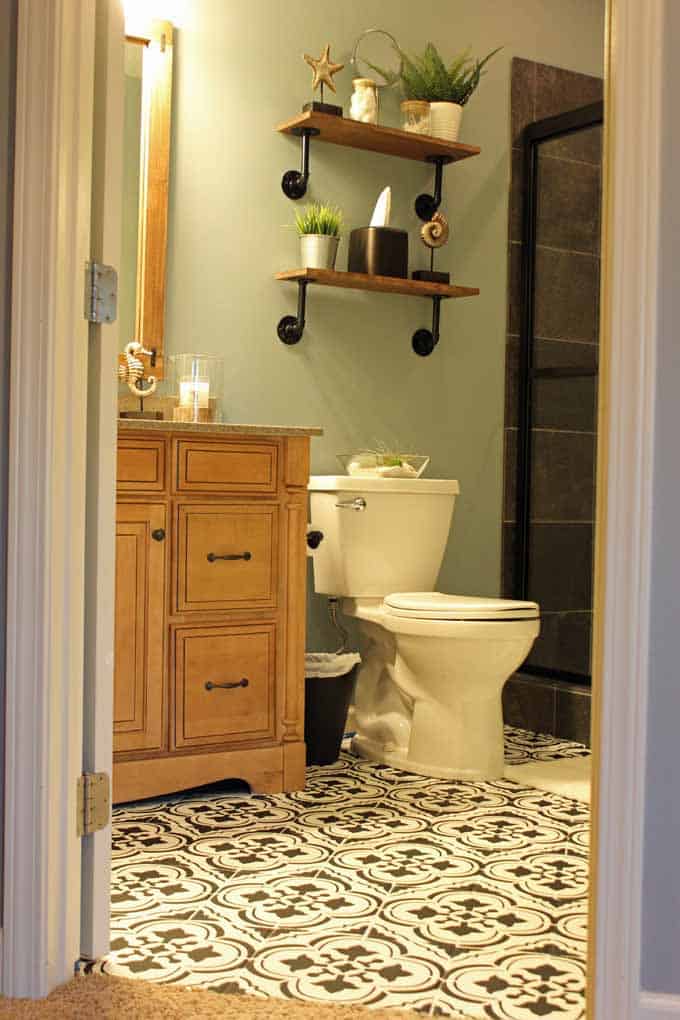
2. DIY Rustic Shelves:
Several DIY projects were done to update this bathroom. DIYs are a great way to save money, plus they ensure you get things exactly how you want them!
The industrial shelving below tied in with the wood stain color in the vanity as well as the new framed mirror.

The shelves added a pretty, yet practical solution to let guests see where we keep tissues, a hand mirror, cotton balls, and Q-tips. My goal was to create a space where my guests feel they have everything they need.
Of course, I added some fun, faux plants from IKEA. I would hate to count how many fake plants from IKEA are throughout my home!
They’re perfect for adding a little bit of greenery. Since I have the opposite of a green thumb (would that make it a black thumb? Red thumb?), I have to stick with faux plants with a few exceptions of easy-to-care-for plants.
Regardless of what color my thumb is, these are perfect!
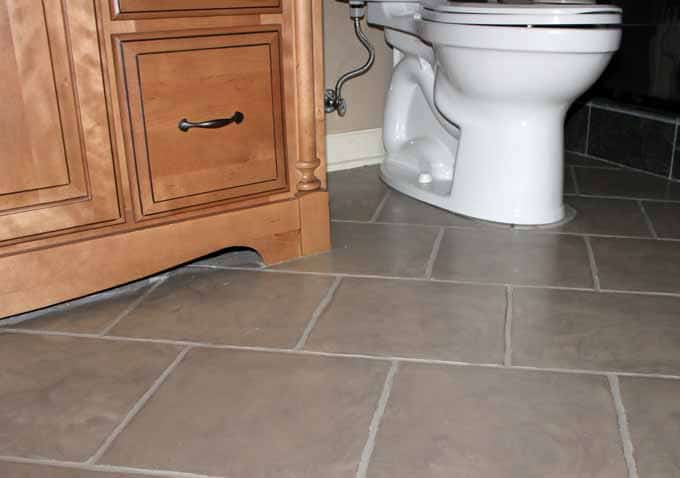
3. Stenciled floor tiles:
The floor makeover definitely has the WOW factor. Be warned, this DIY isn’t for the faint of heart as it takes FOREVER.
But if you have patience, love the look, and are willing to put in the time, I strongly encourage you to do it!
I used the Santa Ana Tile Stencil from Cutting Edge Stencils.
If you want to try this project, or are simply just curious about the process, read about them at How to Paint Tile Floors Using Stencils.
All of the tile in my basement (bathroom, computer desk space, and bar) was painted with the stencils. My recommendation with stenciling floor tile is to pick ONE space, otherwise you risk losing your mind as the project is slow and tedious!
Believe me, I know!
But, I do love the results – now that it’s over;-)
The before shot of the bathroom floors:
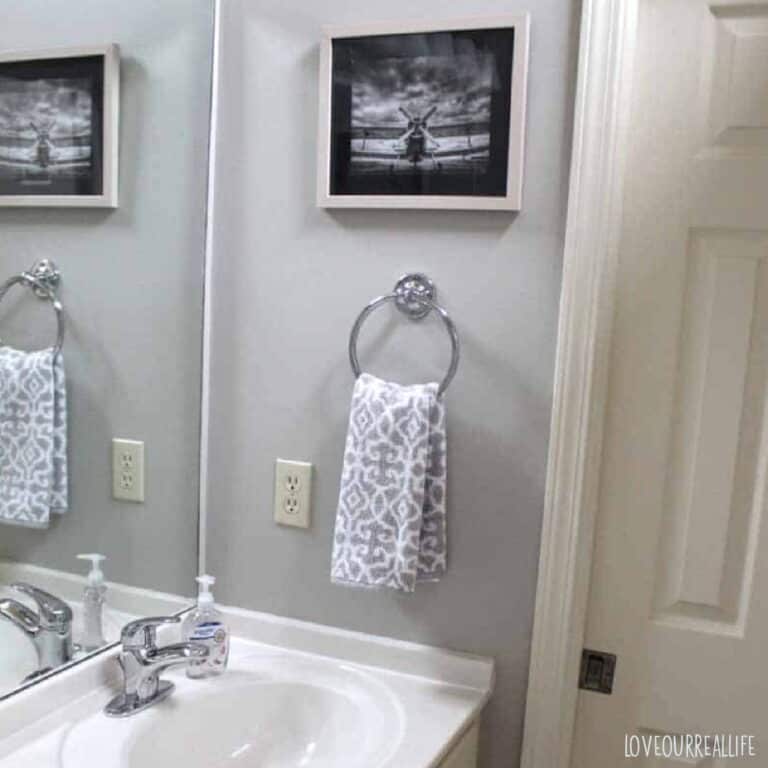
4. Add little touches to the bathroom:
The little things can make all the difference in helping your guests feel at home!
One of my favorite things about our guest bathroom makeover is the hooks I put on the back of the bathroom door. I snagged these Svartsjon IKEA hooks for $5.99.
Dry wall anchors made for hollow doors were used to hang them in a matter of minutes.
If you aren’t comfortable using dry wall anchors, I posted How to Install Heavy Duty Shelves using Dry Wall Anchors that should give you all the tips you need! The process was essentially the same.

The below wall plaque from Hobby Lobby was simple, but perfect.
365 New Days. 365 New Chances.
Loved that!

Some of the other decor I already had. I did a little shopping from other places in my home.
That is one of my favorite ways to decorate: changing the location of decor items can make them seem like new without having to actually buy new things!

RELATED: Teen boy bathroom makeover.

Some good-smelling shampoo, conditioner, and body wash were put in the shower. I don’t know about you, but when I stay somewhere, I love to try things that are different than what I have at home!

5. The walls were painted Nimbus Gray:
It’s hard to capture a great representation of the paint color as there is zero natural light in this bathroom. That certainly makes photography a challenge.
But the below picture gives a pretty decent look at the Nimbus Gray paint color from Benjamin Moore. To me it is a gray blue, giving a calming, spa-like feel.


Basement Guest Bathroom Makeover Reveal:
If you want to see all of the other basement makeovers / updates, you can take a look here:
- How to Paint Tile Floors Using Stencils
- Installing Heavy Duty Shelves Using Dry Wall Anchors (included is a tutorial for making the rustic, industrial shelves)
- How to Paint Tile Countertops
- Painting Cabinets without Primer / The Ultimate Amateur’s Guide
- How to Update a Stone Fireplace Using Paint
Save this pin for later!

Thanks for stopping by! I hope you found some ideas to make your guest bathroom more cozy and company-friendly.
JOIN ME ON PINTEREST / FACEBOOK / INSTAGRAM


Great makeover! Looking forward to seeing more makeovers from you. Thanks for sharing! Carolina at Hamilton Billiards.
Glad you enjoyed it, Carolina! Have a great week!
You did an amazing job! I love everything from the bathroom mirror to the industrial shelves! I can’t wait to try some of these DIY’s on my own bathroom!!!
Thanks so much, Kelly! Best of luck with your bathroom projects!
I love how everything turned out.
Thank you, Jalisa! Have a great week!
Wow! This looks great! I love the frame around the mirror too!
Thanks so much! The framed mirror made a big difference in this bathroom!
I love everything about this transformation! From the framed mirror to the stenciled floor, your bathroom turned out amazing!
Thanks for the sweet comment, Alexis!
Those floors are amazing! I also love your DIY mirror and shelves. The bathroom looks great!
Thanks, Emily! I’m glad I can check that off the list!
Love the floors!!!
Thanks, Amanda! Have a great week!
this looks amazing!!! it’s so different, I love the design
I appreciate the kind words – Thank you, Jasmine!
Love!! Love!! I am in need of a bathroom remodel very soon!! I may be asking for some advice!
Thank you, Jenifer! I’d love to troubleshoot with you;-)
I love your new space! I can’t believe you painted that tile! It looks stunning! This is really motivating me to give some new life to my master bath.
Thank you, Jen! The tile was definitely a commitment! BUT, it looks really pretty. Good luck with your master bath!
LOVE the shelves and the floor! This looks awesome!
Thanks so much, Nicole!
Wow, I love this bathroom makeover! ♥︎ I have a similar bathroom mirror that drives me crazy and has done so for a good couple of years. We have thought about possibly framing it in a way, but seeing how you guys solved it might inspire us to just go ahead and do it. 🙂
Thank you, Anita! Yes, the frame was a game changer for our bathroom. A simple frame hanging over the mirror worked great!
Like the look of the flooring and those shelves. Storage is important so good to see there is plenty. Plus I like hooks on back of a bathroom door.
Thanks, Candy! I am functional / practical to a fault, so I agree 100% that bathroom storage is necessary!