DIY Bathroom Vanity Makeover: Perfect Combo of DIY and Professional Touch
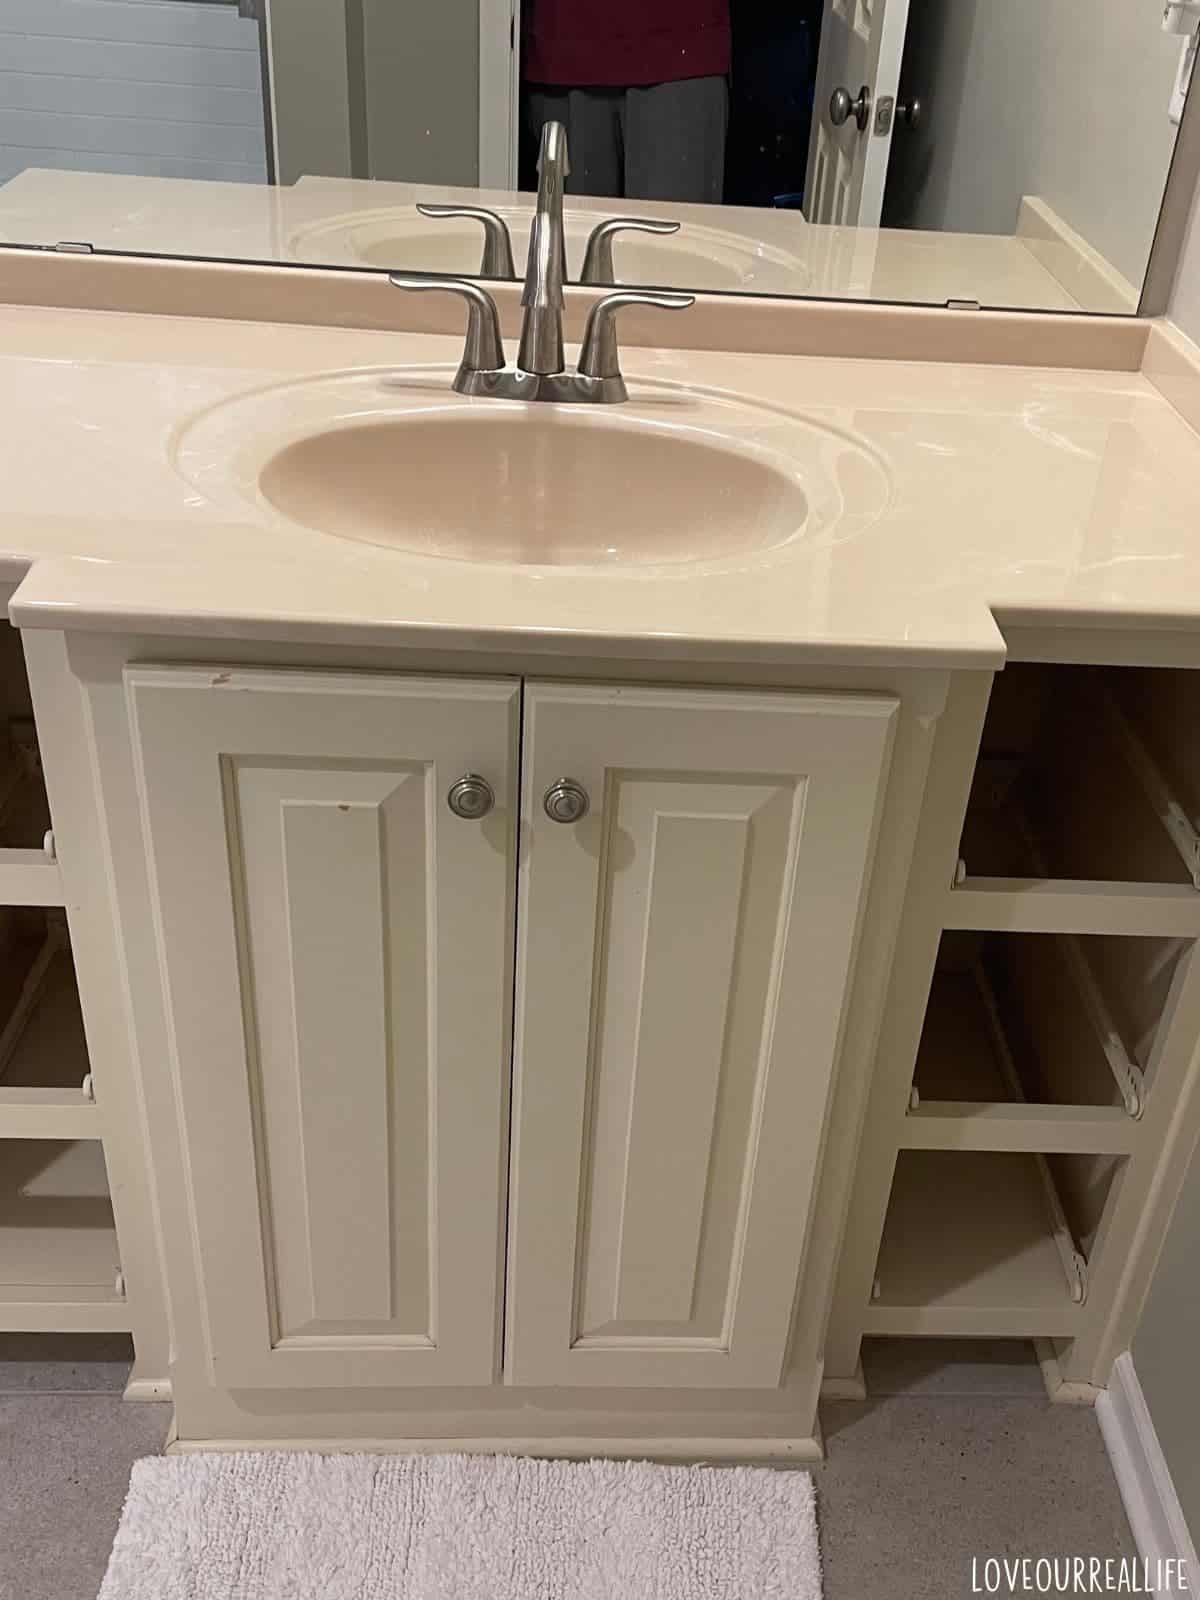
Over the years, we’ve been gradually updating our 20-year-old home to give it a fresh, modern feel. When we recently replaced the old tile in our guest bathroom with sleek gray flooring, it became clear that the cream-colored vanity was out of place. A bathroom vanity makeover was definitely in order, and we couldn’t wait to give it a stylish new look!
My college-aged son uses the guest bathroom when he’s home, and since he loves the look of wood, I decided to give the vanity a faux wood finish using Retique It.
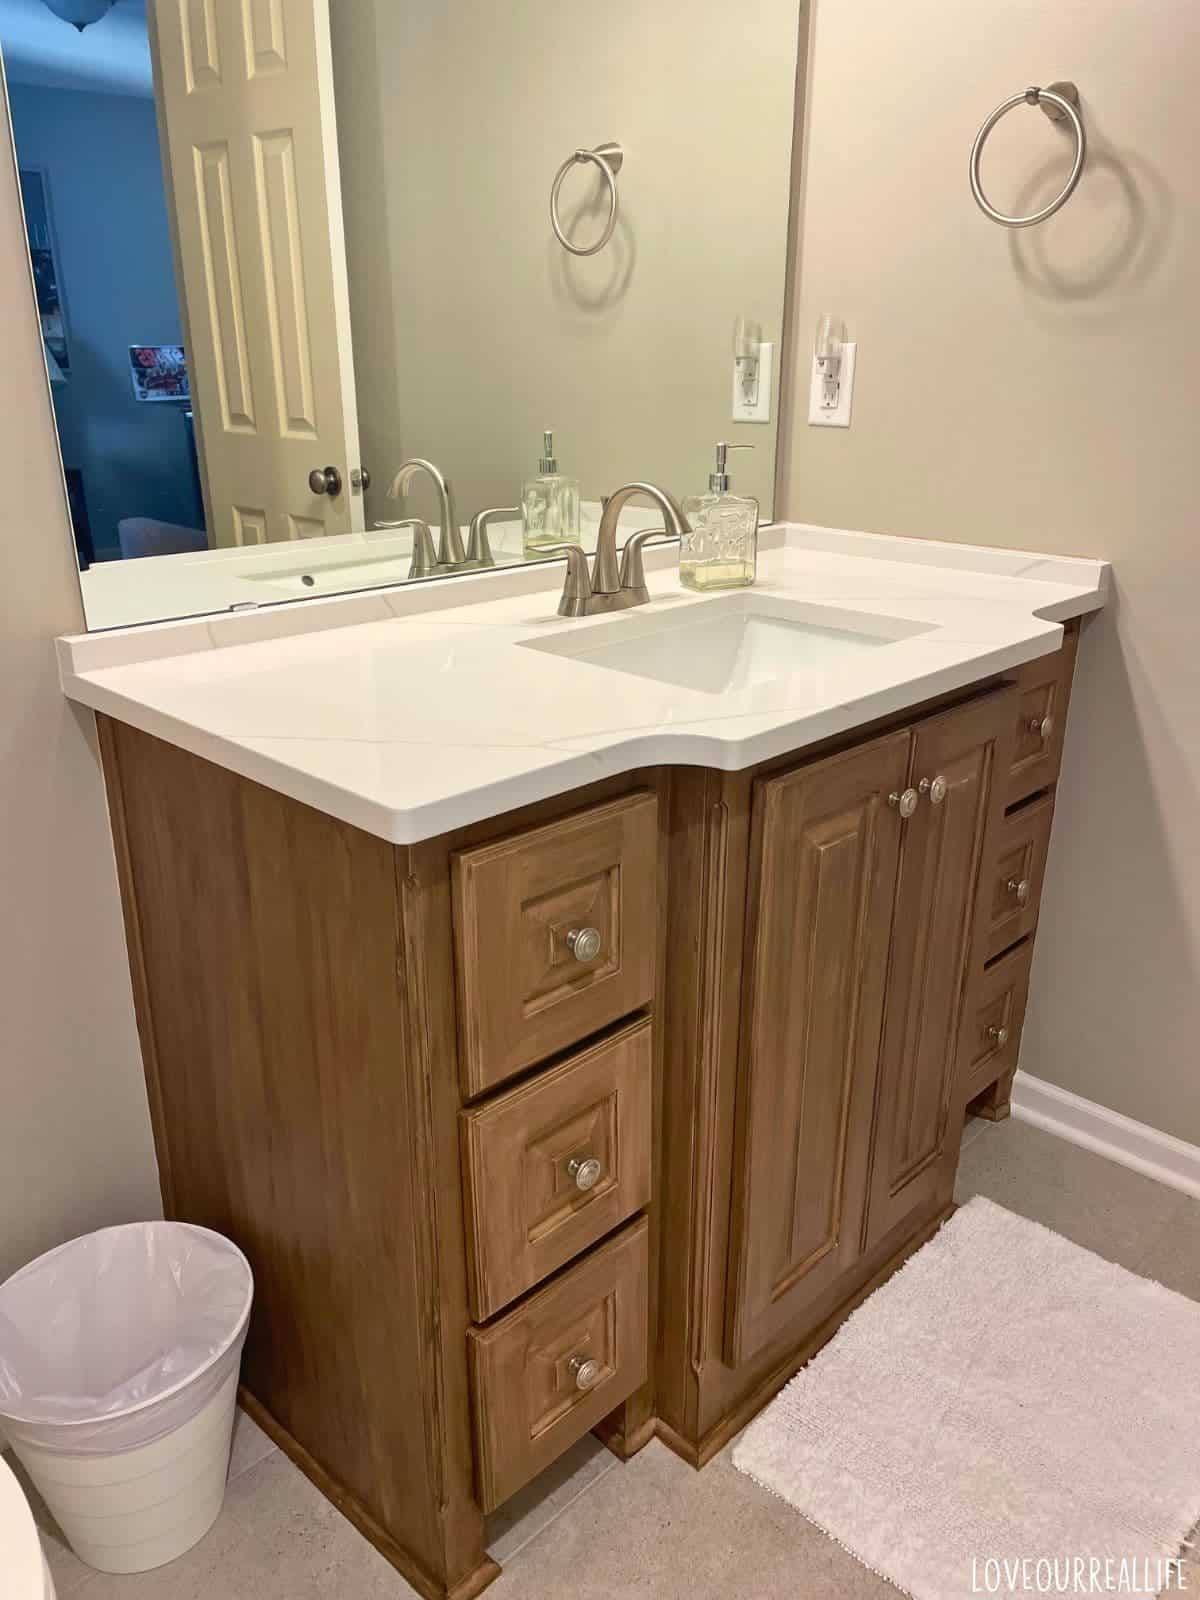
While I briefly considered painting the countertops, I ultimately chose to have them professionally replaced with quartz—and the results were absolutely stunning.

Get more painting tips on the blog here!
Now, let’s dive into all the details of this bathroom vanity makeover!
The Planning Process
The vanity itself was in great shape, but the outdated paint colors no longer worked with the room’s aesthetic. As I mentioned earlier, I wanted to achieve a wood look, and having used Retique It on other projects in our home, I knew it would be perfect for this transformation.
The countertops, on the other hand, were a different story. Their yellowish cream tone clashed with both the new flooring and the wall color, so replacing them with something more modern was a must.
When choosing countertops, we took into account a few key factors. Durability was a top priority since the guest bathroom gets regular use, and we wanted a material that could withstand the wear and tear.
Style was another important consideration—we needed something modern that would complement the new flooring and wall color. Finally, we decided to hire professionals for the installation to ensure a flawless finish, as working with quartz requires precision and expertise.
Step-by-Step: Faux Wood Finish on the Vanity Base
I have a full tutorial on using Retique It for a faux wood finish. Please refer to it for very detailed instructions. But, this is the general idea of what I did to get the wood look for my vanity.
Step 1: Clean and Prep the Vanity
Start by thoroughly cleaning the vanity to remove dirt, grease, or residue. Lightly sand the surface with fine-grit sandpaper to ensure proper adhesion, then wipe away dust with a damp cloth.
Step 2: Apply the Retique It Liquid Wood
Use a paintbrush to apply the Retique It Liquid Wood evenly. Allow it to dry completely before moving to the next step.
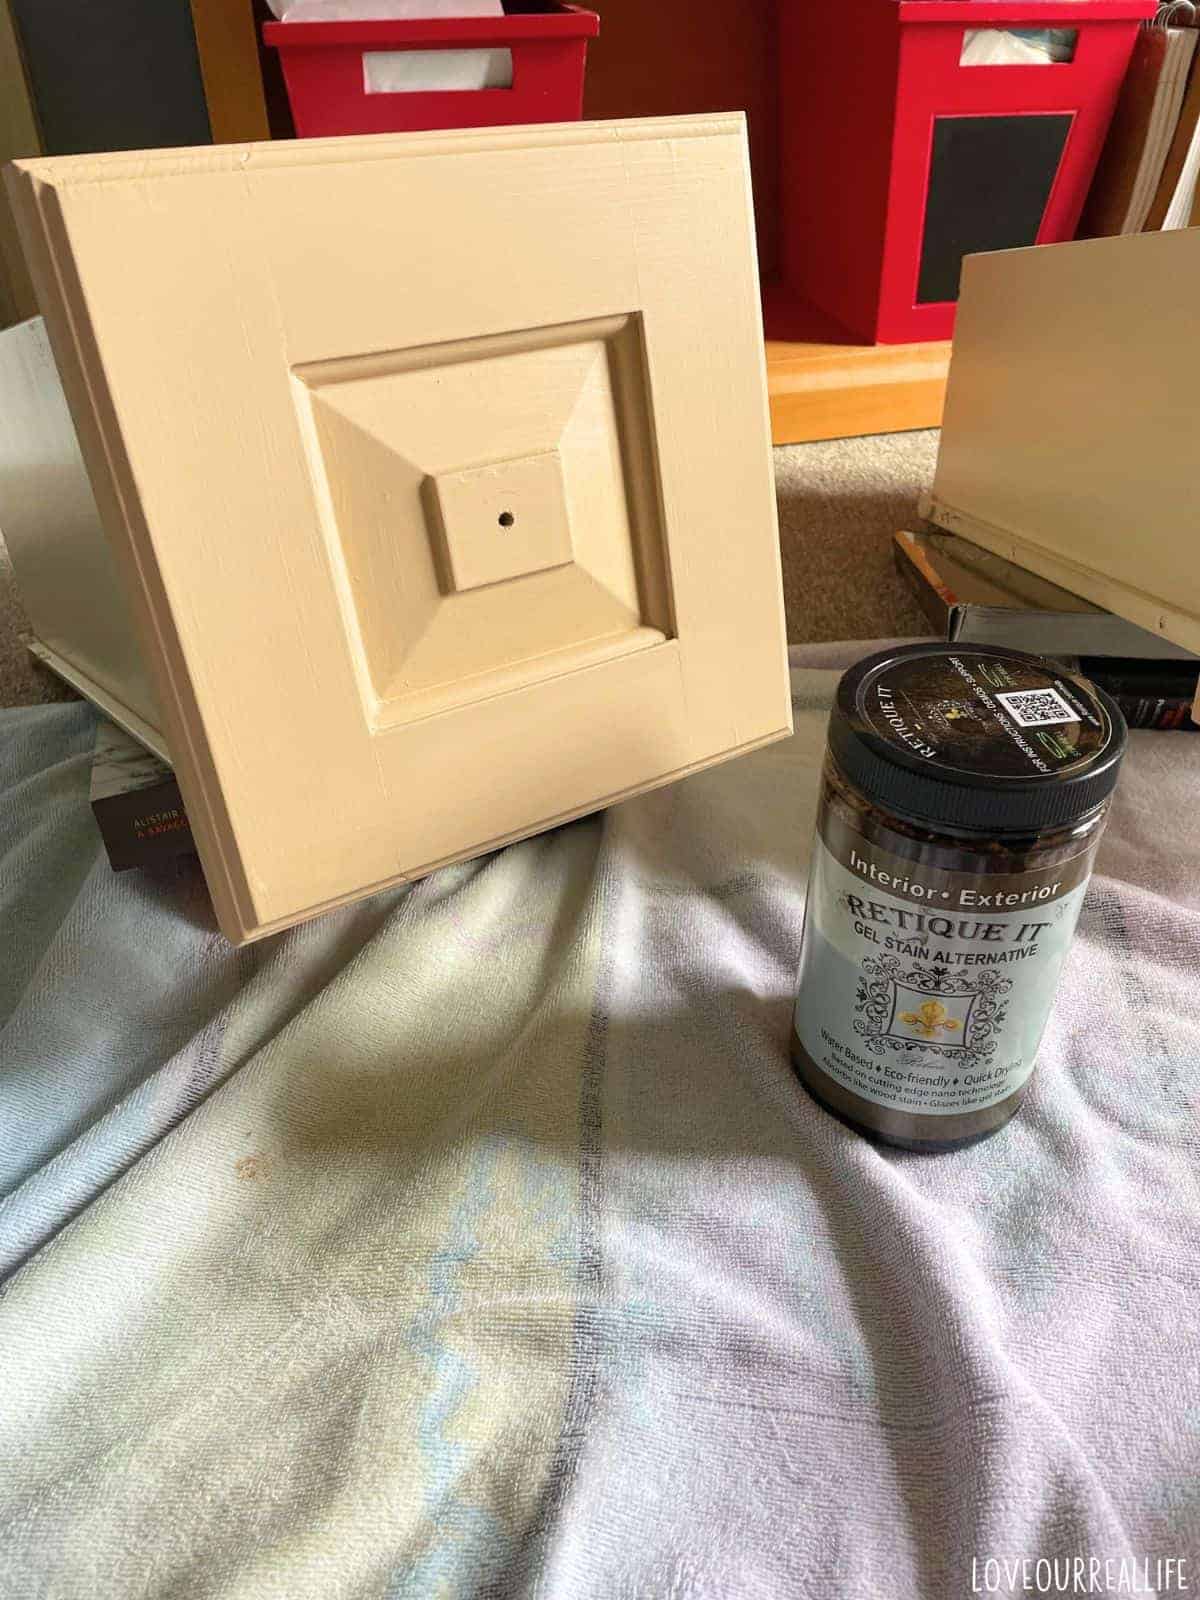
Yes, the liquid wood (which serves as a primer and base coat) may appear quite yellow at first. But don’t worry—once you apply the stain, everything will come together beautifully!
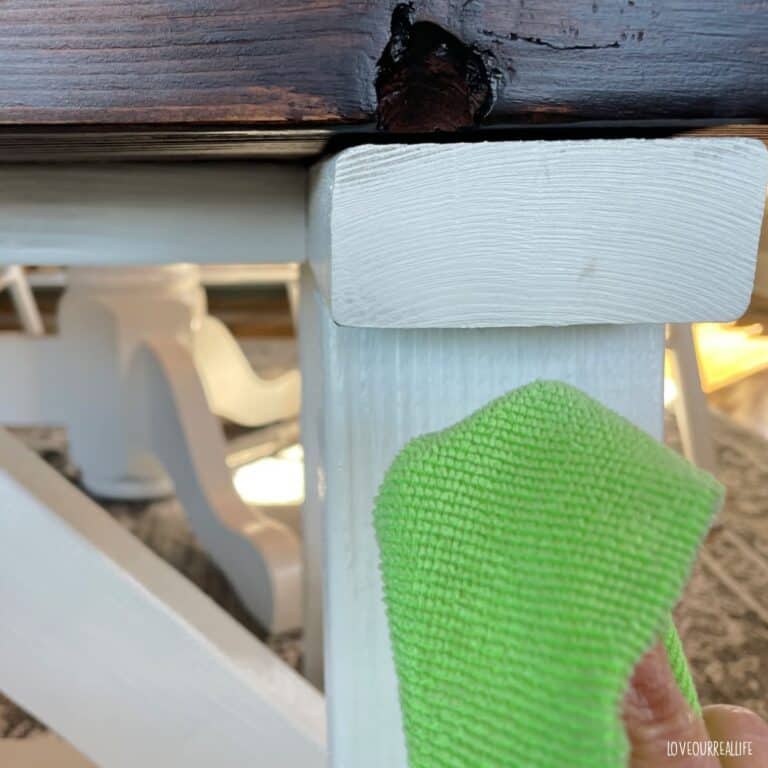
Step 3: Apply the Gel Stain in Black Walnut
Once the liquid wood layer is dry, brush on the Retique It gel stain in the black walnut finish. OR, use a slightly damp sponge for application. This is what I do as it dried pretty quickly and the damp sponge keeps it from streaking.
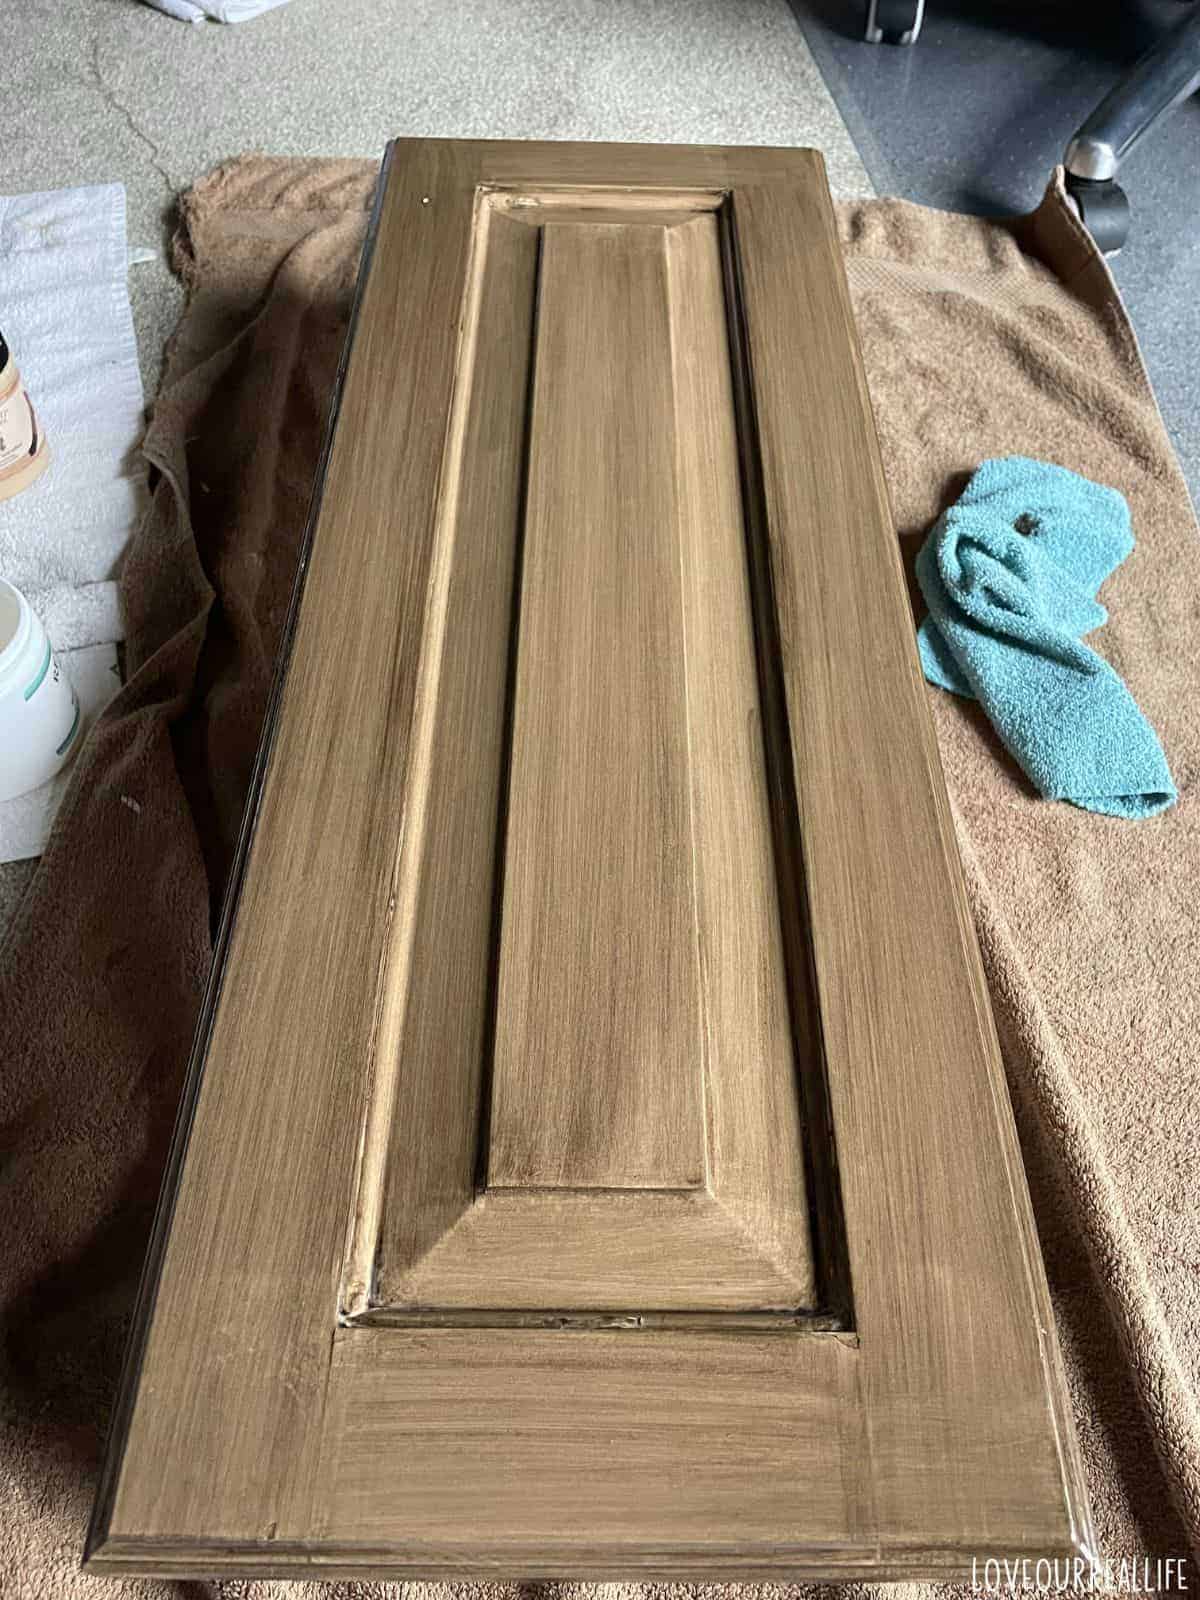
Use long, even strokes to enhance the wood grain effect. You can layer coats for a deeper, richer color.
Let each coat dry fully before applying another.
Step 4: Seal the Finish
After the gel stain is completely dry, protect your work with a topcoat.
Apply a sealer in a satin or matte finish for durability and a natural wood look. I used the Retique It Tripletique in matte.
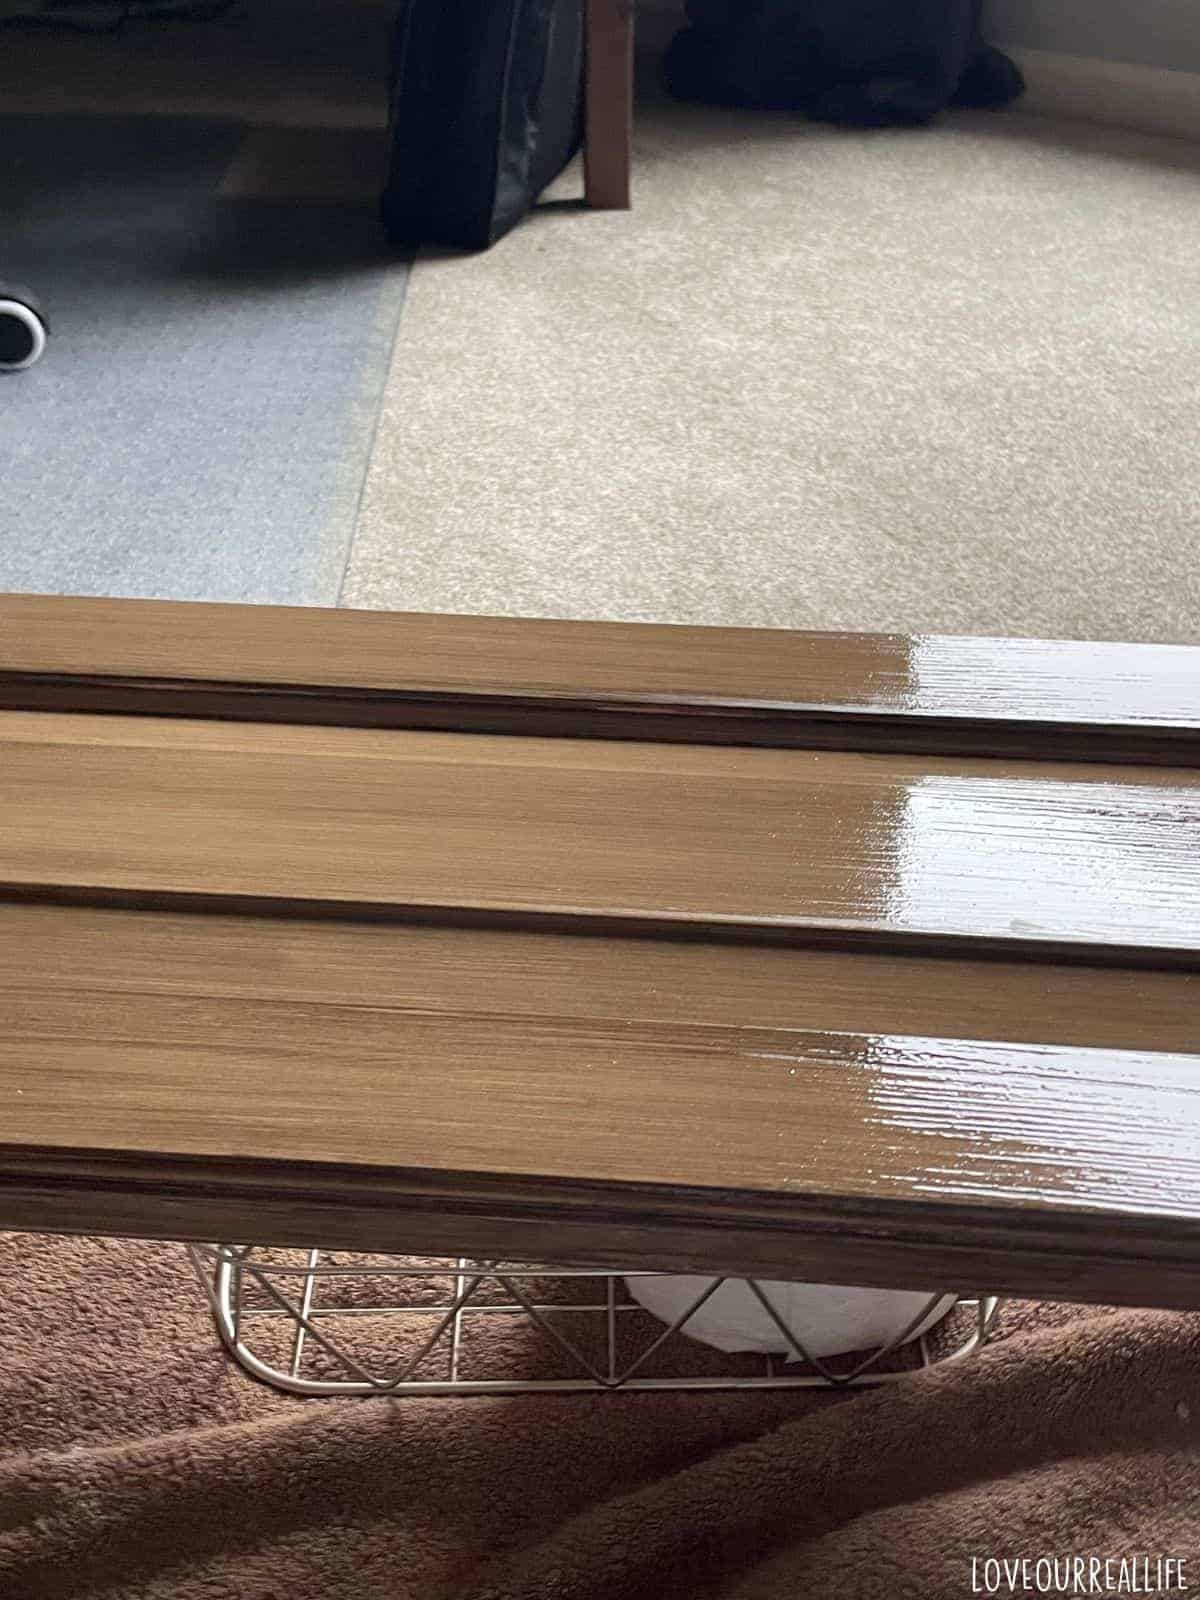
Allow it to cure fully before using the vanity.
Importance of Top Coat in a Bathroom
Applying a top coat to your bathroom vanity is essential for protecting the finish from moisture, humidity, and daily wear and tear.
Bathrooms are high-moisture environments, and without a proper sealant, your vanity surface can quickly become damaged by water splashes, steam, or cleaning products.
A high-quality top coat creates a durable, water-resistant barrier that helps prevent peeling, warping, or staining, ensuring your beautiful faux wood finish stays intact for years to come.
Replacing the Countertops
When it came time to replace our countertops, we decided to hire professionals for the job. Quartz is a heavy and precise material, and we wanted the installation to be flawless without the risk of damaging the new pieces or existing cabinetry.
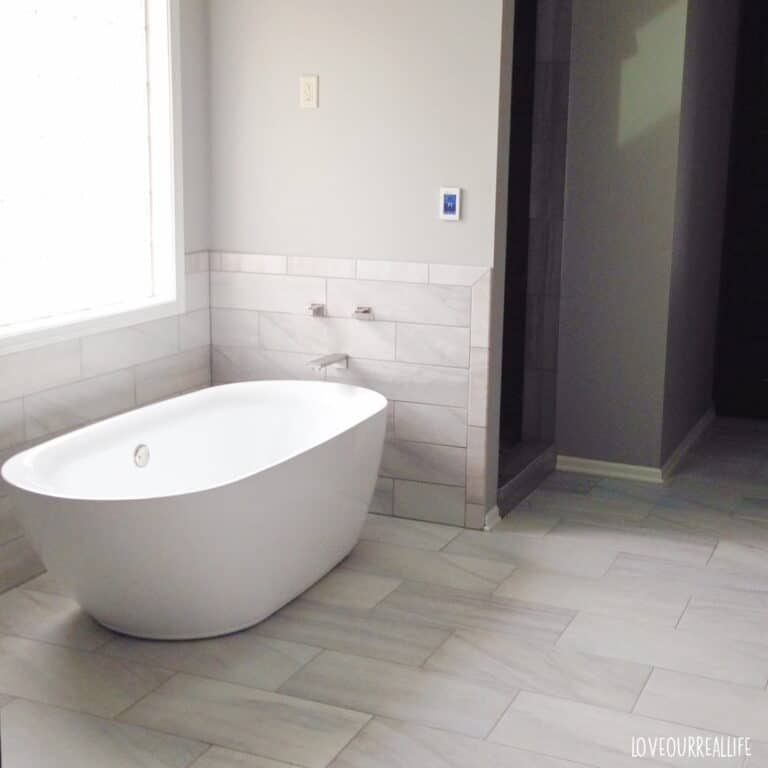
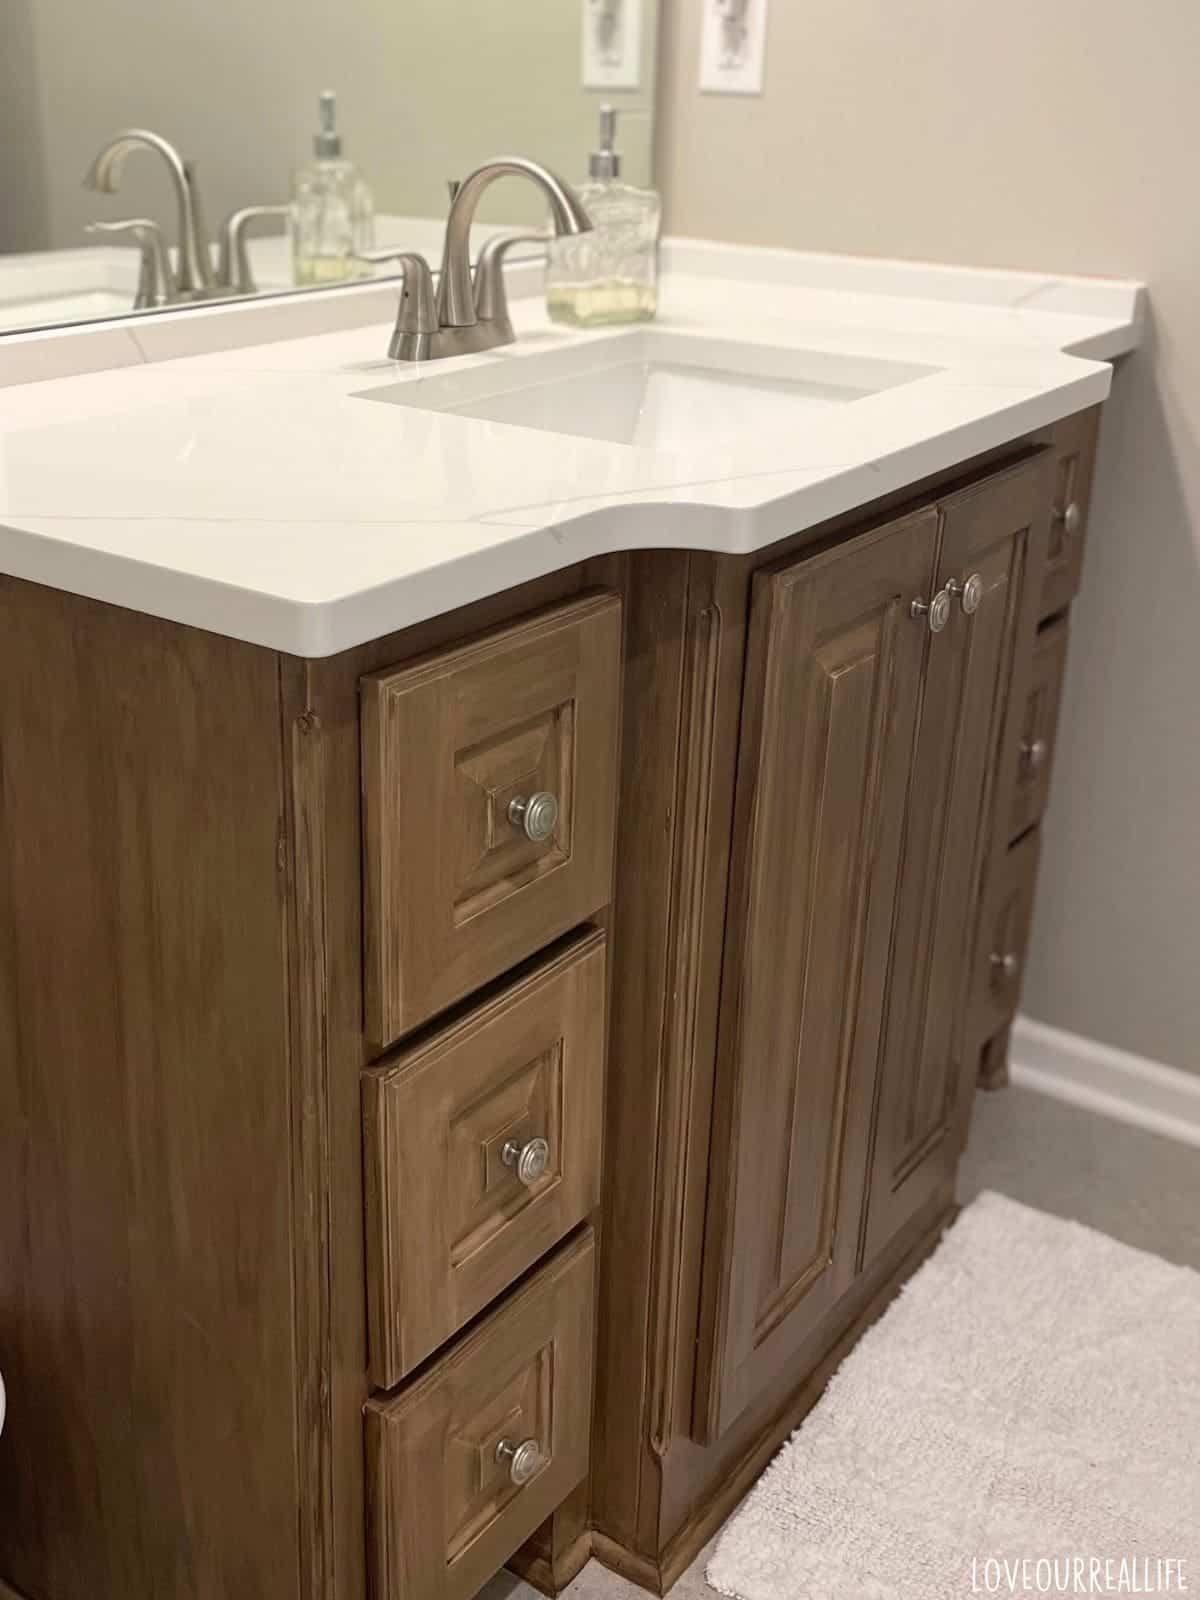
We went with Calacatta Ultra Quartz. It is a gorgeous, low-maintenance countertop material that looks just like luxurious marble. It has a clean, white base with bold gray veins, giving it a timeless, sophisticated vibe.
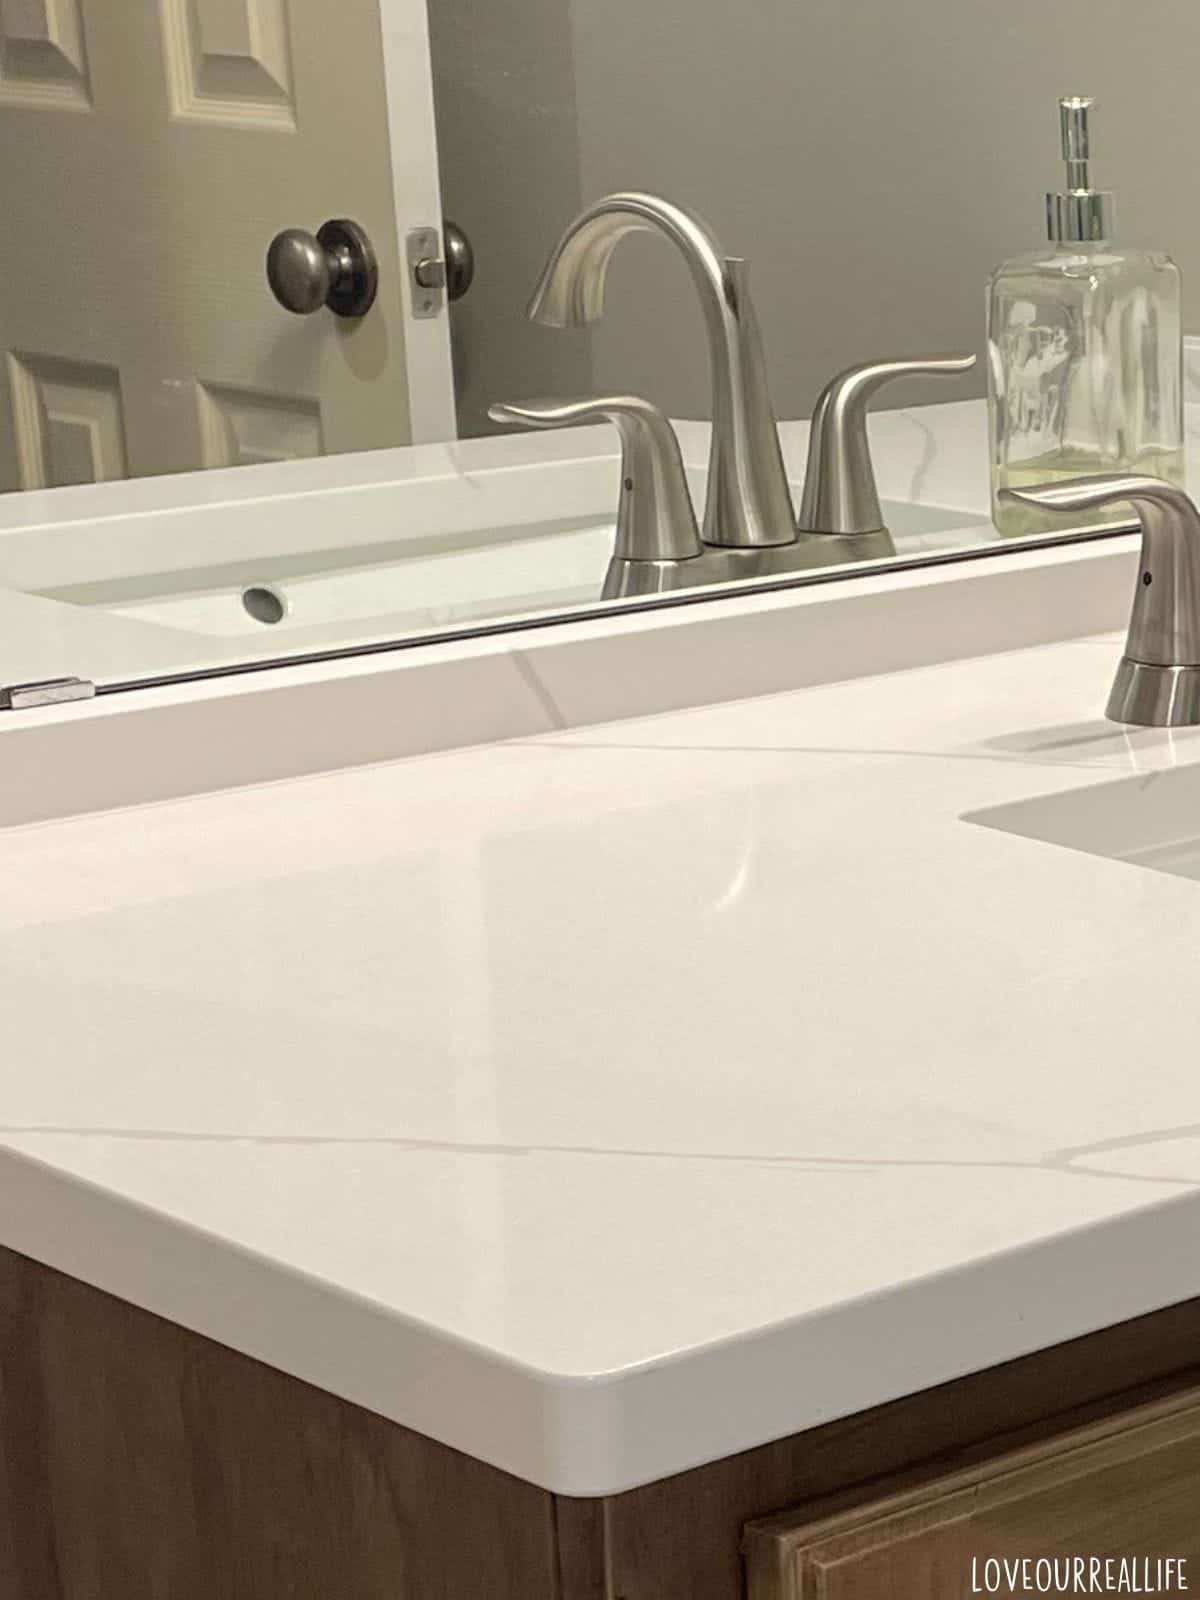
Unlike marble, it’s super durable, scratch-resistant, and doesn’t need sealing, making it perfect for busy kitchens or bathrooms. Plus, it’s easy to keep looking new without all the extra care that comes with real marble!
The team handled everything from removing the old countertops to installing the beautiful new quartz, and the results were absolutely worth it. Hiring professionals ensured the process was smooth and stress-free, even though it was an added expense.
Hiring a Plumber
One thing we didn’t initially factor into our budget was hiring a plumber to reattach the faucets after the countertops were installed. We realized this was beyond our comfort level, as we didn’t want to risk any leaks or damage to our plumbing.
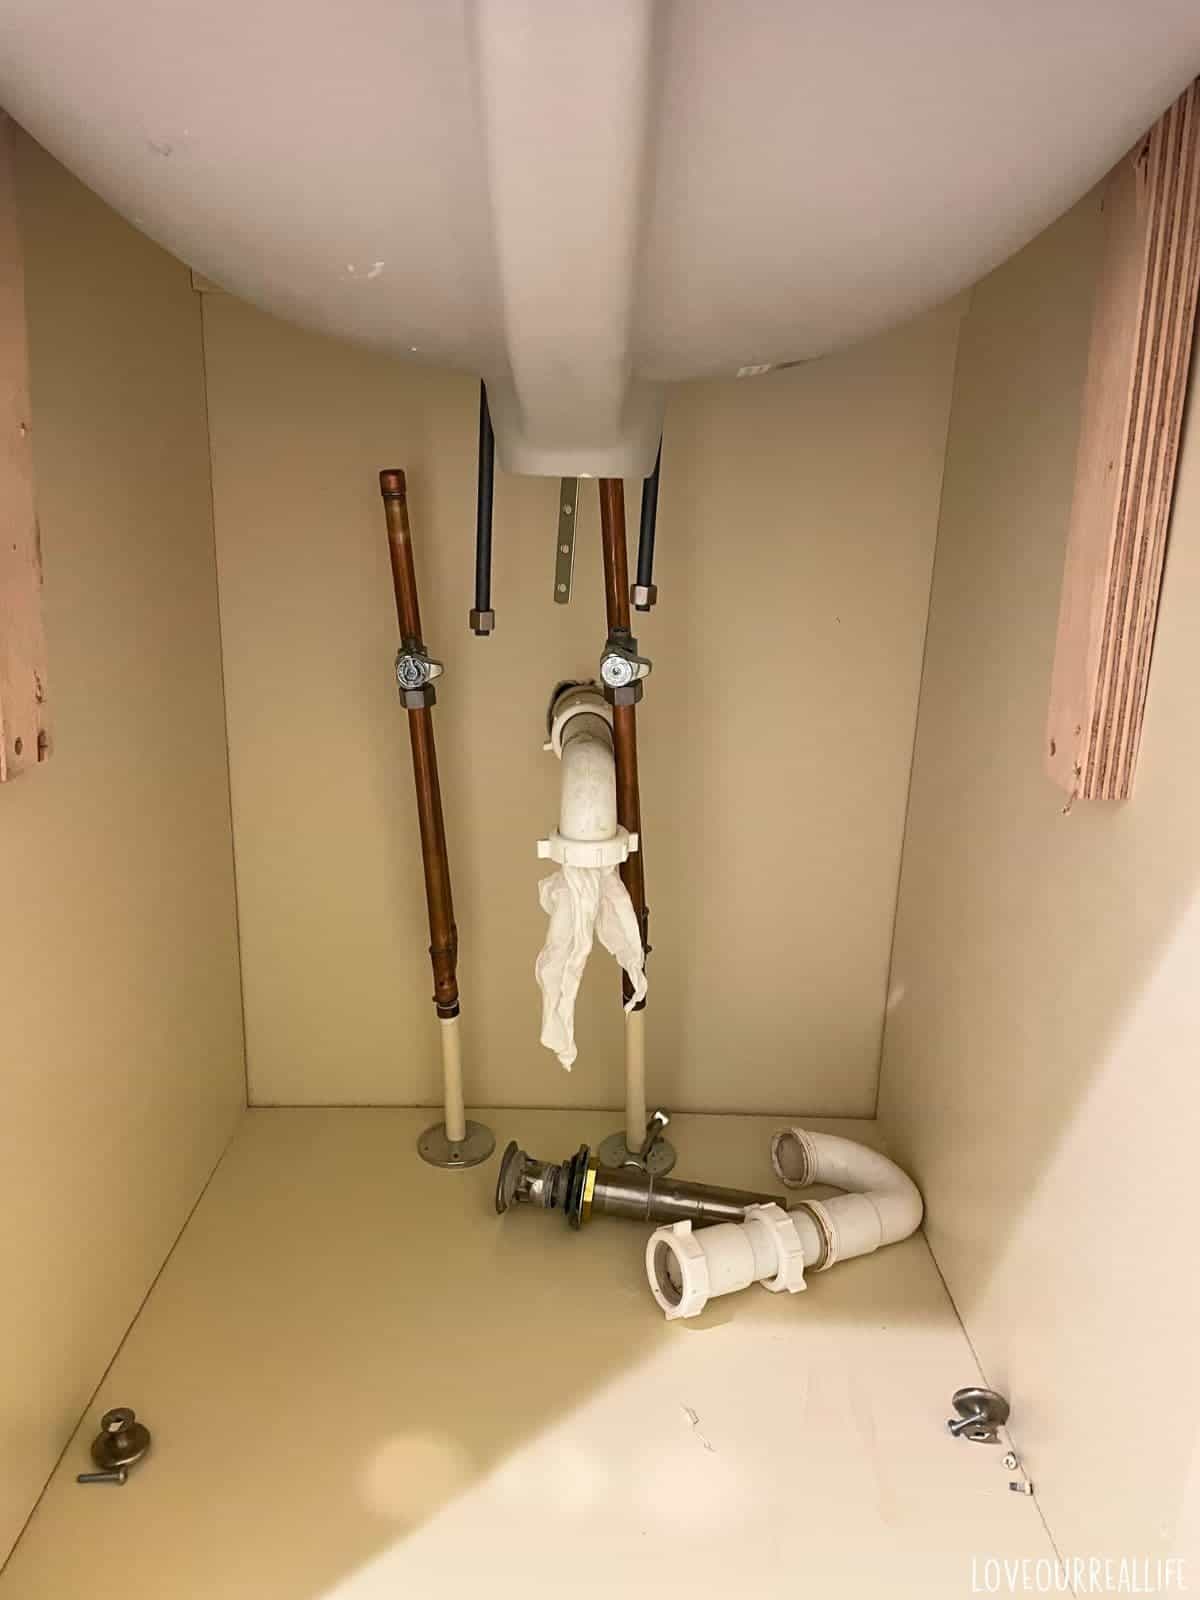
While this was an extra cost, it gave us peace of mind knowing everything was done correctly. For those comfortable with basic plumbing tasks, this is definitely an area where you could save some money by doing it yourself.
The Final Reveal
The new finish and quartz countertops completely transformed the look and feel of the bathroom, giving this bathroom vanity makeover a fresh, modern update.
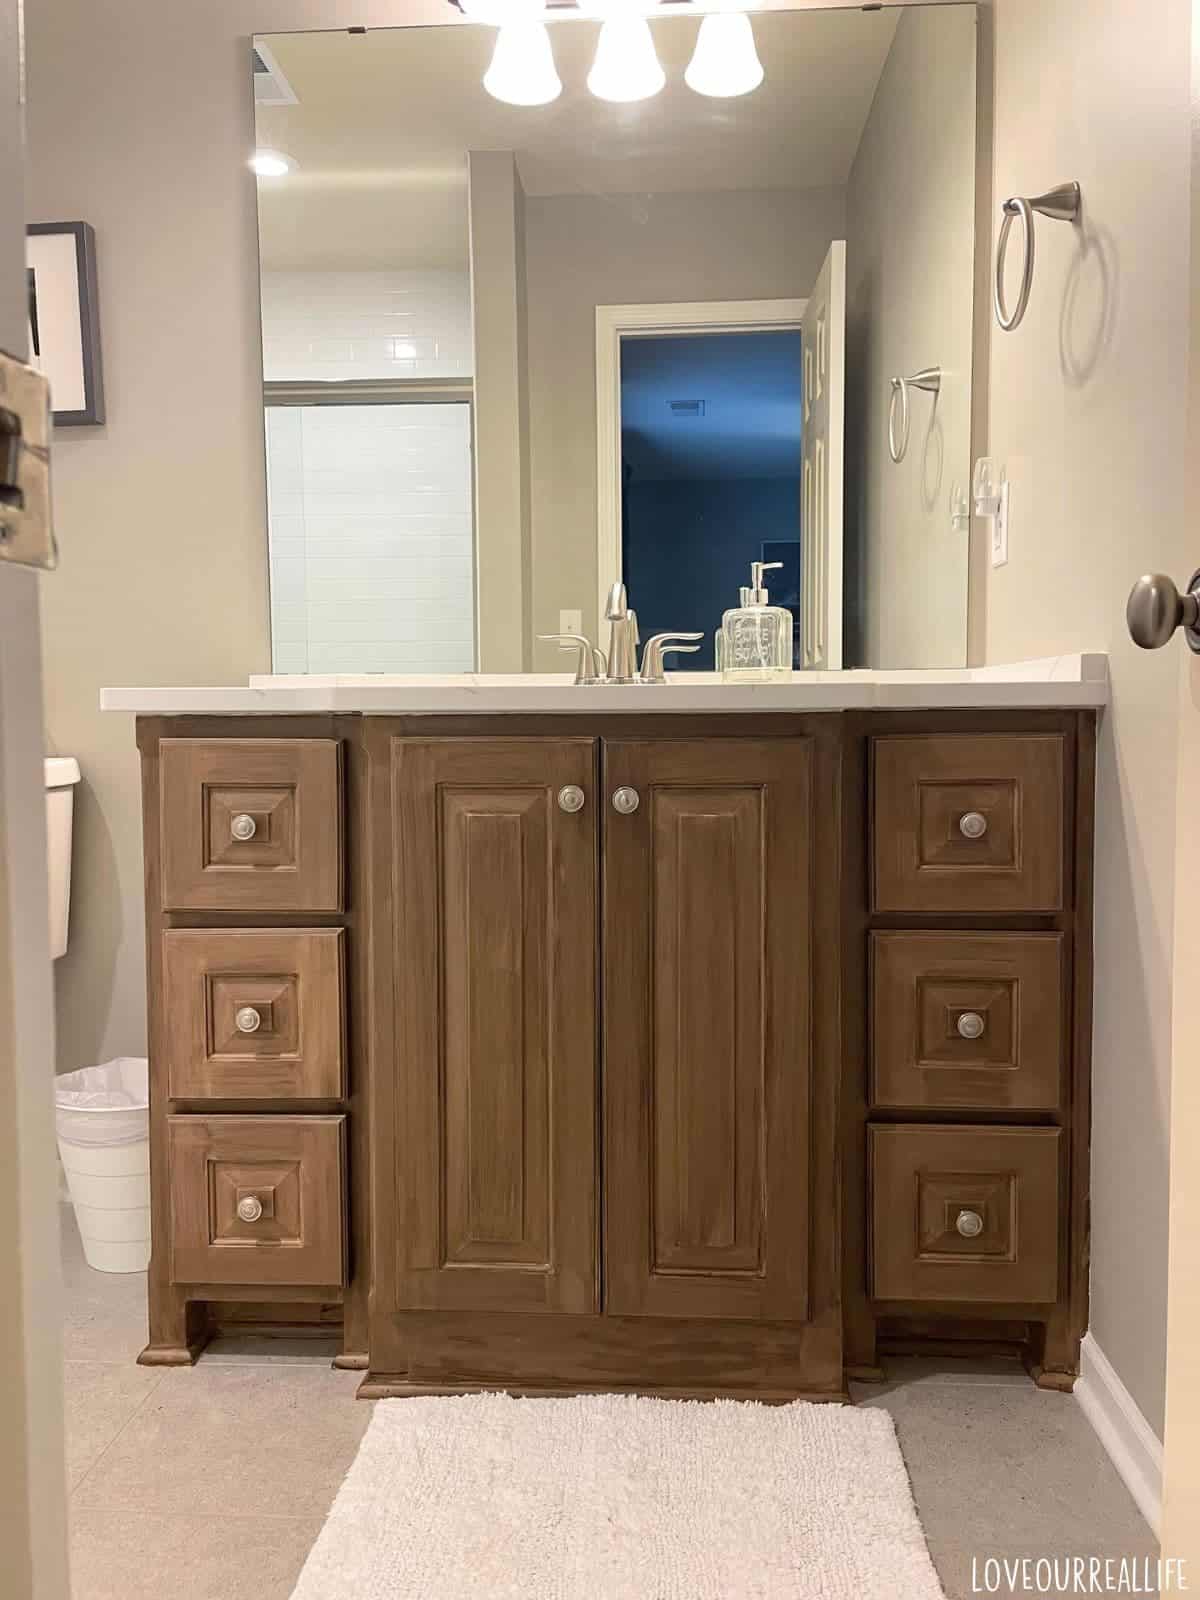
The dark walnut faux wood finish on the vanity base added warmth and texture, balancing out the cooler tones of the walls and flooring.
The smooth, sophisticated quartz countertops in Calacatta Ultra enhanced the space’s elegance. Together, these updates brought a high-end, timeless look that made the guest bathroom feel more cohesive and inviting.
Beyond aesthetics, the new finishes improved the bathroom’s functionality as well.
The quartz countertops provide a durable, low-maintenance surface that’s resistant to stains, scratches, and water damage, making them ideal for a high-moisture environment like a bathroom.
Lessons Learned and Tips for Others
I learned a few things along the way that you might find helpful.
- Using a faux wood finish is a fantastic alternative to replacing cabinets that are still in good condition but need a style update. Not only is it a more affordable option, but it also allows you to achieve the look of expensive wood without the cost or environmental impact of new materials.
With products like Retique It, you can easily transform the surface with a realistic wood appearance, while preserving the structural integrity of your existing cabinets.
This approach saves time, money, and effort while giving your space a fresh, modern feel, all without the hassle of a full replacement. Plus, it’s an eco-friendly solution by repurposing existing furniture instead of sending it to a landfill. - Hiring professionals when something is beyond your skill level is crucial for ensuring the job is done correctly and safely. While DIY projects can be rewarding, certain tasks—like countertop installation or plumbing—require specialized knowledge and tools to avoid costly mistakes or damage.
Professionals bring expertise, experience, and efficiency, ensuring that everything is installed properly and functions as it should.
Plus, hiring experts gives you peace of mind, knowing the work will meet local codes and standards, and can save you time and stress in the long run. If you’re ever in doubt and it’s within your budget, it’s often worth the investment to hire someone who knows the ins and outs of the job.
Conclusion Bathroom Vanity Makeover
The transformation of our guest bathroom was so pretty!
By updating the vanity with a beautiful faux wood finish using Retique It and adding sleek quartz countertops, we were able to elevate the entire look of the space. What was once an outdated bathroom now feels modern, stylish, and welcoming, all while maintaining functionality.
If you’re looking to give your bathroom a fresh, stylish makeover, I highly recommend trying Retique It for a DIY faux wood finish—it’s an easy way to achieve a high-end look without replacing your cabinets. Perfect for a bathroom vanity makeover.
And for a modern, durable touch, consider quartz countertops, which offer both beauty and practicality. With a little effort and creativity, you can transform your space just like we did!
Other Home Projects You’ll Love
- What is Chalk Paint and How to Use It
- How to Apply Glaze to Furniture
- What is Heirloom Traditions Paint?
Get Access to the FREE Printables Library
When you join our newsletter!