No Sew Fleece Blanket Tutorial
Follow my step-by-step no sew fleece blanket tutorial to make a warm and cozy blanket to give as a gift or keep for yourself! Kids can even help with this easy fleece tie blanket.

I’m a big fan of no sew projects. After reading this project, you’ll want to check out my easy Christmas gnomes. They are so cute and fun, you’ll want to add that to your project list without doubt!
Check out more no sew and easy sew projects!
This tied fleece blanket project is super simple, but it did take a while. I would suggest getting everything ready to go, grab a seat on your couch, then tying all the knots during some TV time.
Make your no sew blanket during your favorite football game. We are big Kansas City Chiefs fans here, so hopefully that is your game of choice;-)
This post contains affiliate links. See my disclosure policy for details.
No-sew fleece blanket supplies:
- 2 yards of your favorite fleece
- 2 yards of a coordinating fleece to be the bottom side of the blanket
- Fabric scissors or rotary cutter
- Straight sewing pins
- Measuring tape
When selecting your pieces of fleece fabric, know that you will need two fabric pieces.
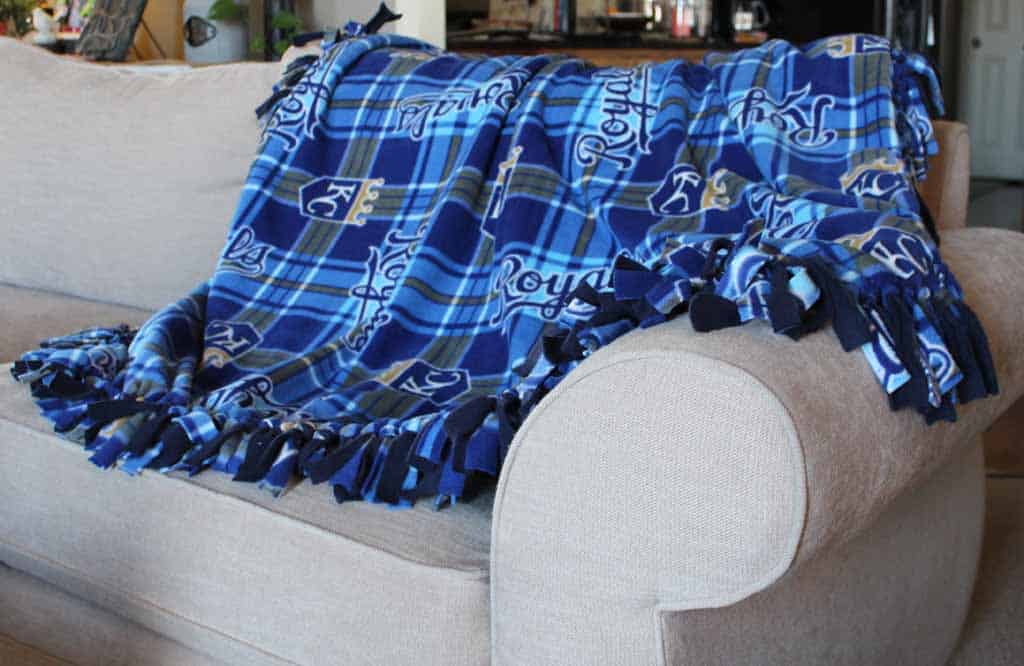
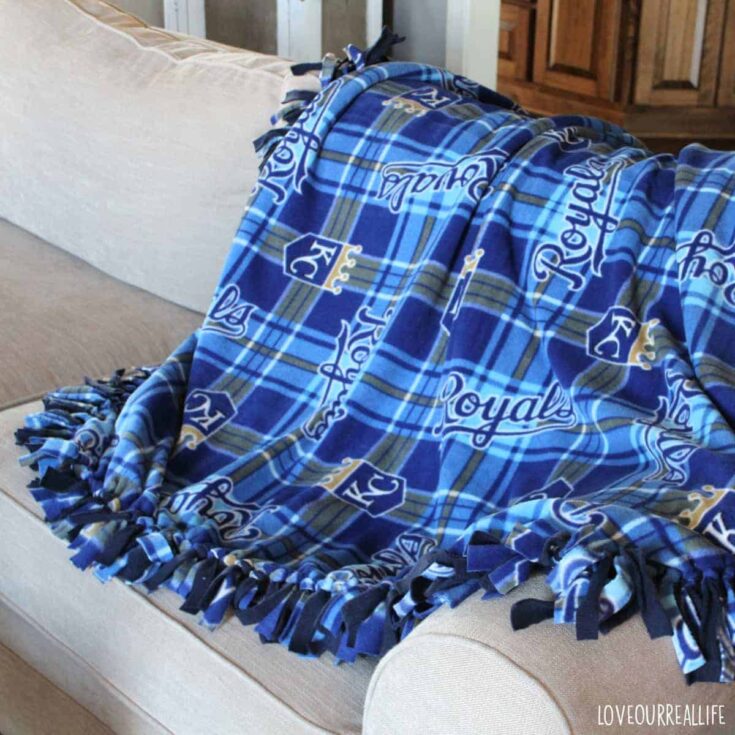
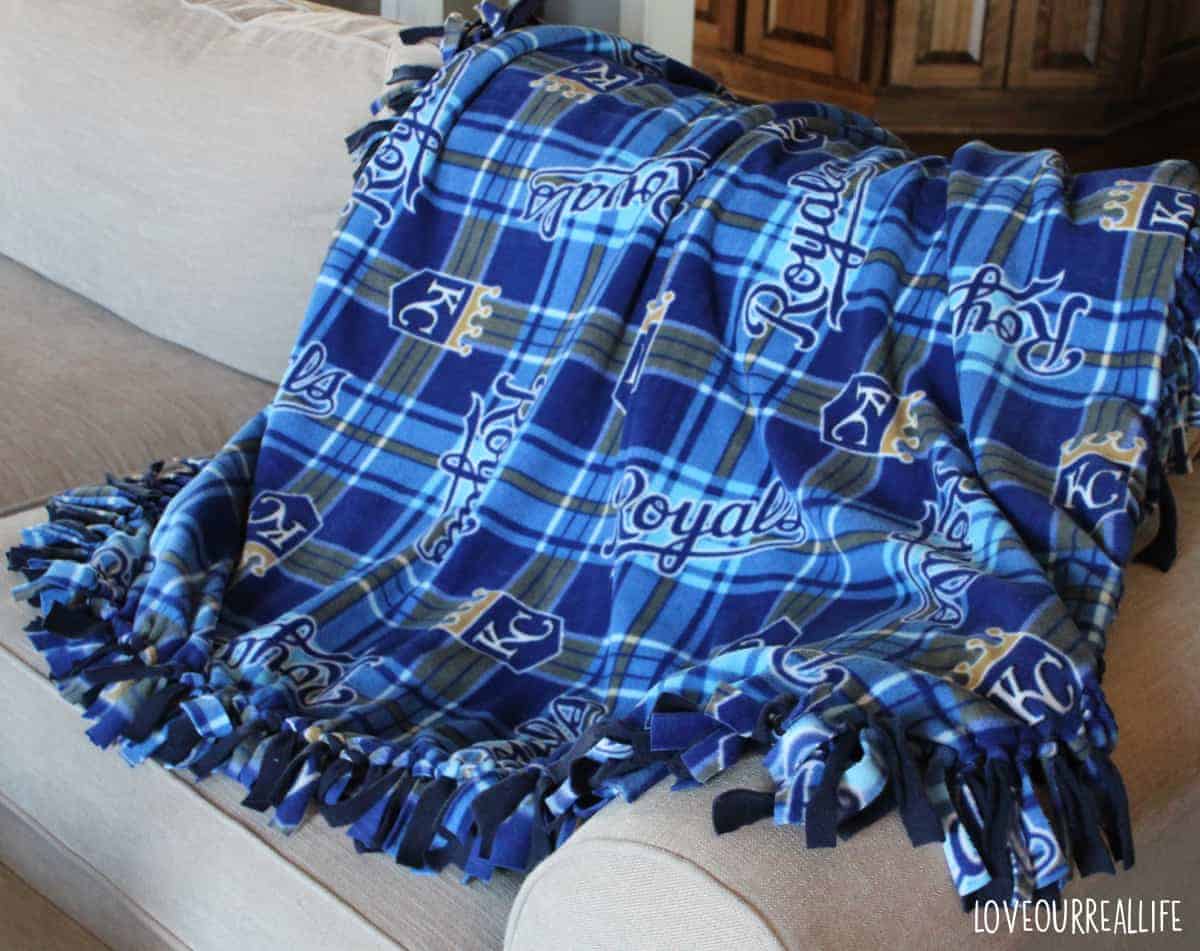
For my pieces of fabric, I choose a basic navy fleece for the bottom piece and for a pop of color I used a pretty blue Royals baseball fleece for the top.
Two yards of each made a good size for a finished blanket to lounge with on the couch for a teen or adult size blanket.
If you are making a baby blanket or a smaller child size blanket, I would suggest just getting a yard of each fabric for this fleece blanket with two layers of fleece.
How much fabric you get will depend on the size of blanket you are going for.
DIY No sew fleece blanket tutorial:
Follow these easy step by step instructions and you will have a beautiful, cozy fleece blanket with two layers of fabric.
While I used fleece, you could certainly use flannel. Also note there are various types of fleece such as blizzard fleece, anti pill fleece, cotton blend fleece, plush fleece, etc. Plush fleece tends to be very soft, cozy, and great for blankets such as these.
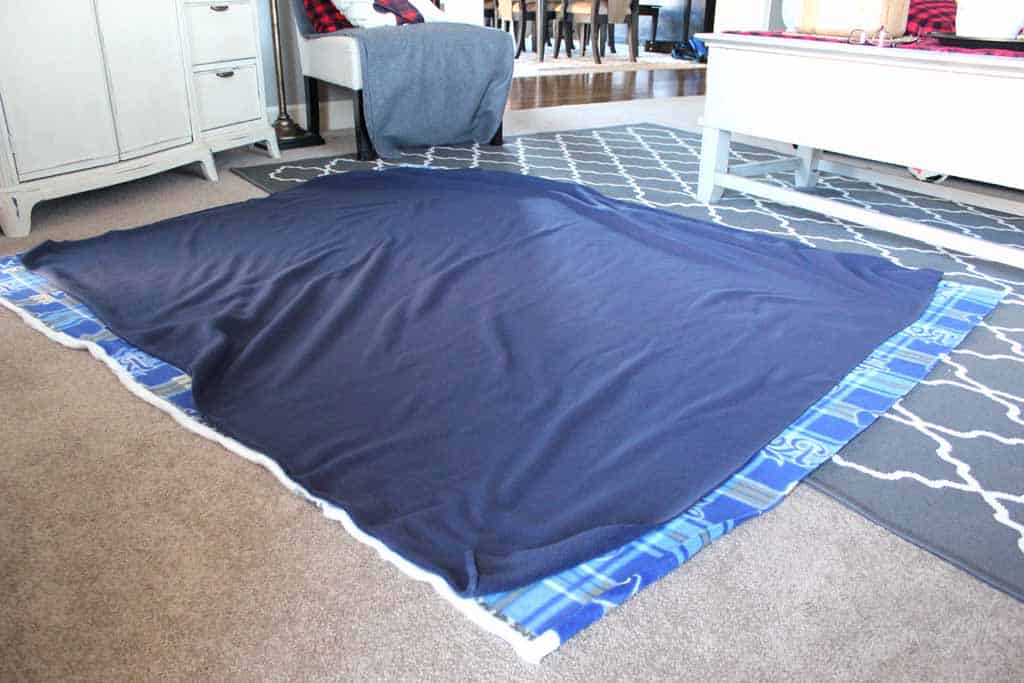
Put top piece and bottom piece of fleece together
Start with two yards of fleece for both pieces of fabric. (i.e., two yards for the top of the blanket and two yards for the bottom portion of the blanket).
Place the wrong sides together, which would allow the most vibrant sides of the fabric on the outside. This will allow the brighter sides of the fleece to show when the blanket is finished.

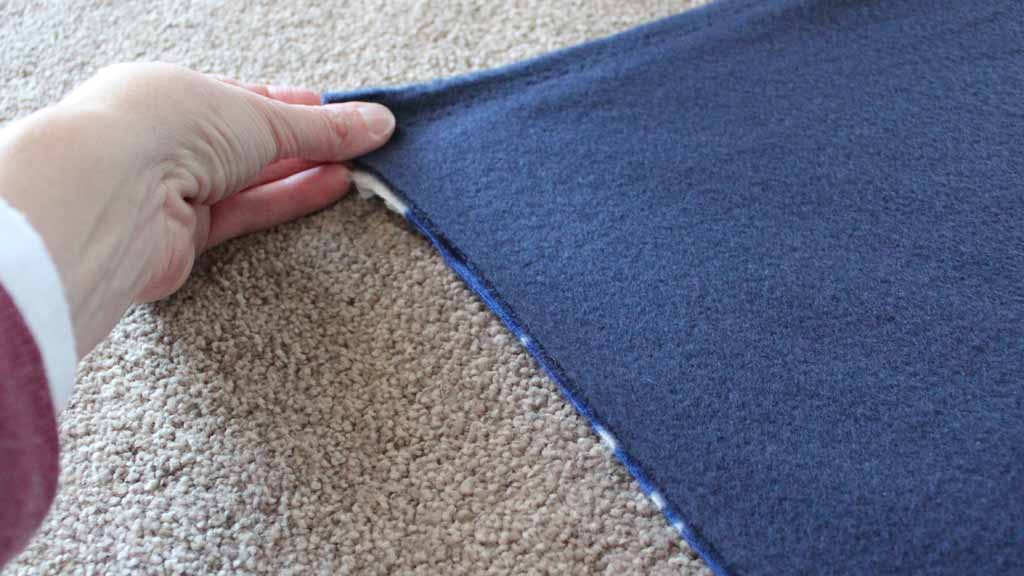
Pin both layers together and trim off any excess material
Line up the straight edges, smoothing out any wrinkles.
If your fleece comes with selvages, you will need to trim away the selvage edge before lining up your two pieces of fabric.
Trim layers of fabric so they are the same size.
I used a solid, navy color fleece for the backside and Kansas City Royals fleece fabric for the top. Typically a pattern will be more expensive. So, getting a solid back material will save you money!
Alternatively, you could make a single-layer blanket.
But in my personal opinion, the double layered blanket is a lot more cozy and warm. It’s worth the extra effort! If you are making it for a gift, you just might want to keep it for yourself.
Don’t forget to check that the most vibrant sides of the fabric are facing OUT!
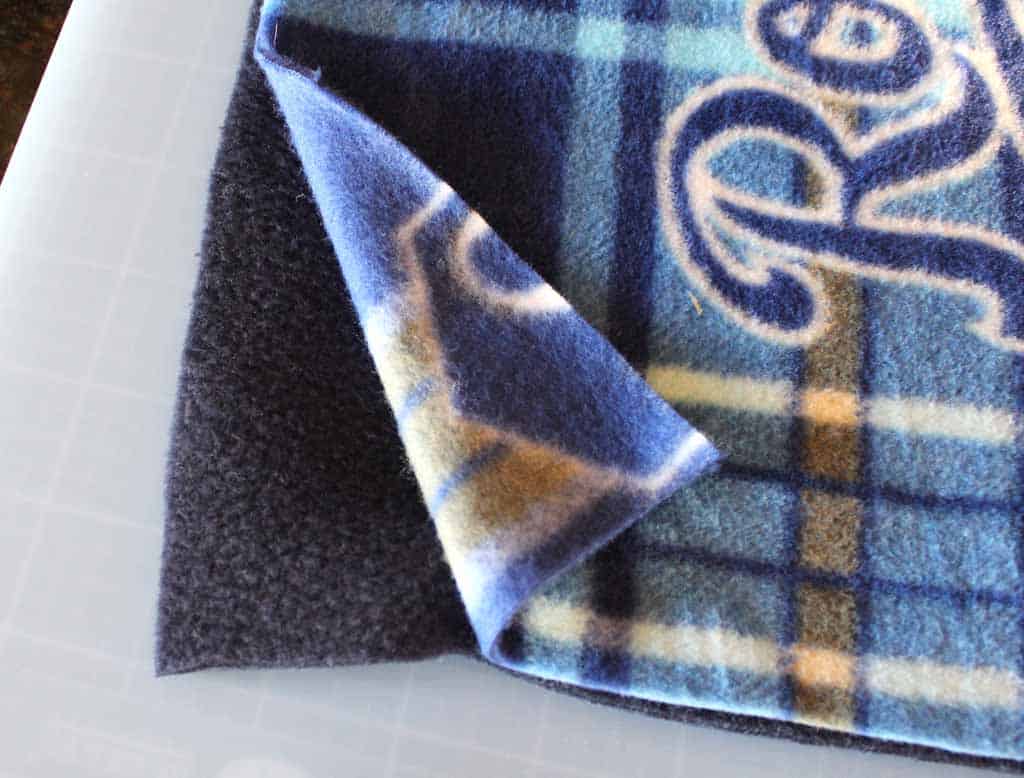
Cut a 5-inch square from ALL four corners.
Make fringe cut on all four corners of blanket.
Measure a 5-inch square at each corner. Then, cut this 5 inch portion from each corner of the blanket as shown below.
The rotary cutter helped to make fast cuts but regular sharp scissors would work just fine. I really like Fiskars.
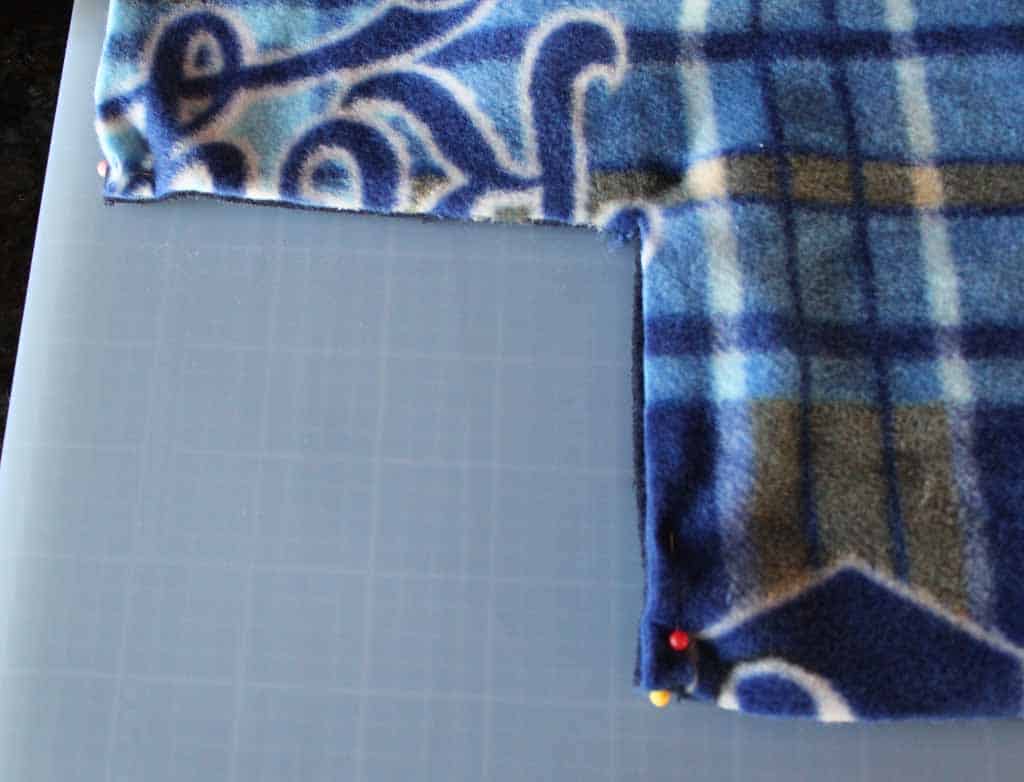
Cut strips along all sides of the blanket 1 inch wide and 5 inches long:
Have a ruler handy to guide you with quick measurements for your fringe pieces.
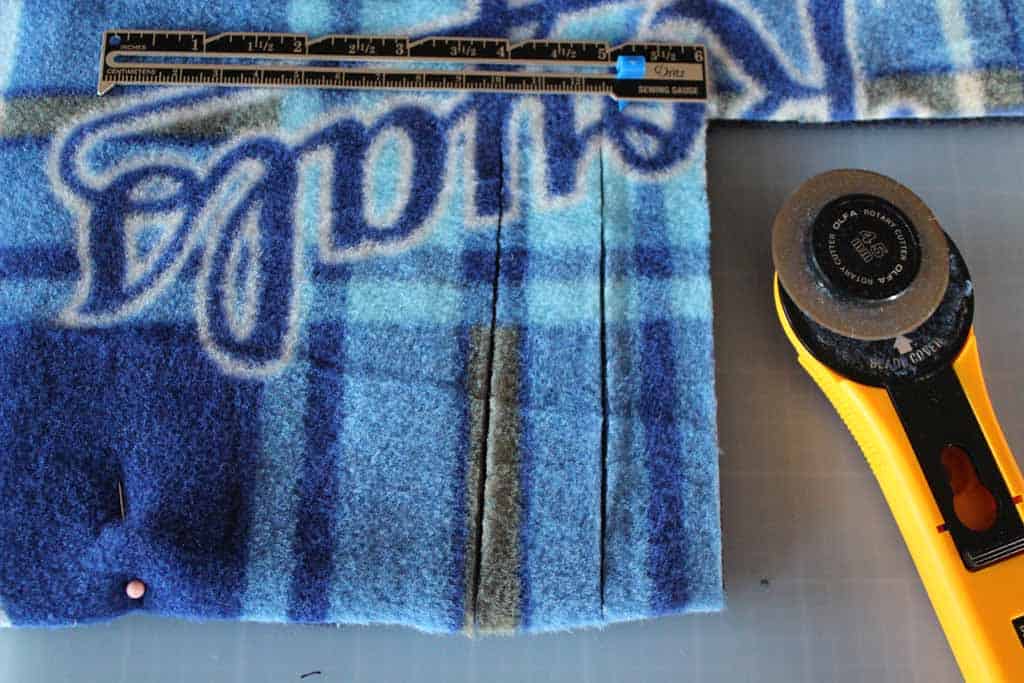
Using a rotary cutter if you have one as this makes it go pretty quick. As I mentioned earlier, you could certainly use scissors but just know it is a tad more time consuming.
If you decide to use the rotary cutter, just be sure you have a cutting mat underneath the material!
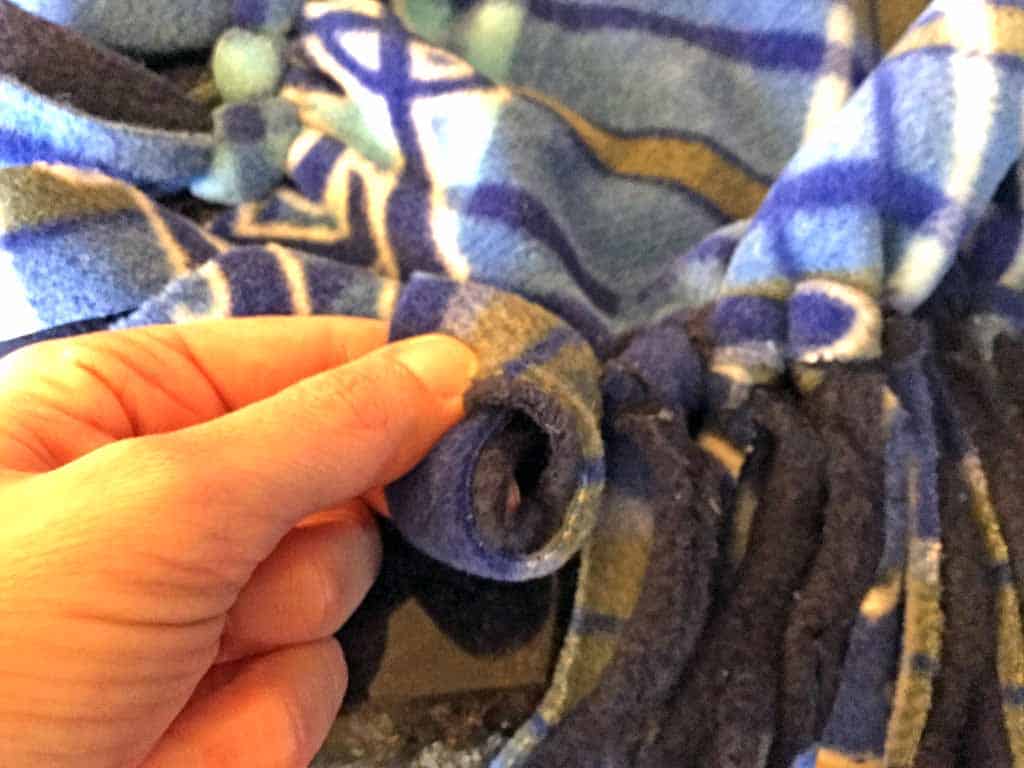
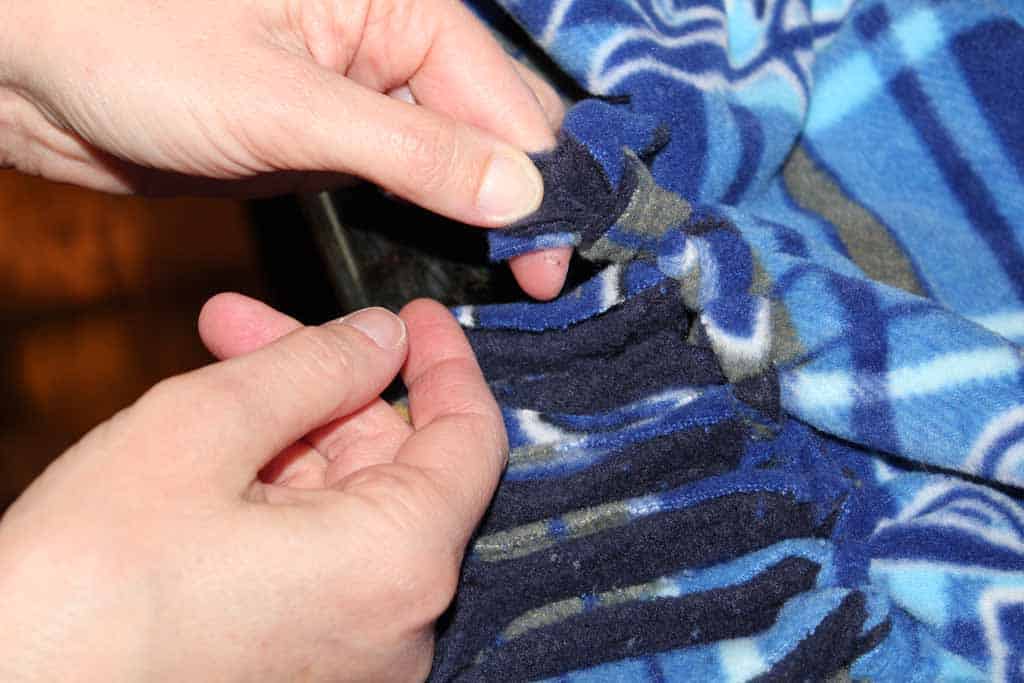
Tie knots in fringe pieces along sides of blanket
Use balloon knots when tying knots with the strips (this is what connects your two pieces of fabric together).
Wrap the ends over the top and pull the ends through. Pull tight to make a durable knot.
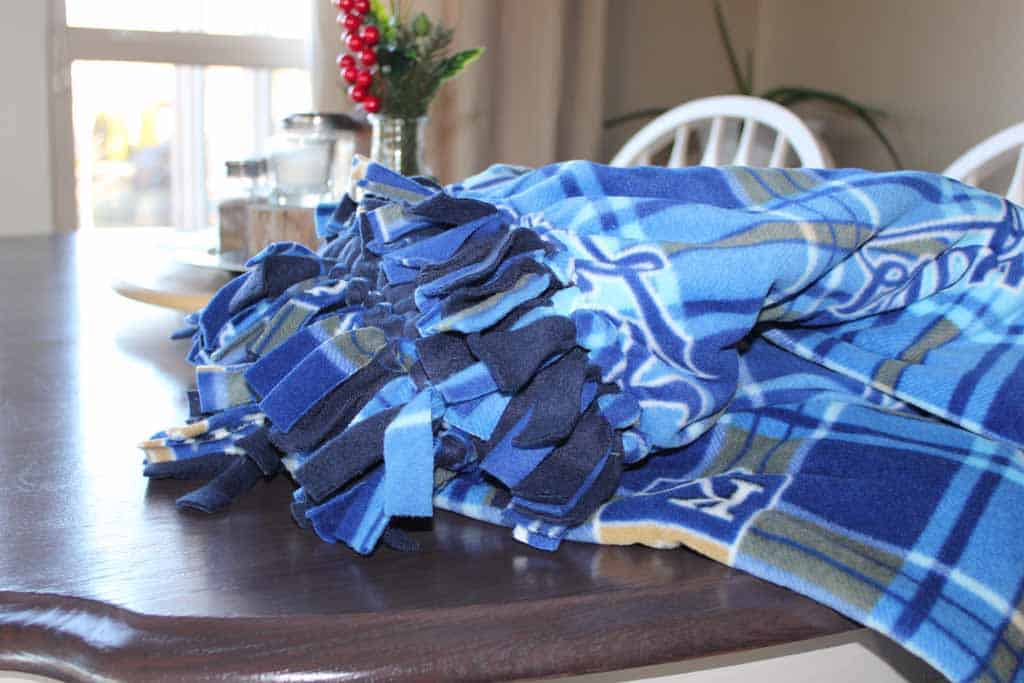
That is it! So simple!
The knots held up great with washing AND drying! As I mentioned earlier, just be sure you get a tight knot and you’ll be set.
More winter projects here!
Note you could certainly use a different kind of knot such as a square knot, but this would affect how your fringes will lay. Experiment and see what look you prefer.
If you want to try some beginner’s sewing crafts:
Pin to your favorite Pinterest board

Easy No Sew Fleece Blanket Tutorial
Make a no-sew fleece blanket with these step by step instructions. Easy and cozy!
Materials
- 2 yards pretty fleece fabric (for top of blanket)
- 2 yards coordinating plain fleece (for bottom side of blanket)
- Straight sewing pins
Tools
- Scissors or rotary cutter
- Measuring tape or ruler
Instructions
- Place two pieces of fleece fabric together, wrong side in. One piece of fabric can be pretty with a pattern and the other more plain, that coordinates with the prettier fleece. This will keep the cost of your blanket more reasonable. I used 2 yard for each piece. If making a baby blanket, 1 yard of each piece is sufficient. Ensure the vibrant colors are on the outside.
- Pin pieces together, ensuring fabric pieces are same size. Smooth out any wrinkles and cut fabric pieces to be the exact same size. If the fleece has selvages, you will need to cut away the selvage edge.
- Cut 5-inch square from all four corners. Use a ruler and cut away a 5 inch square from each corner of the blanket.
- Cut fringe pieces 1 inch wide and 5 inches long. For consistency, use your ruler to ensure your pieces are 1 inch wide and 5 inches long. Cut through BOTH layers of fabric.
- Tie knots in both layers of strips using balloon knot. Ensure knots are secure / tight. Use balloon knot to tie strips together, which will connect the layers of your blanket together.
Notes
Tying the knots is a bit tedious, but simple. This is a great task to complete while watching television!


This is so adorable! Love that it’s relatively easy to do. ❤️
Thanks, Ashley! Easy is the best kind of project!
So cute! I think Ava would love to do this project. I also love te materials you chose!
The fabric was a great weight…I got mine from Hobby Lobby. Thanks, Jenifer!