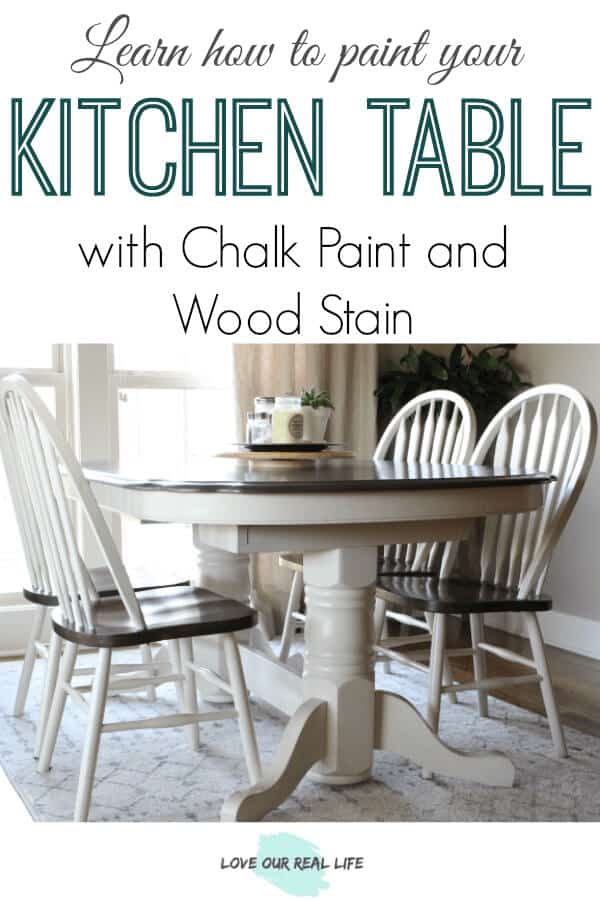
Kitchen Table Makeover Using Chalk Paint and Wood Stain
Look at almost any DIY blog and you’ll find a post about transforming an old piece of furniture with chalk paint. Do you know why it’s so popular? Because it’s awesome! In a world full of waste, it feels so nice to find a way to modify an outdated piece of furniture, creating something new and beautiful.
Chalk paint has a way of breathing new life into something old. I definitely gave my kitchen table new life! Read on to learn all the steps for this kitchen table makeover using chalk paint!
My Kitchen Table Makeover / Labor of Love

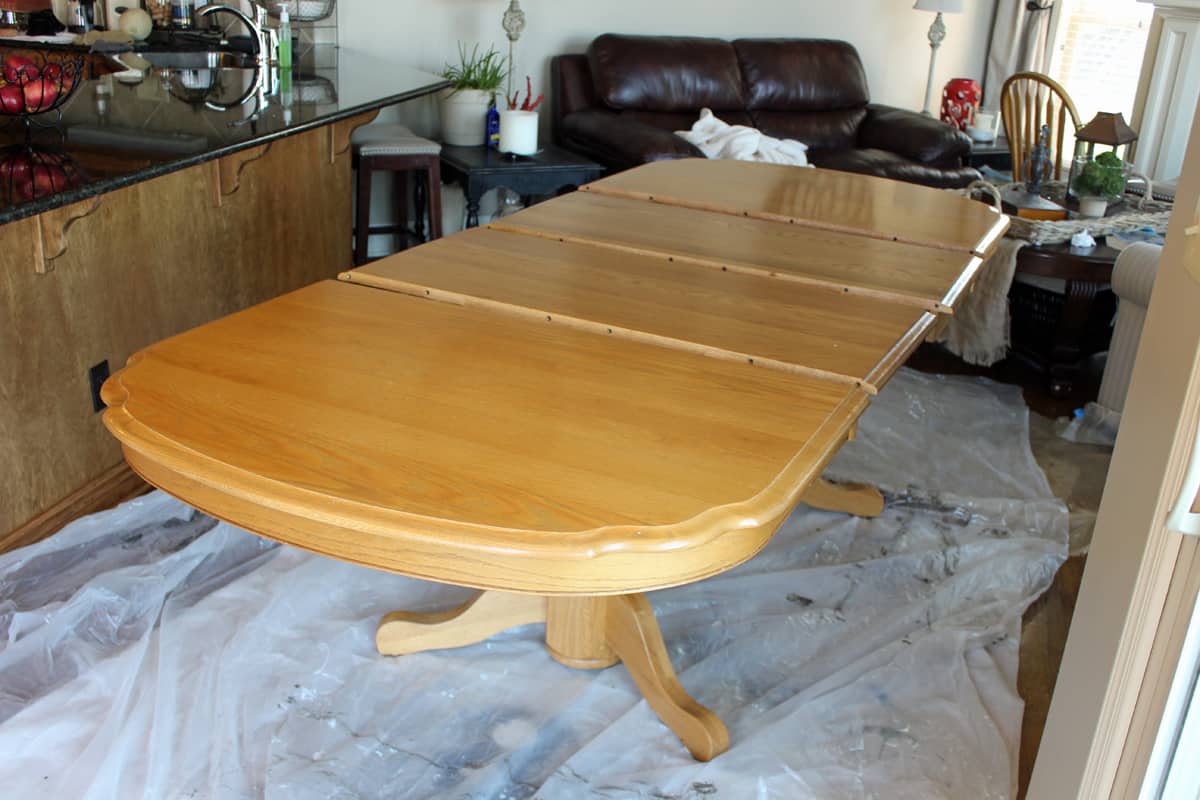
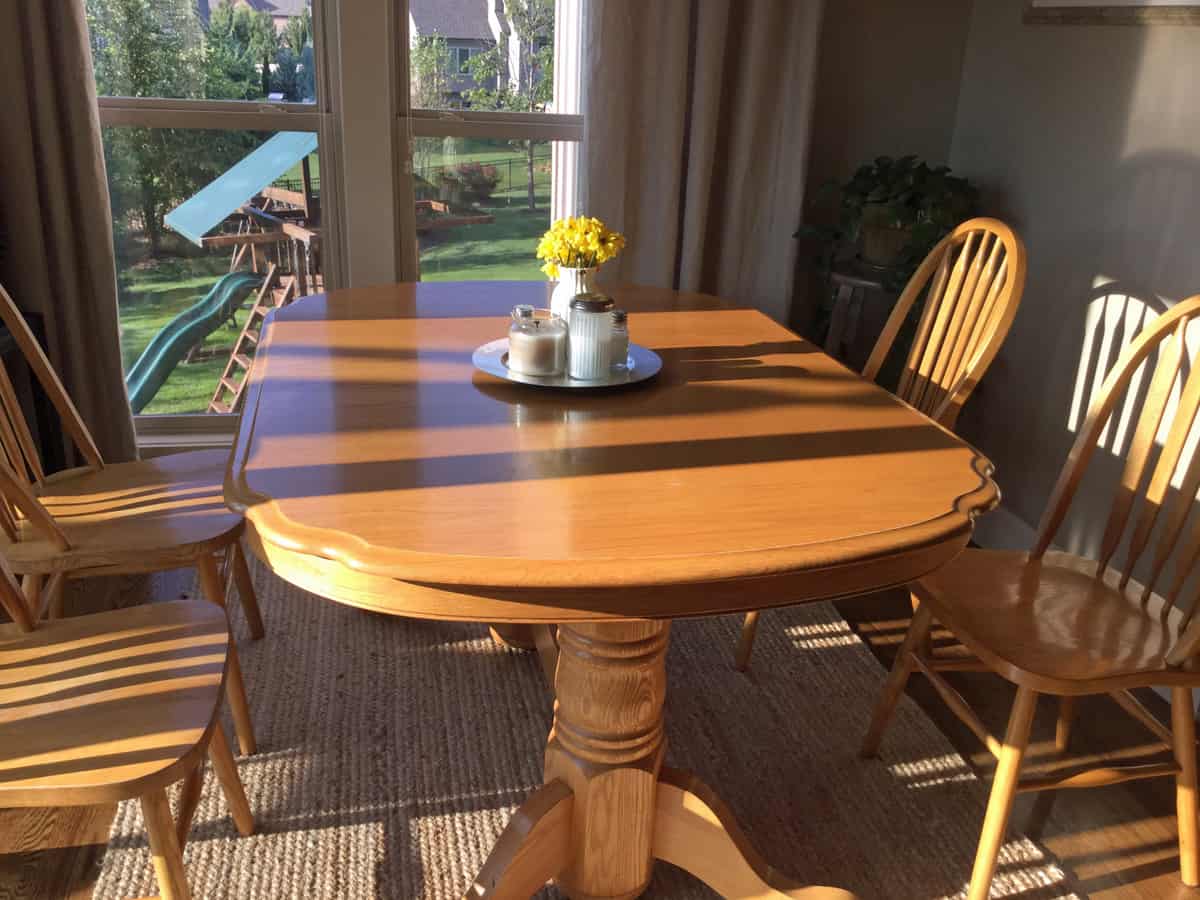
My in-laws got this pretty, oak kitchen table for my husband and me as a wedding gift almost 15 years ago. After two kids and everyday daily living, it was beat up and needed some love.
I researched lots of potential options and quickly knew chalk paint would be part of the solution.
Get more ideas for furniture makeovers and paint projects here.
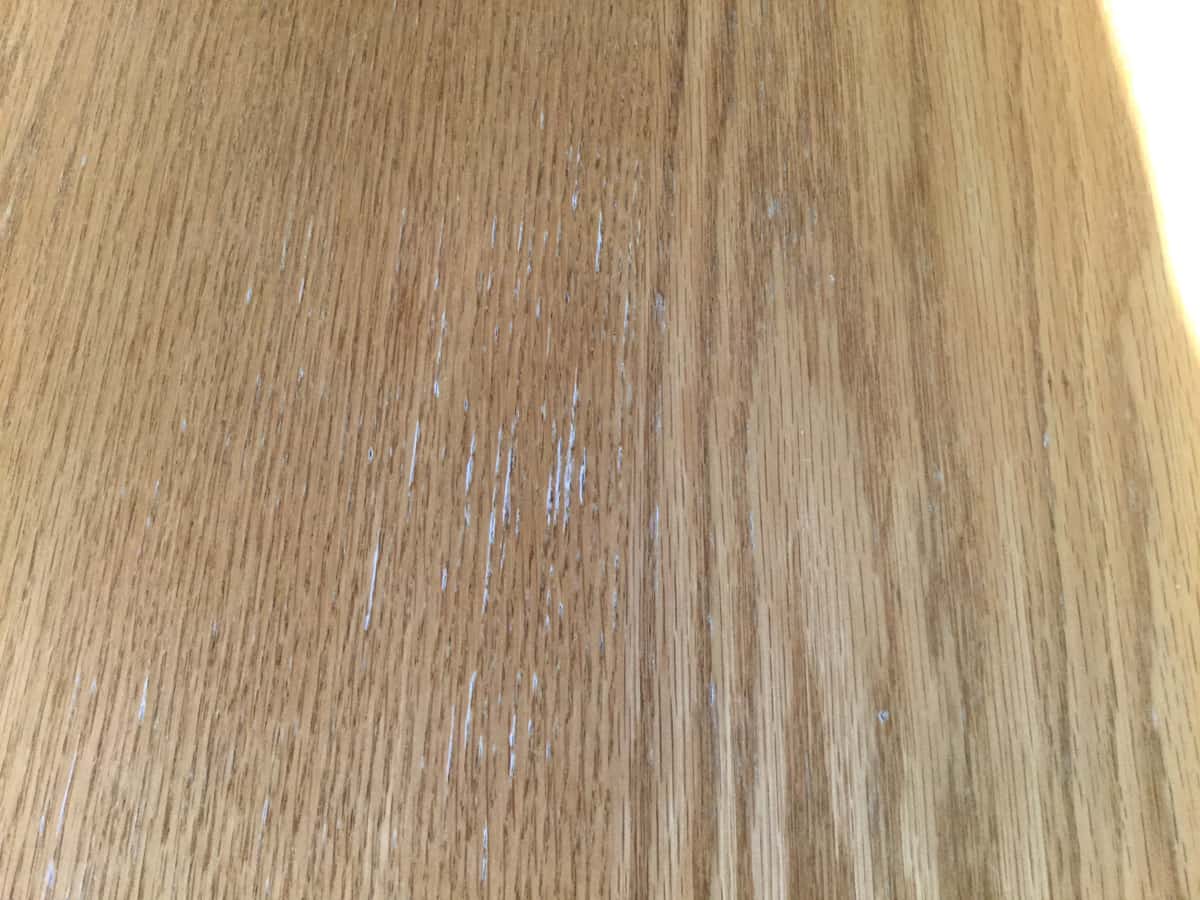
As much as I loved the table, the color no longer matched anything in my home. Plus, the old stain was not holding up well any longer.
Here is a close up image of the original finish.
My family was not thrilled with the process required to re-do this kitchen table and chairs. My house was in disarray for about a week during this chalk paint table makeover.
Fortunately, they are all used to my “diy projects” and go about their life while I do my thing.
In the end, everyone is typically happy with the outcome.
TRY THIS OUTDOOR DIY: How to Hang Outdoor String Lights
This post contains Amazon affiliate links, which means if you make a purchase after clicking through one of my links I make a commission at no additional cost to you. Please see Disclosure policy.
SUPPLIES For Kitchen Table Update:
- Citristrip
- drop cloths
- Putty knife
- Plastic dish scrubbie
- Mineral Spirits
- Lint-free cloth
- Painter’s tape
- Glad Press and Seal
- Minwax Pre-Stain Wood Conditioner
- Paint Brush (Purdy is my favorite paintbrush)
- Wood Stain in color of choice (If I were to do this over, I would select Minwax Dark Walnut)
- Paint for table and chair bottoms: Amy Howard Chalk Paint in Linen is what I used. This is rarely available on Amazon. Another chalk paint option is Annie Sloan Old White. OR, If you prefer to avoid chalk paint, consider Benjamin Moore Advance paint. This is a paint that was recommended to me by a local painter that insists it has amazing durability for kitchen cabinets (and kitchen tables). If you use this paint, you would NOT need a top coat over the painted portion of your table, ONLY the stained portion.
- Top Coat: A couple of options are Minwax Polycrylic or General Finishes High Performance Top Coat. Some have suggested the Polycrylic can yellow over time when applied over white paint. I have NOT had that issue, but it’s something to consider. The General Finishes topcoat is something I’ve heard good things about, but have not personally tried.
- Drop Cloths
Steps for Kitchen Table Makeover:
If you will be staining the tabletop, you will need to remove the current stain from the table top. At the time of this post, I did not own an electric sander, so opted to use Citristrip to remove the stain.
It worked great.
1. Strip Off the Old Stain
- I stripped the stain from the table top as well as the seat portion of the chairs. I used Citristrip to assist with taking off the old stain. This stuff is fantastic.
Citristrip doing it’s thing:
- A plastic (metal could damage your wood!) putty knife is a great tool to scrape off the goopy stain and residue, scraping with the grain. This was SO messy!
In retrospect, I should have done this entire project outside. But, know it can be done indoors, just be prepared to do a LOT of clean up. Also, make sure you open windows and create a well ventilated area and wear gloves.
- After you have scraped off everything you can with your plastic putty scraper, use a plastic dish scrubbie with water to wash the wood surface.
- Be forewarned, this entire process is tedious and time consuming! Then, let your wood surface dry completely. After it has dried, lightly sand with fine grit sandpaper to smooth out your surface. This will sand off any remaining Citristrip as well.
- Consider using mineral spirits on a lint-free cloth to assist with any further cleaning of the table.
Also note that an orbital sander would also work great to remove the stain, but at the time of writing this post, I did not have one.
Read here for more information about removing chalk paint and other types of paints and stains.
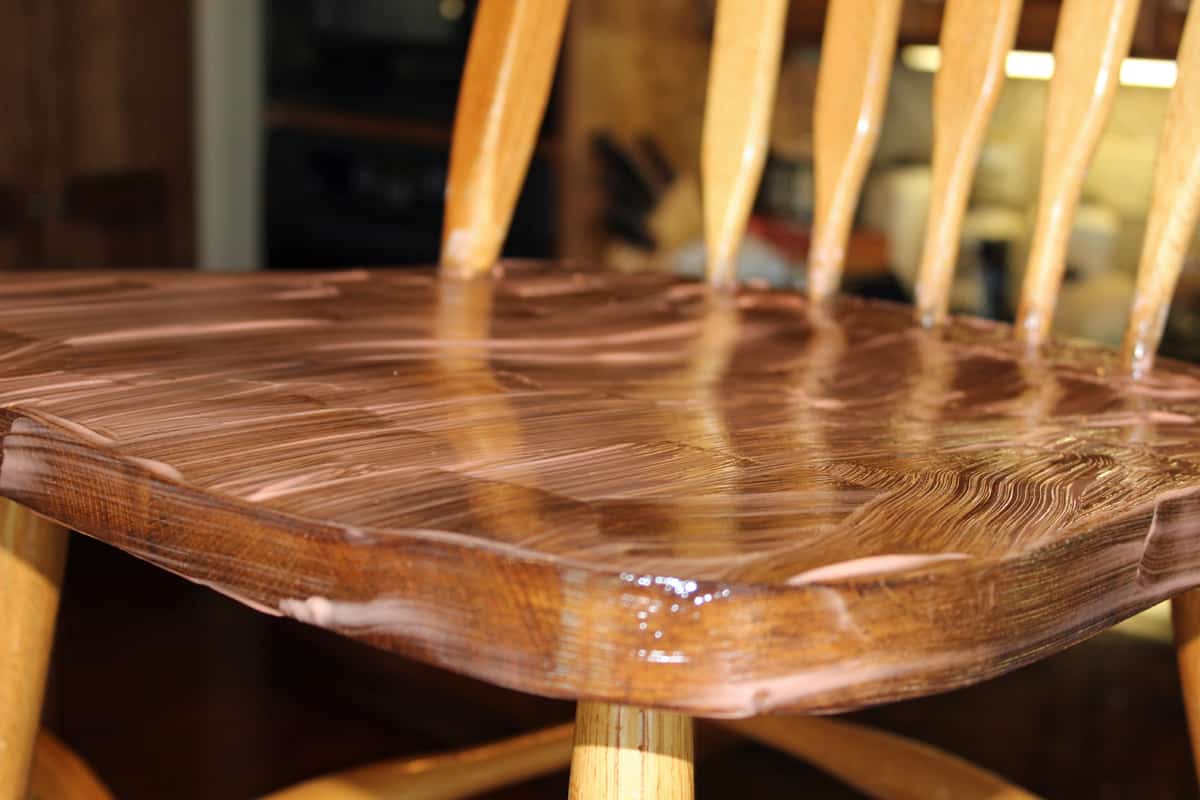
2. The Staining Process:
- Wipe the surface well with a clean, dry cloth to get rid of all remaining debris from the sanding process. Next, I applied Minwax Pre-Stain Wood Conditioner prior to staining.
- Once you complete this step, you don’t have a huge window of opportunity to complete the staining as this needs to be applied within two hours of application of the pre-stain wood conditioner.
Now, it’s time for a confession.
I panicked a bit during the staining process. I stained the chairs using my favorite staining method of tea and oxidized vinegar/steel wool.
RELATED: Learn how to make the tea stain!
But, soon after I completed the application on the chairs, I thought it looked uneven. So, I impulsively dove into the kitchen table top with a different method.
I used a combination of different stains.
My Wood Stains:
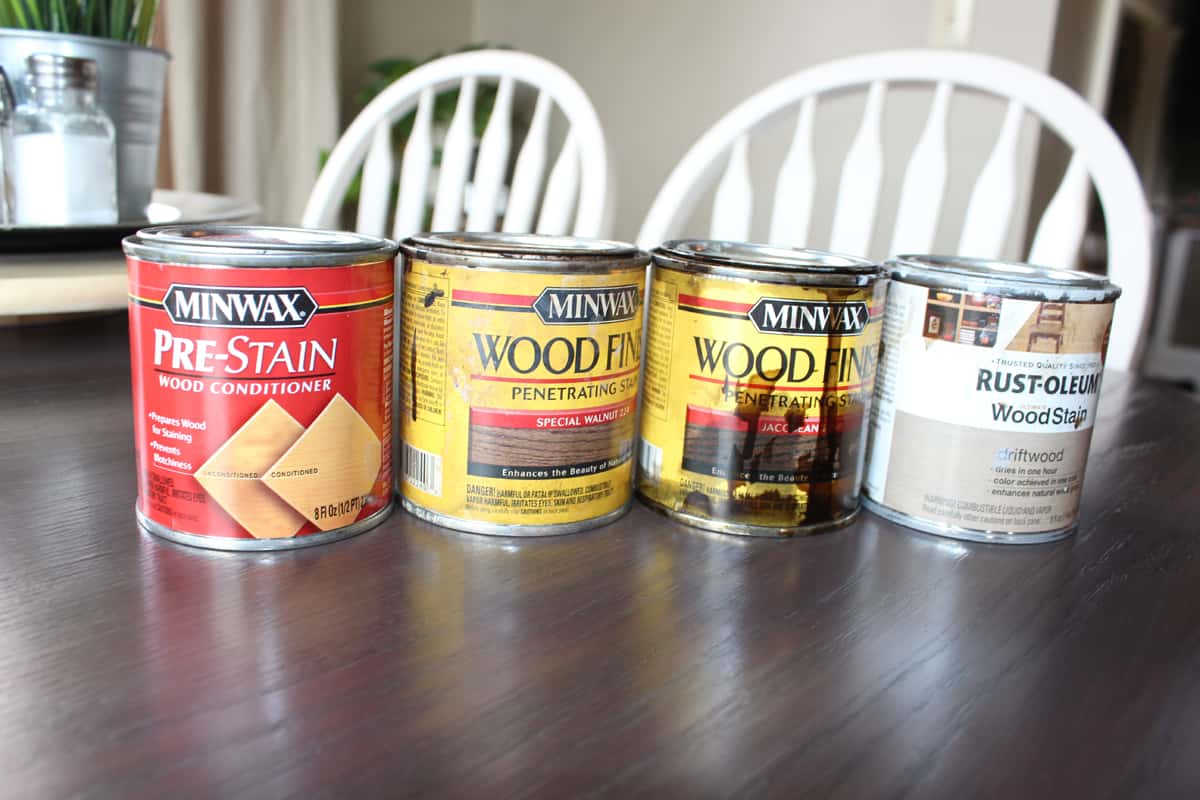
I wish I could tell you exactly what I did. But, I couldn’t duplicate it if I tried.
Although I do like how the stained portion of the kitchen table turned out, I definitely am not thrilled that it isn’t exactly the same as the chairs. Plus, after the chairs had an opportunity to dry, they looked fantastic.
- If I were to completely do it over, I would have just used Minwax Dark Walnut stain on the chair seats and table top and called it a day!
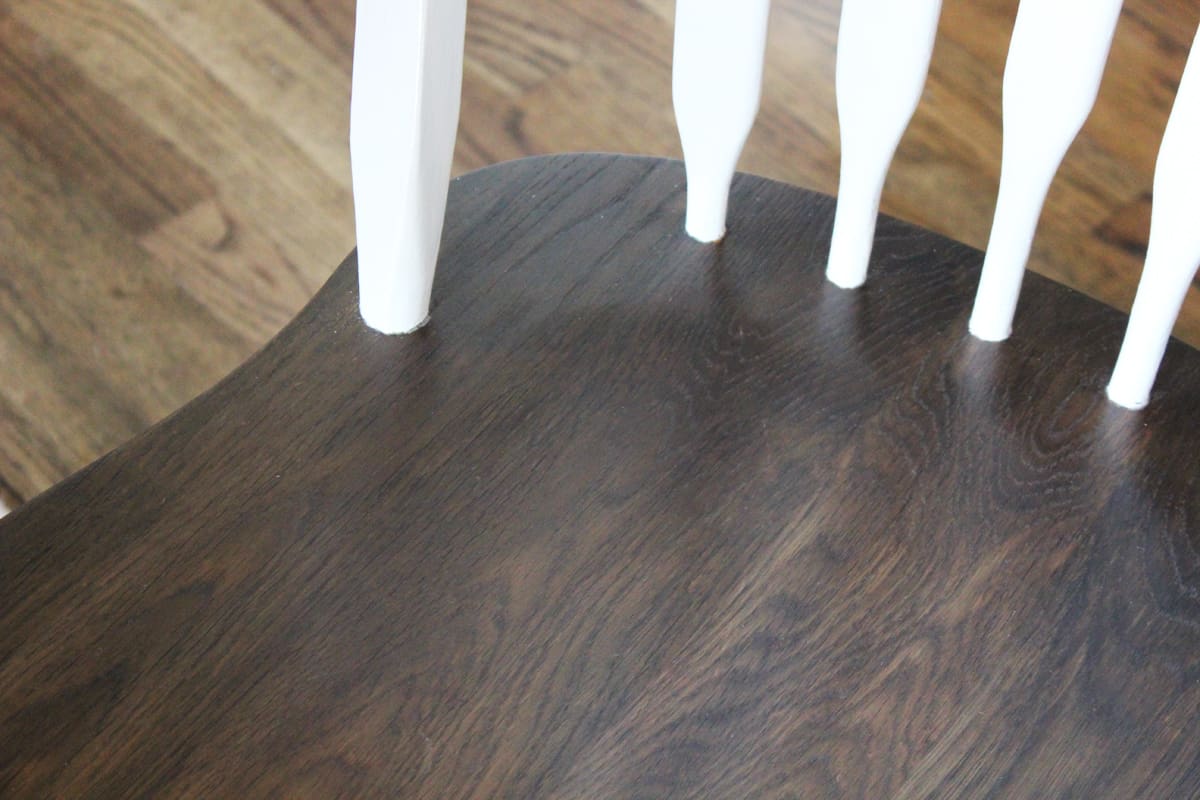
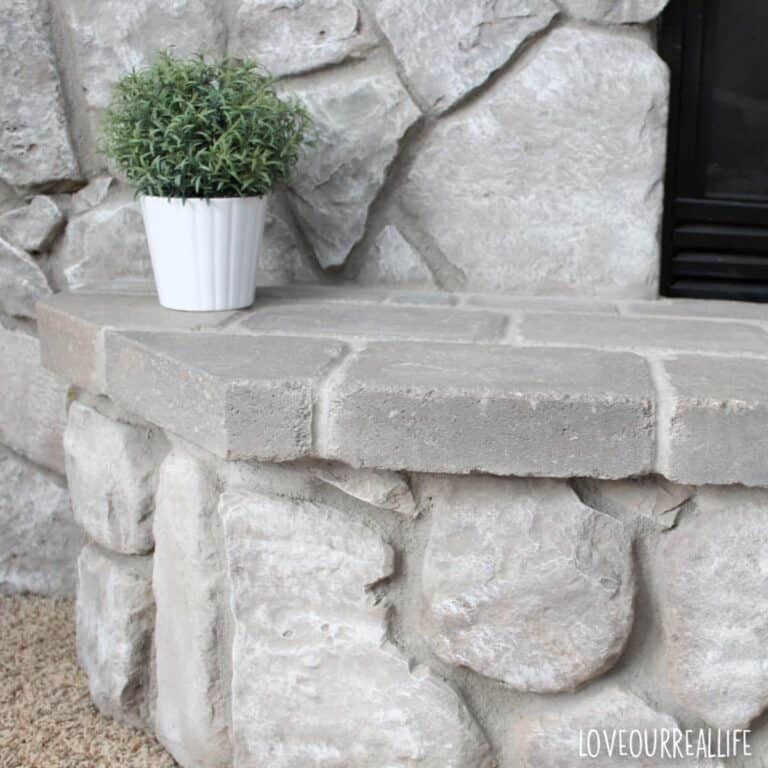
The difference between the kitchen table top color and chair seat:
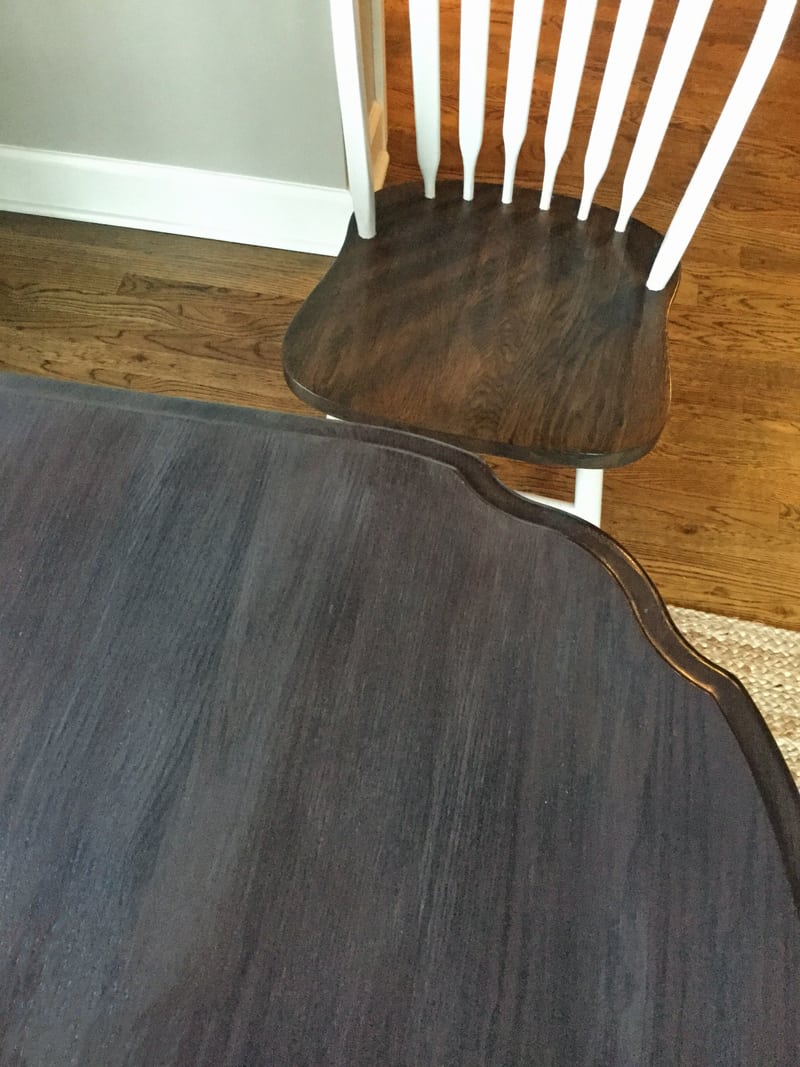
The table is a bit too blue-toned for my liking.
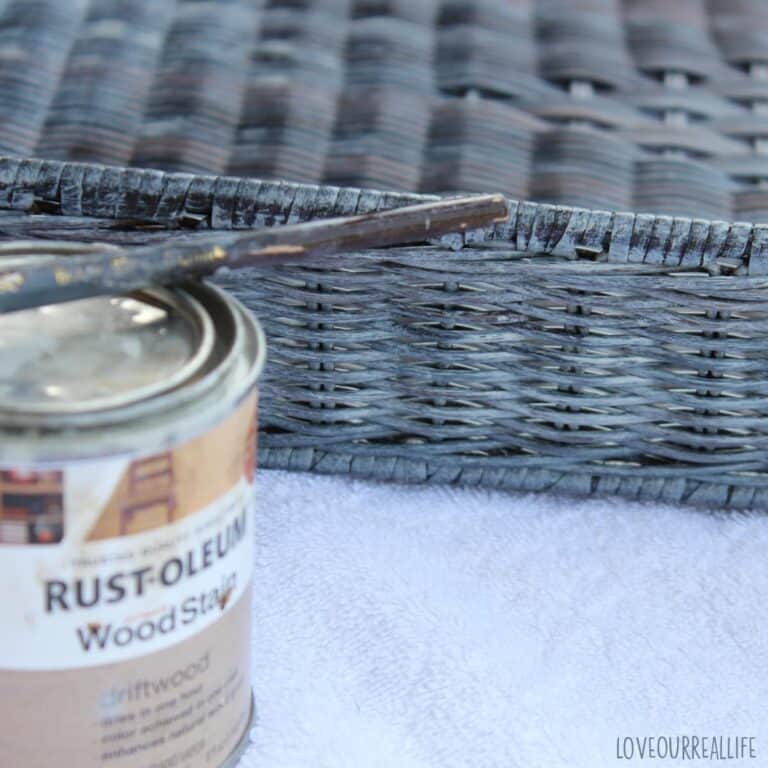
I really wanted to like the Rustoleum wood stain in Driftwood, but it’s just not for me. I get a lot of natural light in my kitchen so you can barely notice the difference in color unless you are looking for it.
BUT, I know it’s there! It just hasn’t made it to the top of my lists of priorities to re-do the table top again. It’s a lot of work!
After allowing the stain to thoroughly dry, I was ready to complete the painting portion. Compared to the staining, this was a breeze! I chose Amy Howard One Step Paint in Linen.
- Before painting, I cleaned the base of the table and legs/back of the chair with soap and water. There were a few places with unidentifiable dried food that required sandpaper to remove…yuck!
- After it dried, I taped off around the chair spindles so my new stain wouldn’t get ruined. I definitely didn’t want to repeat that process! I also used Glad Press and Seal on the seat to avoid paint splatters.
3. Painting the table and chairs with chalk paint:
There is no need to remove old paint for the chalk painting portion of this diy project. The key to painting over old paint, including painting over chalk paint, is to ensure you have a clean, smooth finish before you begin.
The finished product will only be as good as the surface you are painting over.
So the first thing to do prior to painting is to clean the areas you will be painting.
Prep before painting chair:
As per above, when painting the chairs, I used the Glad Press N Seal and painter’s tape to cover the stained portion of the chairs. Although this is tedious, it’s worth the effort to ensure your hard word isn’t in vain.
I did not use primer, BUT I have completed many paint projects since this particular project.
If you are painting over wood stain with white paint, I would suggest using 1-2 coats of primer. The use of primer will help you avoid bleed through from tannins into your new paint finish.
To make it easier, you could try primer spray which would help avoid brush strokes. There was no bleed through with my white paint, but I have since had experienced that with other furniture.

- I painted two light coats of the Amy Howard One Step paint in Linen (chalk paint) on the chairs (minus the seats) as well as the base of the pedestal table and table legs, allowing time to dry between coats.
- A final (third) touch up coat in only the places that needed it and to ensure good coverage in all the nooks and crannies.
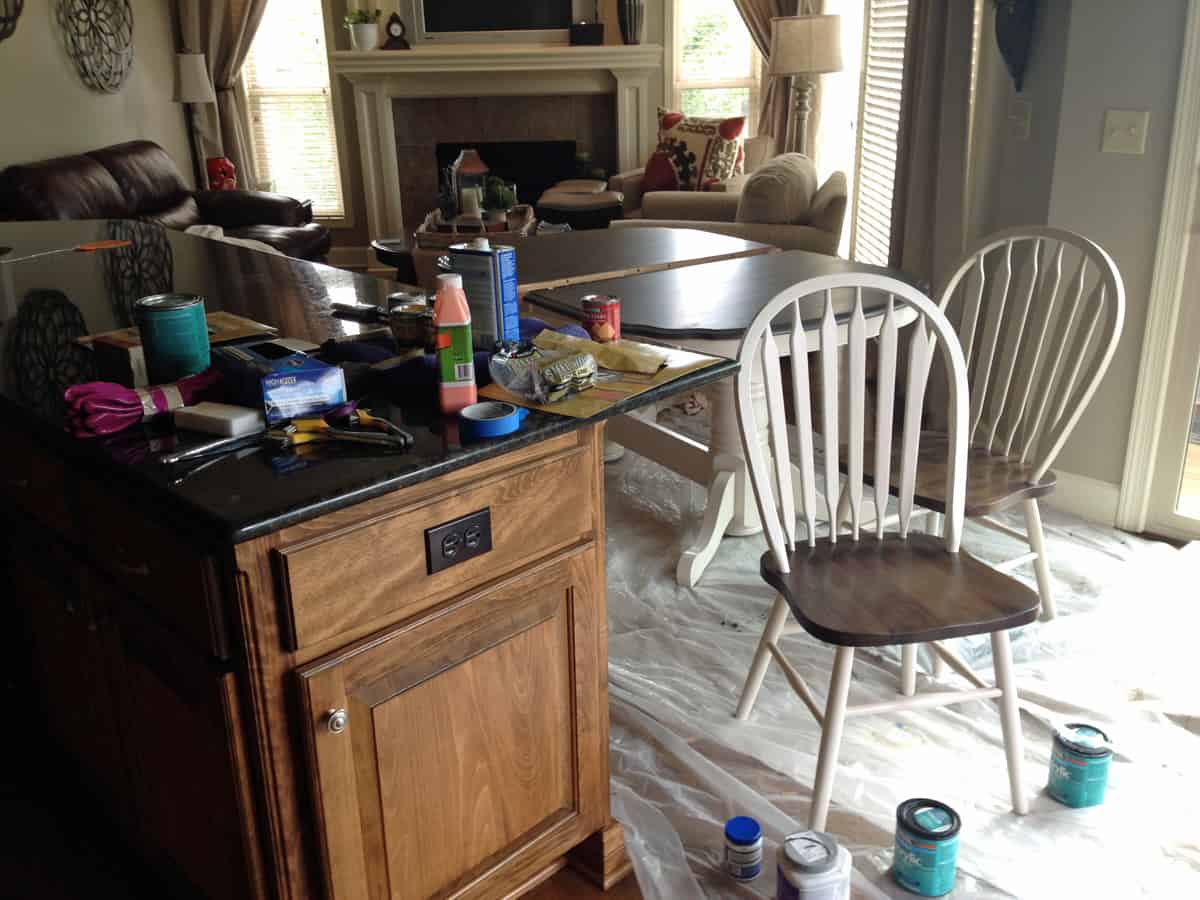
Enough emphasis cannot be put on the effort for this project. I had supplies absolutely everywhere in my kitchen during this project. It was worth it, but my family wasn’t very happy with me for a week or so!
Related: Best Paint Brushes for Chalk Paint
Painting with a brush can be tedious, so using a paint sprayer is certainly something to consider.
What a mess!
4. Seal the Table
For the final step, I applied three coats of Minwax Polycrylic protective finish in matte, allowing drying time between coats.
The smell is very strong, so as I stated earlier, only complete in a well ventilated space.
My recommendations would be to use a good quality synthetic brush (best for applying the polycrylic) and follow directions on the can for best results.
Be sure NOT to shake the can as it can cause bubbles in the finish. Instead, stir prior to use.
The polycrylic was used over the entire table and chairs, both the painted and stained portions.
I didn’t allow my family to use the table for a couple days after it was finished sealers need to fully cure. It has been fairly durable considering all of the high traffic use it gets.
There are many other ways to seal chalk paint furniture including polyurethane. and wax. Read this article to determine what type of top coat will work best to seal your chalk paint project.
Chalk Paint Table
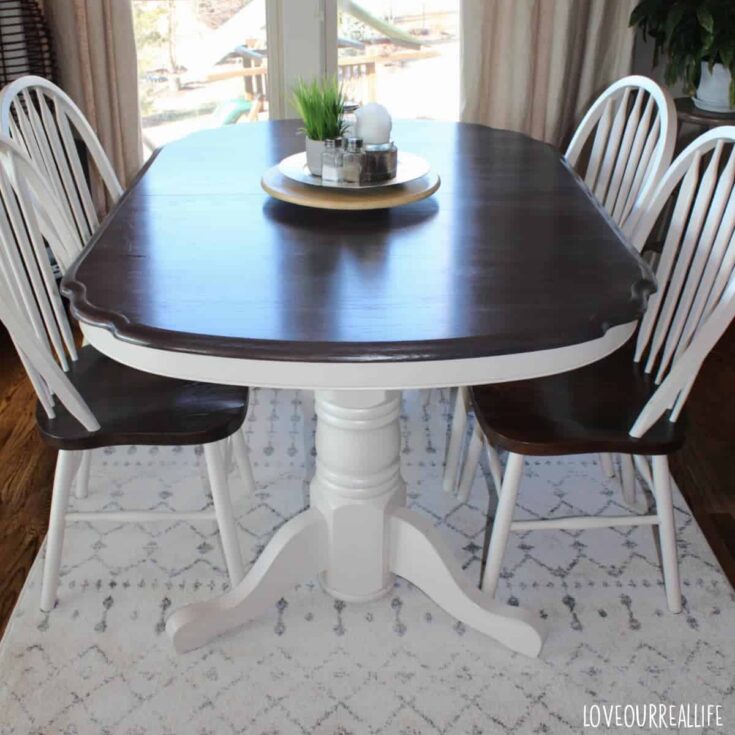
With a little bit of effort and a little paint, a dining set can be transformed into what looks like a new table.
The best thing is you can achieve a beautiful finish and create an entirely new look with paint (and stain).
Take a look at my chalk paint dining room table before and after.
Kitchen Table Before:
Chalk Paint Farmhouse Table After:
A whole new look!

Options to Seal Chalk Paint:
- Polycrylic (what I used and I believe to be durable). Some have reported yellowing over time. Be aware of this if using white chalk paint.
- Chalk Paint wax. I find wax to NOT be terribly durable. I would personally not recommend it for the intense wear and tear a kitchen table will get daily.
- Polyurethane. General Finishes High Performance Water Based Top Coat is a good option.
Even the best chalk paint will need a good top coat to ensure the paint job will last a long time. Each type of sealant has its pros and cons.
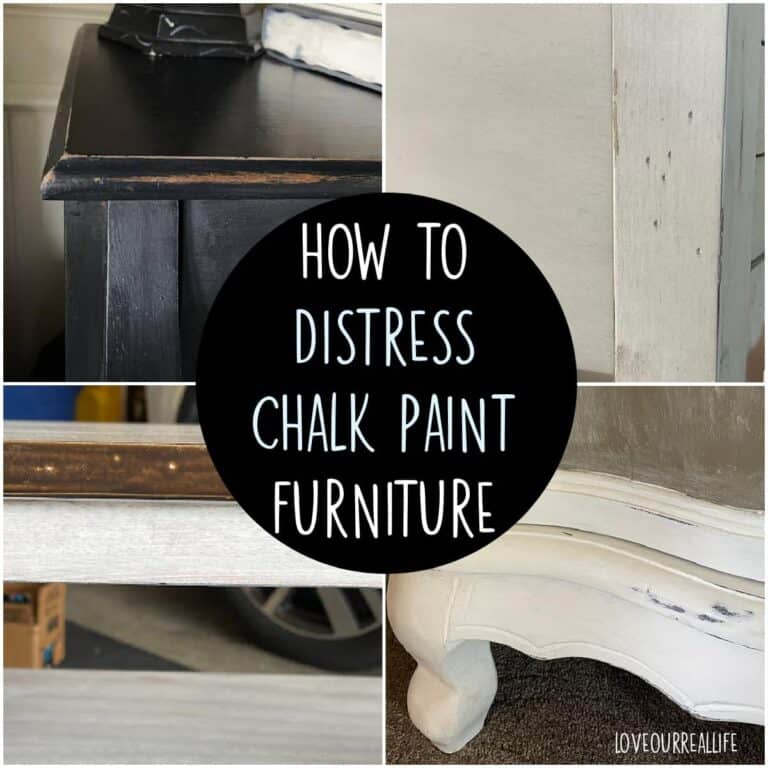
For a farmhouse style or shabby chic look, you may also want to consider distressing your table. The distressed look is a good way to help make occasional paint chipping less noticeable.
For a table getting heavy use, distressing is a good option to consider!
Another Fresh New Look: Dining Room Table Makeover
Is Chalk Paint Durable for Kitchen Tables?
Yes. The key to chalk paint durability on a kitchen table is to ensure you have a good and durable seal over the chalk paint. I used polycrylic to seal my table and have been pleased with the durability.
Should you Paint OR Stain Your Table?
This is a complete preference. Even though it was a lot more work, I loved the look of a stained table top and stained chair seats. If you are trying to do this more quickly, painting the entire table and chairs might be a good alternative to what I did but would still give you a nice makeover.
Are There Other Options to Using Chalk Paint?
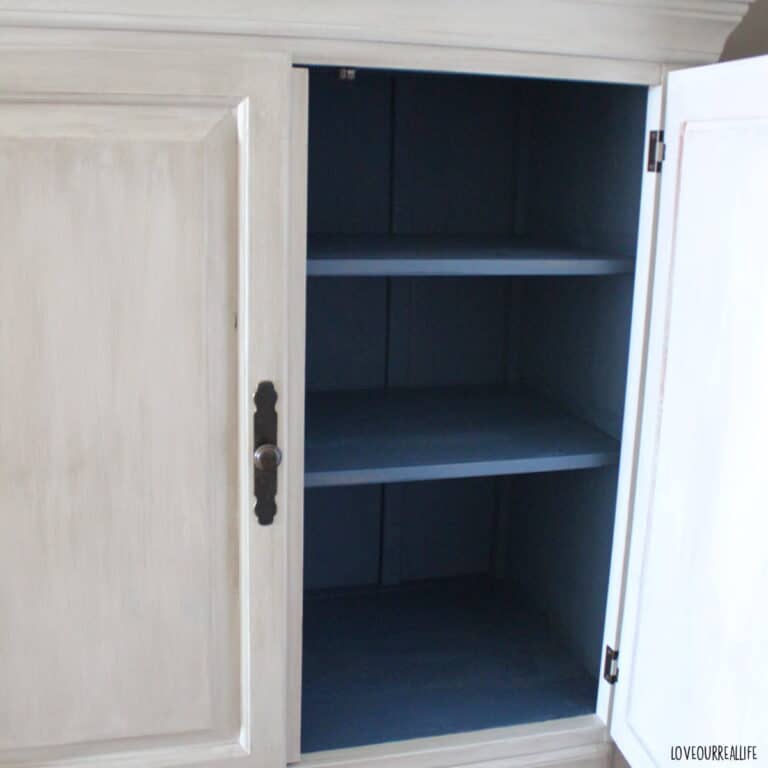
Yes. Another great option is using Benjamin Moore Advanced paint. I used this when painting some of my basement cabinets and it is wonderful.
- The negative to this paint is it takes at least 24 hours drying time between coats. I would also wait several days after you are finished prior to regular use.
- The positive is that you do NOT need to seal this type of paint.
- IF you decide to go this route, you will need to use a great primer before applying Benjamin Moore Advance. I recommend INSL-X STIX Waterborne bonding primer.
I have also found that Heirloom Traditions Paint is an excellent all-in-one paint option. I have used it on several recent projects and have been very happy with the results.
There are many different colors to choose from, even if white paint color isn’t for you.
What do you think? This is certainly not a project for the faint of heart.
It takes a LOT of time and hard work. But, if you love the bones of your kitchen table or another piece of furniture and are motivated to make a change, this might be for you.
If you don’t have the time to complete the staining process, perhaps you could use chalk paint on the entire piece.
I truly am so glad I did this. I love the change it has made in my kitchen and it’s so special to keep the gift that my husband’s parents gave to us so many years ago.
Some time soon, I’ll post a full before and after of my kitchen. It is so different from when we first moved in 11 years ago.
An Unfortunate mishap that happened after my DIY Table Makeover:
After the ENTIRE project was complete and I was finished with nearly all of the cleanup, I stacked all of my wood stains (a bit precariously) in my arms to carry to my basement.
The stack toppled onto the carpet and left this:

My husband suggested I just stain the rest of the carpet to match. Instead, we just replaced it. It was time anyway (11 year old carpet +2 kids +60 pound dog).
Please leave a comment below and tell me about your kitchen table transformation.
Have you painted and/or stained your kitchen table? If so, I’d love to hear how it turned out for you. Hopefully you didn’t spill the stain on your carpet;-)
Want to see how the table is holding up two years later?
My kitchen table has held up very well since I first painted it. Read the full description below.
Kitchen Table Makeover // How It’s Holding Up 2 Years Later!
Chalk paint can provide a durable finish for a kitchen table with proper sealing. Polyurethane is the most durable finish for the top of the table due to water exposure.
There are several options to seal furniture projects. The most common are polyurethane, polycrylic, and furniture wax finish. Polyurethane is considered the most durable top coat for a furniture piece. Nearly all top coats come in matte finish, smooth or satin finish, as well as gloss and high gloss finish.
Yes, you can paint an old table with chalk paint with minimal prep work. A popular choice is Annie Sloan Chalk Paint, but there are many brands that provide a chalky finish for updating wood furniture.
The majority of chalk paint brands are considered non-toxic and low in VOCs (volatile organic compounds) making them safe for use on a kitchen or dining room table set. However, it is a good idea to read the can of the specific paint brands you are considering before beginning big projects.
If you love DIY Furniture Makeovers, take a look at some of my other projects!
- Piano Makeover with Chalk Paint
- Painting Cabinets without Priming: The Ultimate Amateur’s Guide
- Painted Furniture: A Before and After

Want to remember this? Pin it to your favorite Pinterest board as a reminder!
Chalk Paint Kitchen Table DIY Project
This easy tutorial for a DIY kitchen table makeover will help you update an old dining table or kitchen table with a little bit of effort. The end result will be a stunning, farmhouse table you will love for years to come.
Materials
- Kitchen table
- Citristrip
- Drop cloth
- Mineral spirits
- Lint free cloths
- Painters tape
- Glad Press-n-seal
- Minwax pre-stain wood conditioner
- Minwax dark walnut stain
- Chalk paint in color of choice
- Topcoat / sealant
Tools
- Plastic putty knife
- Plastic dish scrubbie
- Paint brush
Instructions
- Strip table top. If you will be staining the top of the table and seats of the chairs as I did, you will need to get down to bare wood. This means stripping the old stain or paint with Citristrip or an electric sander. I used Citristrip which worked well. Follow instructions on container for best results. A plastic putty knife and dish scrubbie are helpful in removing paint. Have mineral spirits and a cloth on hand to assist with paint removal as needed.
- Stain the Top of the Table. Use a pre-stain wood conditioner, then stain the table top using stain color of choice.
- Clean portions of table and chairs to be painted. Use mild warm water on cloth to clean the areas of the table you will paint. For tougher stains or grease spots, consider using a degreaser such as TSP.
- Cover stained portions of table. Use Glad Press-n-Seal to cover the stained portions of the table and chairs to ensure paint does not get on these areas.
- Chalk Paint Table. Using chalk paint in your color of choice (Annie Sloan Chalk Paint is a good choice as is Amy Howard), paint a thin coat of chalk paint and allow to dry. Apply second coat of paint. After adequate dry time, apply touch up paint or third coat as needed.
- Seal Painted Kitchen Table. Use polycrylic or polyurethane to seal the table top. Chalk paint wax is an option for a top coat, but I find it is not as durable. A kitchen table top gets heavy use, so keep that in mind.
Notes
- Project is best completed in well ventilated area, perhaps in a garage if able as the process will take several days when including dry times
- Protect the work area with drop clothes.
- Test stain on underside of table to ensure you are pleased with stain color choice.
- If painting with white or light colored chalk paint, consider using a primer, especially if painting over wood stain.
- White or light color paint may need 3+ coats of paint for excellent coverage.

Oh my goodness, that really was a labor of love!! I always get in over my head with big projects like that and I’m ready to quit halfway through!
Thank you for your tutorial. I did a similar project with my table and chairs years ago, so they’re needing some work now. My ladder back chairs were spray painted (many cans of red paint) and they’ve held up pretty well, but some areas of the chairs are getting dull, so thinking I will repaint them soon! My table top is stained dark walnut and I probably did a wipe-on polyurethane over the stain. Perhaps I didn’t do enough coats, because I have lots of scratches on the top. I also think it’s pine wood which is softer and more susceptible to scratching (ugh). I was wondering what you used to apply your polycrylic? Do you use a brush or a foam brush or something else? The bottom part of my table is just latex paint and it’s held up great – this was before I ever heard of chalk paint (and before Pinterest! Lol!). I’m really wanting to redo the top, even though I want to keep it the same color. I guess I’d have to sand it down to get rid of the scratches – basically start over on the top. What do you think? Thanks!!
Hi, Lynn! Thanks for commenting! With you table top, I would sand down just as you mentioned. To apply the polycrylic, be sure not to shake the can prior to use (just stir it) as you will get bubbles otherwise. A nice synthetic brush for application is likely your best bet. I’ve used a foam brush with pretty good success, too. But, I know most people would recommend a nicer synthetic brush, so try that. Perhaps have a pack of foam brushes on hand just in case you decide that works better for you. GOOD LUCK! It’s such an undertaking, but I’m sure you’ll love the end result.
I’m getting ready to start this project today with my table and chairs. The top of my table is that really light wood that isn’t pine or oak. I think it’s some sort of Asian wood. Anyway, we’ll see how it turns out. Also, I wanted to say that water based polycrylic shouldn’t/isn’t supposed to yellow over time. I just wanted to put that out there for everyone that was wondering. I love how your table and chairs turned out. I’m hoping mine will turn out as well as yours did. My table is round with a leaf that folds down into the table top. Fingers crossed.
Best of luck with your table makeover!
I followed every word …. from the list of materials to the number of coats of stain. Thank you so much for the directions. My grandparents breakfast table is now a refreshed and updated dining room set that I truly love!!
Aw, you just made my night! This is exactly why I love blogging. Thanks so much for sharing this sweet comment. Enjoy your special table!
Have looked at this post several times. I have a table just like yours, maybe not quite as orangey, that bothers me every time I look at it. Our house has gray paint and white trim and I so long to redo it like yours but my husband doesn’t want me to bc we have two small children.
I am not afraid of the staining and painting part. I have done that before but not on as big of a scale. What scares me is the stripping of the tabletop enough. There is a sort of lip/groove around the edge of the table similar to yours and I have no idea how I would sand that with my electric sander where it is not the flat surface. I have not used Citristrip before but we already have it. How well did the Citristrip take off the finish? Did you do it over and over? Did you use a palm sander as well?
It certainly would be easier to just paint the chair all white but is so much more stunning with the seats painted.
The sanding/stripping is the not fun/tedious part for me, and the part that scares me if I do not do it enough the stain will look horrible.
Thank you for any thoughts 🙂
Hi Carrie Beth! I get it; this is a really big undertaking, but I have been so pleased with the outcome. Re: your questions…I sanded the lip/edge of the table by hand. Keep in mind it’s been a while since I did this, but I do not recall it being too much of an issue. I also do not recall using Citristrip more than the initial time. The dish scrubbie / wash was really helpful in getting little pieces of stain that didn’t remove perfectly with Citristrip. Also sanding after letting it dry took care of the tiny remnants of stain. As I mentioned in my post, I don’t love the stain color choice I went with for my table top, BUT the quality is good. I hope this helps! Let me know how it goes and if I can be of any further assistance. Best of luck to you!
Your table is beautiful!! We just bought a similar one of of Craigslist that I am going to paint and stain for a new house. Did you use poly over the painted portions as well?
A couple of years out, are you still pleased with your choice of poly (no yellowing?)
Thanks so much!!
Thanks so much, Heather! I used polycrylic over all of it! I have not personally experienced any yellowing with the polycrylic, but I have definitely heard others complain of this so it is a risk. Best of luck with your table project. It is one of my favorite DIY “after”!
April can I ask also what finish you chose for your basement cabinets for the BM paint?
Absolutely. I used semi-gloss. I’m attaching a picture of the paint can so you can find it more easily if you decide to shop for it. On the right is the paint used on the backside of the bar for your reference.
Hi April
I’m considering doing my table as well thanks to your inspiration. I wanted to ask if we used the Benjamin Moore advanced paint do you think I need to still use the citristrip and sand as well. Also you said with that paint I won’t need a top coat correct?
Was thinking of doing a painted black and white table no stain.
Hope mine will look as good as yours. Thanks
Thanks for the sweet words, Janet! If you opt for Benjamin Moore Advance, I would sand it first – Citristrip wouldn’t be necessary. Then use a great primer (I like STIX), then the Advance paint. I used Advance paint on some of our basement cabinetry and I love it! NO TOP COAT NEEDED, yay! It does require ~24 hours to dry between coats. But, once it fully cures, it is really durable. Let me know how it turns out!
I am preparing to start a similar project. One thing that I get stuck on is how to apply the stain. How did you apply yours? I read about how some brush it on and wipe off, or apply with a rag or do I brush on and allow to dry? Yours turned out beautiful!
Hi Jennifer! It’s a big undertaking, but I’m sure you will love the end result! Regarding stain application, I would brush it on then use a clean, dry rag to wipe off the excess – all going with the grain of the wood. The longer you leave it on, the darker it will be. Your best bet is to get a board of the same wood and experiment. It’s worth the extra time and effort to get it exactly how you want it! Best of luck!
I too have begun stripping and re-staining my kitchen tressel table, benches and chairs. I’m also going to chalk paint all the bases. My question is also on using white wax on the stained portions of the project (as well as the chalked bases) as opposed to the polycrylic finish (which I had on before and yes, it had turned yellow over time). Has anybody had any adverse affects with the wax that you know? Will the wax stand up to wear and tear of a kitchen table better or about the same as the polycrylic?
First of all, I commend you for taking on this project. It is A LOT of work. As for your questions, wax isn’t as durable as polycrylic. I’ve used wax on many pieces of furniture that do not get as much wear and it works great! However, on the furniture that takes a bit of abuse it gets fairly scratched. SOOOO, I would continue to recommend polycrylic for a kitchen table. You might consider General Finishes High Performance Top Coat. I have not tried this, but I’ve heard very good things about it. Best of luck!
LOVE this table! I was wondering if I could use white wax , instead of Minwax Polycrylic?
Thanks,
Thank you! I have never used white wax, but I would imagine it would work fine over the white chalk paint. As with anything, I would test it out first. Of course the polycrylic will be more durable. BUT, I have also had some say that the polycrylic looked a little bit yellow over time over the white. I personally have not had that issue, but it’s something to consider.
Sorry if this is a silly question, but I’m getting ready to do something similar to my table, just with a lighter ashier stain on top. Do you need to strip the existing stain off and sand the bits you paint white? I’ve never used chalk paint before, not sure if it will chip/peel without going on a fresh surface
Not a silly question at all! If you are using chalk paint, no, you do not need to strip/sand existing stain. Chalk paint doesn’t require any priming…it’s kinda awesome really. BUT, if you have oily or greasy spots, I would suggest cleaning that really well. A clean surface is all that’s necessary for chalk paint. I would lightly sand between coats of chalk paint (wiping clean with dry cloth each time) as this will give you a smoother finish and make it much less likely to chip. It does take a bit of extra time to do this, but you’ll be glad you did! Obviously if you do any staining, you’ll need to get that surface properly prepared before applying new stain.
Me again! So I have applied one coat of Minwax Espresso. The table is red oak so the table has more of a red hue than just brown peeking through the stain. I guess it’s ok but I was thinking it would look different. I have Minwax Classic Grey. Do you think a light coat of that would tone down the red or another coat of Espresso – which would make it darker. I don’t really want it that dark as I am painting the bottom black. Either way it looks 100% better than it did.
Patti – I’m so excited to see that you’ve jumped in with this project! Regarding your question…is there any way you can find an inconspicuous place to experiment with the stain colors? Perhaps the underside of the table? I can tell you I regretted gray on my table because it gave a bit of a blue cast to the overall color. I think you won’t be sorry if you take a little more time to figure out what stains look best together. If you can’t find an inconspicuous place on the table to experiment, perhaps you could grab a piece of red oak lumber from Lowe’s? My main advice is to make sure you are happy now because you will likely be looking at this table every single day. It’s worth getting it just right! Best of luck and keep me posted! 😊
Table update! So I didn’t use the Gray as I was unable to pick up some oak to practice on. I went with a second coat of Espresso but only left on for a few minutes. Turned out very nice. Have started the painting process, table was a snap to do but painting the chairs is painful. Thankful for your pics showing that you covered seats with plastic wrap. Here is my new question – with the plastic wrap on the seats I have noticed bits of wet stain that seem to have come to the surface. I can wipe them off but am curious as to what caused this to happen and hopefully are easy to remove once the wrap is off. Secondly, I taped off around the spindles but on the off chance that some of the paint has seeped through onto the stained wood how will I remove that? I hope you don’t mind all the questions. I live in a rural area with very limited resource people so appreciate the help you have given me. Thanks again.
Patti – I’m so excited for you (I feel like I know you!). I bet you feel like you can almost see the light at the end of the tunnel. It sounds like the stain wasn’t fully dried before you put the Press-n-seal on it. Let’s keep our fingers crossed that it remains a nice smooth finish when you remove it. Let’s cross that bridge only if we need to. I’m hopeful that your stain will remain how it was when you started the painting process. In regards to possible paint seeping through the tape…once again, let’s hope it doesn’t. But if does, perhaps you could use a little bit of mineral spirits on a q-tip to remove it. Or, you could possibly even use your fingernail to remove it if it is just a fleck of paint here and there (I would start with that as there is a chance the Mineral Spirits could remove some of the stain). I MUST see a picture when you are finished! I love that you are finding my tutorial useful😊. I just hope you think it’s worth it in the end! Keep me posted!
I have the exact same table!!!! Love the table, two fold out leaves(sp) fits our family gatherings 20 years later:) I started to sell the table and my daughter said ” mom! This table is found in all the antique boutiques in Texas, just redone!” Soooooo here we go…… after we finish redoing kitchen:)
Small works that I found the same table, same idea:)
Thanks from Texas!
I love this, Donna! Best of luck with your table. I have a feeling you’re going to love the “after”!
Thank you for the tutorial! I couldn’t tell how you applied the stain to the seat. Did you tape off the spindles for that as well? Will the paint cover up any mistakes with the stain? Thanks!
I stained the seats first, not worrying too much about getting the stain on the spindles. Painting over the newly stained portion of the spindles didn’t seem to be a problem. Obviously you’ll want to make sure it thoroughly dries first. Best of luck!!!