How to Update a Mirror with Chalk Paint
I’ve been slowly working on updating the decor in our entire home, one small space at a time. Little by little, I’m making progress. Our basement has been the recent focus. One or two projects quickly turned into about 10 million! Can you relate?!
Perhaps I exaggerate just a little, but let me just say there are LOTS of posts to come with the basement update. For now, I’ll try to stay focused on today’s post! It’s all about how to update a mirror with chalk paint.

Get more ideas for painting projects here!
If at all possible, I love to repurpose pieces I already have to save money here and there. As usual, paint saved the day for me yet again. This rust / gold mirror no longer fit with any of the other accents in our basement. Nothing a little chalk paint can’t fix!
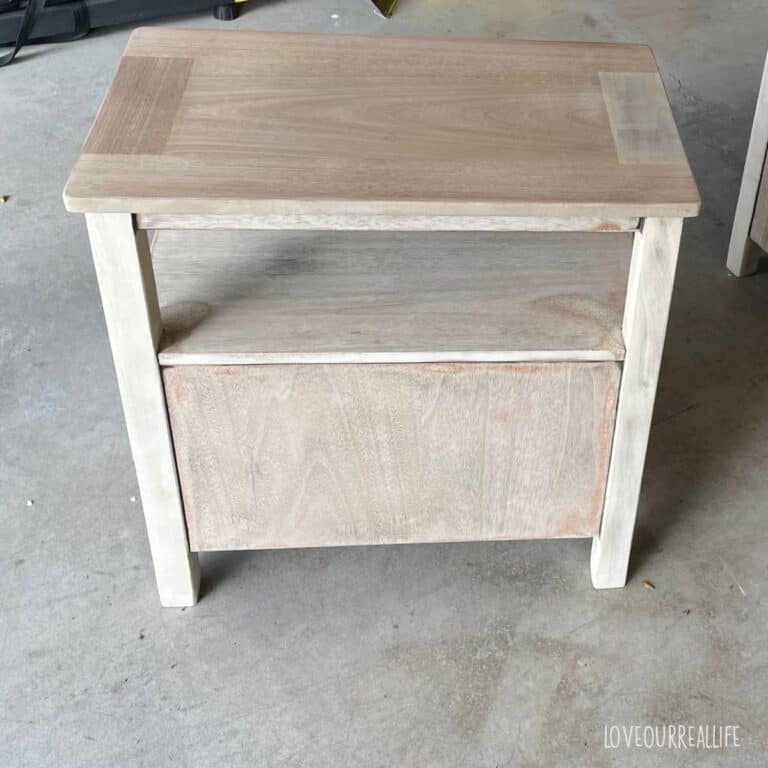
Mirror before:

Time to give this old mirror a facelift!

I am certain many of you can relate, I’m making a switch from dark browns, golds, yellows, and rusts to grays, whites, and just brighter colors in general. This gloomy winter hasn’t helped much!
It seems I’m trying to find any way possible to brighten up every space in our home. Sunshine and natural light, oh how I miss you!
BUT, back to the mirror! The mirror was still in great shape, but didn’t match a thing. So, watch how I turned it into a pretty, coordinating decor accent with a little bit of paint.
How to update a mirror with chalk paint:
This post contains affiliate links which means should you make a purchase after clicking through one of my links, I might make a small commission at no extra charge to you. See my disclosure policy for details.
Supplies for updating mirror:
- White chalk paint. I used Amy Howard One Step Chalk Paint in Bauhaus Buff, but it was not available to link on Amazon at the time of this post, so I linked to something similar for your convenience.
- French Linen Chalk paint by Annie Sloan
- Medium gray paint – Seriously, you guys…use whatever you have!
- Chip brush
- lint free cloths
- Painter’s tape
Steps for the mirror updating process:
- Clean mirror.
- Tape off mirror with painter’s tape for easier clean up in the end.
- Paint entire mirror frame 2-3 coats of white chalk paint, allowing dry time between coats. Chalk paint drys very quickly. 30 minutes is the approximate time for each light coat to dry.
- Use French Linen to apply a wash over the white coat. I wanted a very layered final look, so in this step, I watered down the French Linen to approximately 50% paint and 50% water, mix well. Use a wet rag to wipe this onto the entire mirror frame. Don’t worry about perfection here! Just wipe it on (see step #5).
- As soon as I finished with the wet wash of French Linen, I took a clean wet cloth and wiped most of it away. I realize this sound counterproductive, but keep in mind the layered look was the intent.
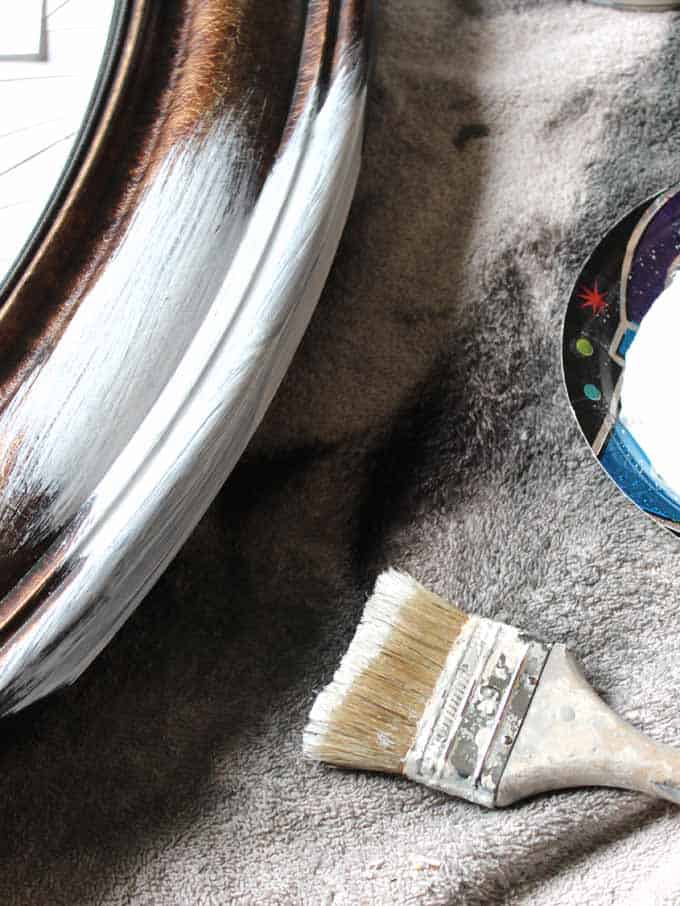
- After the French Linen wash was completely dry, I used a medium toned gray paint that I already had (Intellectual Gray by Sherwin Williams) and dry brushed this onto the mirror frame. If you’ve never “dry brushed” before, it’s a great way to add dimension to a piece. Dip the very tip of your dry brush in the paint, wiping off almost all of the paint. I do this by brushing the tip of my brush on a paper plate or paper towel to get as much paint off the brush as possible. You can always add more if needed. Then work in small sections, brushing in all directions to give it the textured layer look.
- Dry brush white in various places to give a nice highlight.
- Done! Remove your painter’s tape and you have a new-to-you mirror!
Let’s take a look at each of the steps!
Paint 2-3 coats of white chalk paint, letting mirror dry between coats.
Don’t you love my fancy palette, aka 50th birthday plate? I don’t even know who I’ve celebrated turning “50”!


Apply wet wash with Annie Sloan French Linen.

Simply wipe on the watered down French Linen with a wet rag.

Wipe away excess French Linen Paint Wash. This will leave behind a beautiful layer over the basic white.

Dry brush medium toned gray.
I found a pretty gray in a sample I had in my paint closet. I’ve mentioned before, I could very possibly open up a paint shop of my own!
The color I used was Intellectual gray by Sherwin Williams which was used in my great room. Take a peak at it here in my gallery wall post. This was my very first post on Love Our Real Life. 😊

Ensure the majority of the paint is off of your brush prior to “dry brushing”.

Use a paper plate to off load the brush. Dry brush in all directions to give a nice textured look.

Love all the layers!

Dry brush white chalk paint to add highlights.

Remove your painter’s tape and you’re done!
How to update a mirror with chalk paint After:


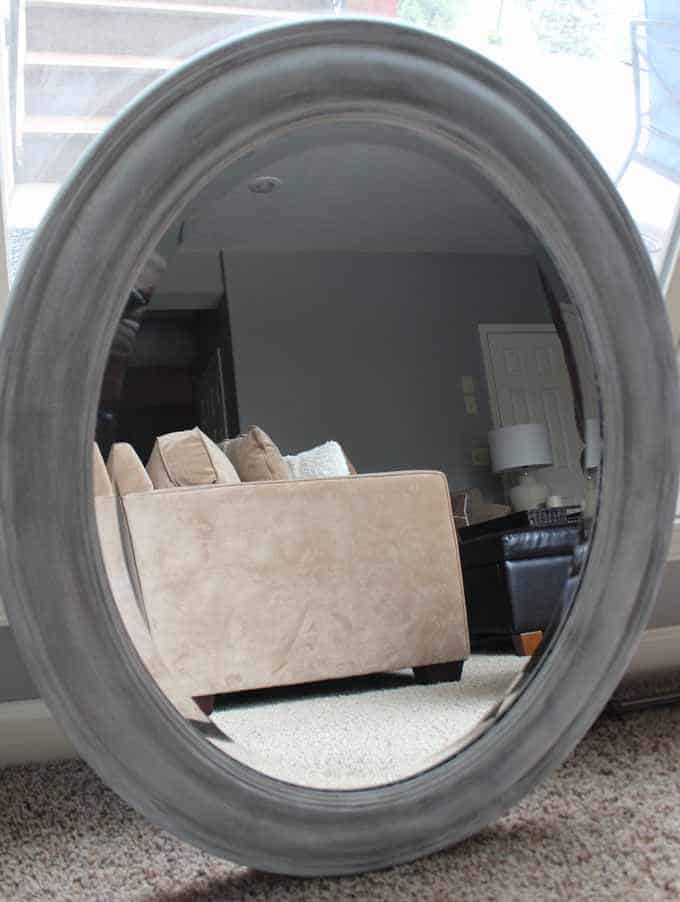
Turns out, photographing a mirror is not an easy task for an amateur photographer such as myself. So, hopefully you get the idea! It turned out really pretty and will coordinate much better with the rest of my decor.
Perhaps you got a tiny glimpse of the rest of the basement in the mirror? Lots of this will be changing too as I finish the rest of my 10 million basement projects;-)
If you need a little more chalk paint inspiration, take a look at these posts:
- 25+ Painted Furniture Makeovers
- Kitchen Table Transformation using Chalk Paint and Wood Stain
- Chalk Paint to Transform Ugly Stair Railing
- Chalk Paint Recipe with Calcium Carbonate
- Piano Makeover with Chalk Paint
If you can’t tell, I’m a pretty big fan of chalk paint. If you haven’t tried it yet, I encourage you to give it a go! It is one of the easiest types of paints I have ever worked with!
More ideas for diy home decor projects here.
Thanks for stopping by!
Take a moment to pop by and see what’s happening on the Love Our Real Life Pinterest account!


This is beautiful! I just moved and am planning to repurpose and update a lot of stuff with lighter colors
Thank you for your simple to understand instructions.
That gives me confidence I didn’t have before reading this! I really like the transformation a lot!!!
My pleasure! Have a great week!
Love the look of the mirror now! Very cool!
Thanks, Kristy! It’s nice to use something I already had!
Wow, what a lovely transformation!
Thanks, Amanda!
I love chalk paint and this project turned out awesome! You have motivated me to get my chalk paint out 😁
Aww, thanks Clair! My chalk paint is out too much, lol!
Looks great! I have an old mirror out in the garage this would be perfect for! Thanks for sharing
Thank you! Good luck with your mirror painting project! A bonus is you’ll free up space in your garage;-)
I definitely have a mirror or two in my home that needs a little refresh. What a great idea! Much more cost effective than buying a new mirror!
Thanks for stopping by, Jessica! I absolutely agree 😊
This turned out so beautifully! It’s awesome when you can repurpose something rather than going out and having to buy something new too!
Thanks so much! I agree! It satisfies the need to change things without spending a lot of money!
Love it!!!
Thanks, Sheila;-)