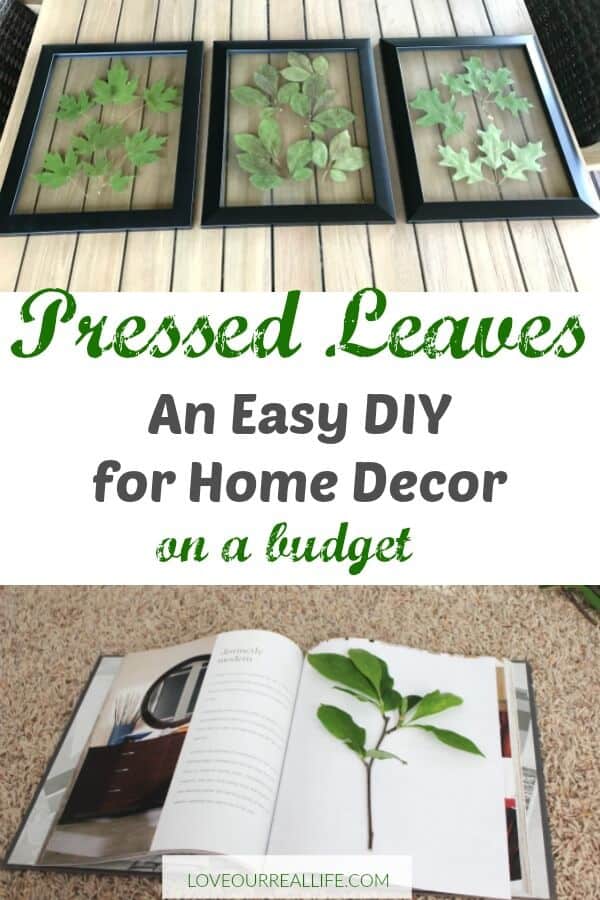
Pressed Leaves Art: How to Dry Leaves and Frame Them
I love trees, don’t you?! Use your favorite specimens from the forest floor or a great choice would be to gather leaves from your own backyard so you and your family will have even greater appreciation for your beautiful DIY creation.
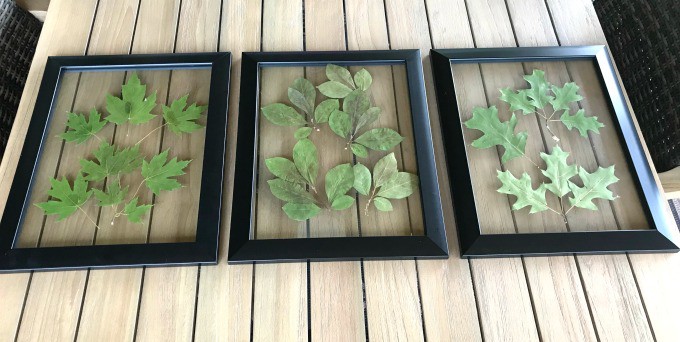
Pressed Leaves in Document Frames can bring a bit of nature to your indoor world!
Due to my love for nature, especially trees, this is a project I’ve considered so many times over the years. But, other projects kept jumping in front of it.
You could certainly use a glycerin solution of one part glycerin to two parts water to further preserve the leaves prior to framing, but I did not do this and mine turned out just beautiful.
I had read that a glycerin bath could affect the coloring of the leaves, making yellows and orange leaves turn brown. While I wasn’t using any fall foliage, I still wanted to preserve the natural material and colors of the leaves I’d selected as much as possible.
Get more craft project ideas here.
SUPPLIES:
- Beautiful leaves from your favorite tree(s) or plant(s)
- Document frames (mine are from Walmart) or other wood frames / antique frames
- Rubber Cement or you could use Mod Podge
- Glass Cleaner (I’m a fan of SprayWay)
- Something to remove sticky remains of label on glass (This isn’t what I had on hand, but I really like this!)
- Heavy old book and other heavy objects for leaf pressing
- Plain, white printer paper
How to Put Your Pressed Leaves in Document Frames:
Clean any dirt or debris off of the glass prior to getting started.
Step 1: Find Some Leaves that you love.
Perhaps you love the way some particular leaves look, or perhaps a certain tree has meaning for you. You decide!
You will want to gather more than you think you will need, because some pressings will turn out better than other. Gotta have options!
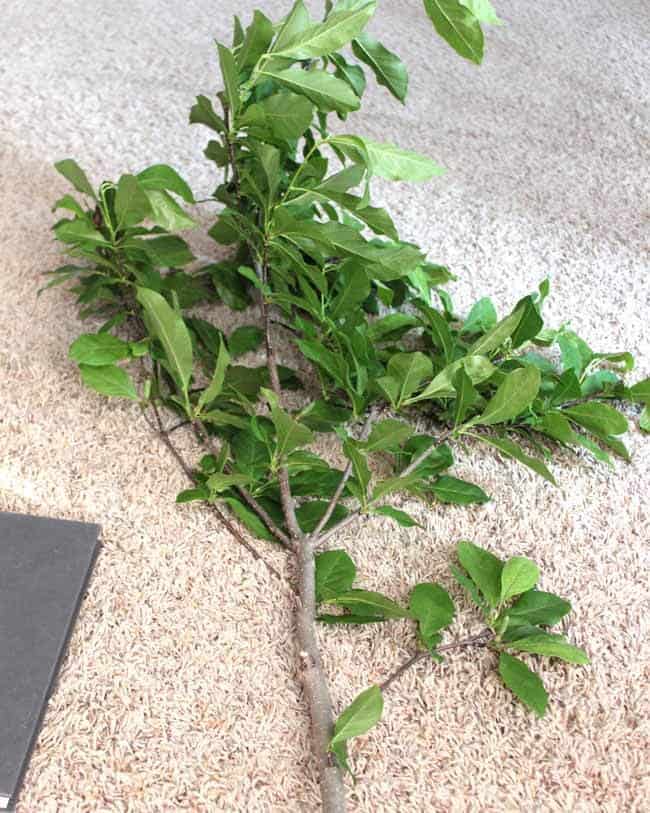
I gathered leaves from a pin oak, maple, and magnolia tree in our backyard. There are things I love about all of these trees and I was so excited to use each of them!
I should mention, this particular branch (below) actually broke off during a storm we had a couple of days before I started this project. You certainly do not need to take that much off of your tree!
Get more outdoor spaces project ideas here.
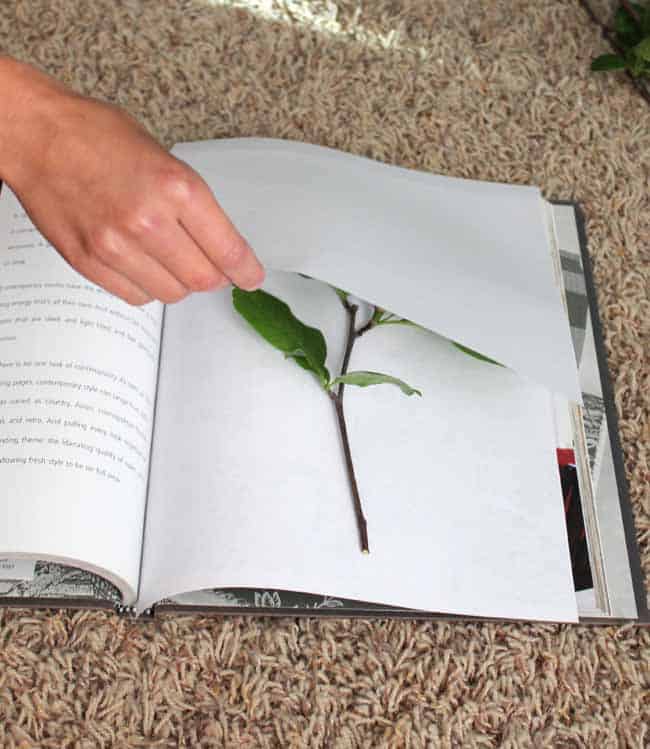
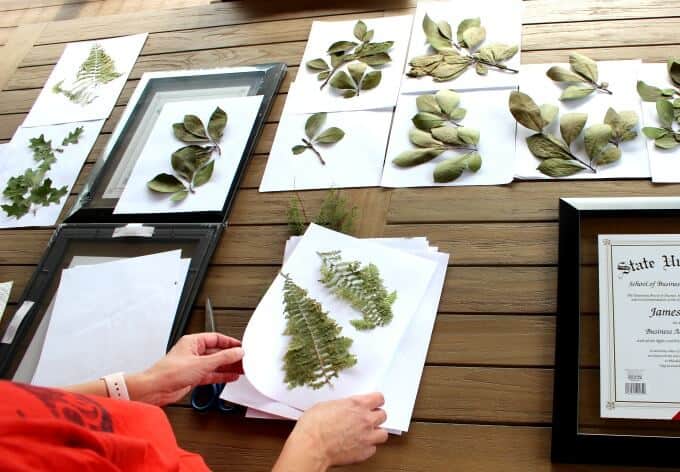
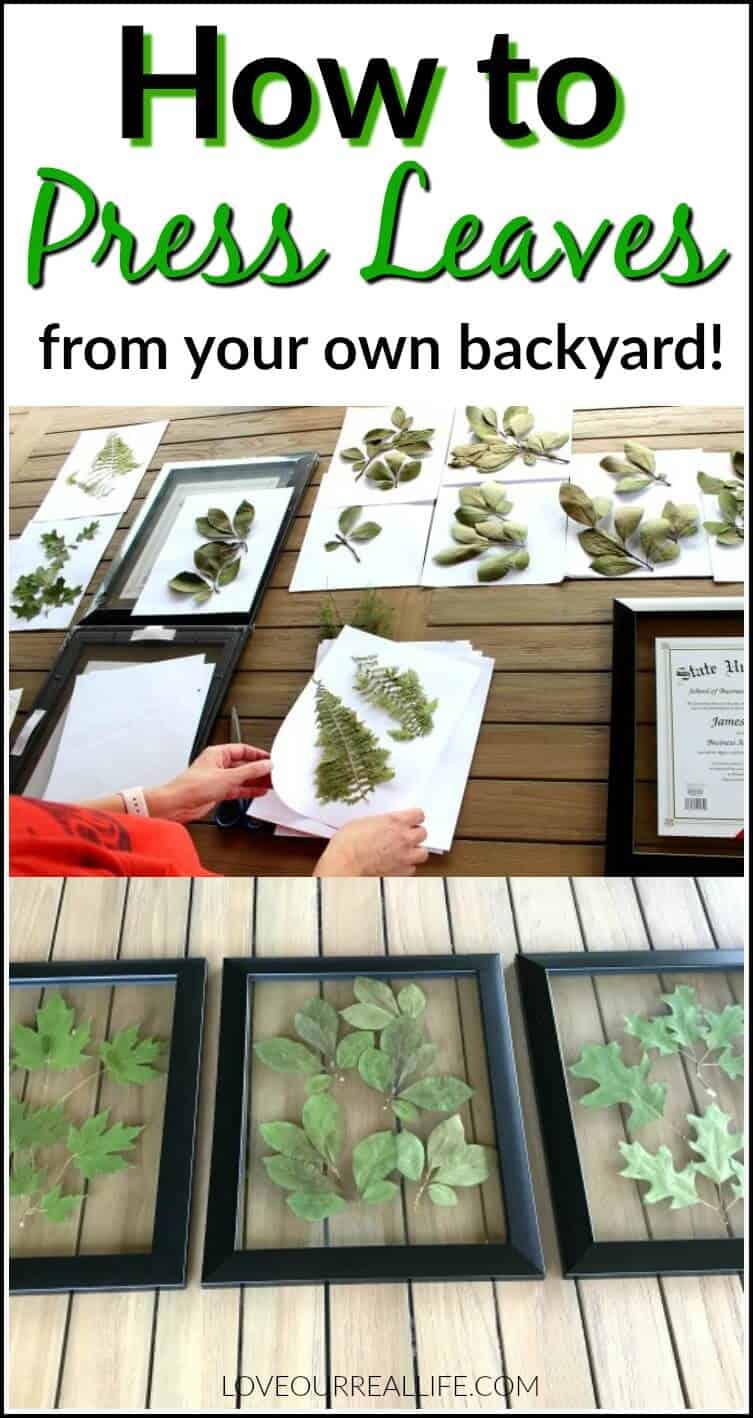
Step 2: Trim leaves down and press in book
Grab one of your heavy books, selecting a book that you don’t love. The oils in the leaves can leave a residue and potentially ruin some of the pages so a layer between the leaves and your book are necessary.
Trim the leaves down and place on a piece of plain printer paper or alternatively, between two sheets of wax paper.

The layer of paper did appear to help remove any lingering moisture. Plain printer paper is a more absorbent paper than wax paper, so it worked well for me.
Put a sheet on either side of the leaves, then gently close the book pages, pressing leaves flat. You might shape the arrangement of the leaves slightly to ensure they are not folded on top of themselves.
Step 3: Put a heavy object on the book
After placing the leave between two sheets of paper in your book, close it and place something really heavy on top of the book.
Then wait!
I waited about 2 weeks (I did this before our recent Alaska vacation), but one week would be sufficient time.
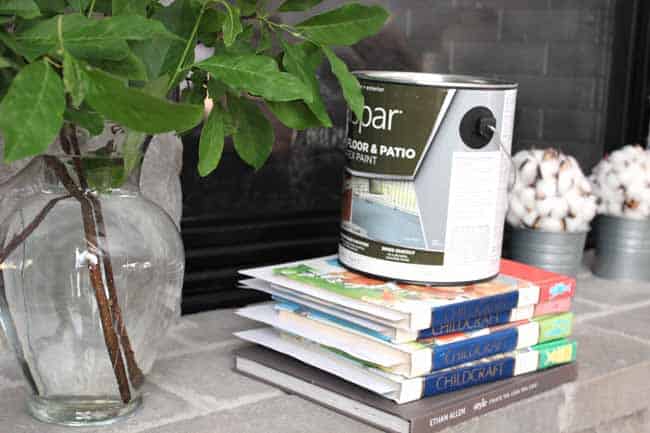
Note: some might suggest using an iron / ironing board to help flatten the leaves in less time. To me, placing a stack of books or other heavy item on top of the leaves seemed safer to ensure the leaves didn’t get ruined.
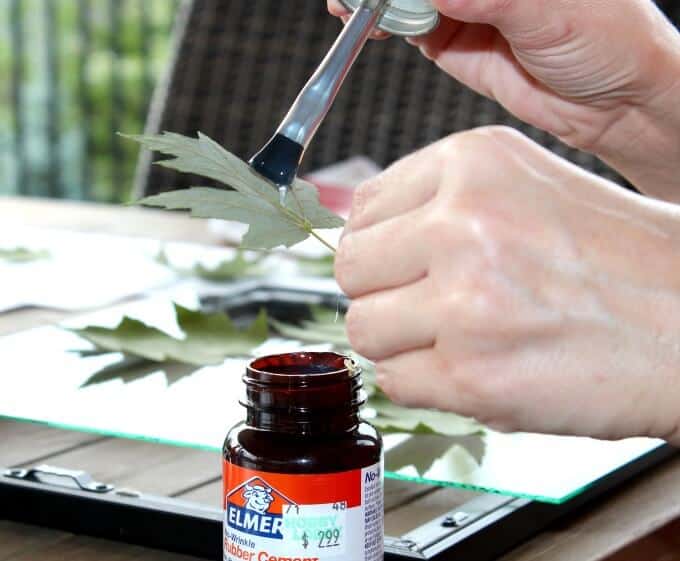
Step 4: Gather your other supplies to start the framing process
Grab your rubber cement, document frame, window cleaner and cloth, and possibly something to clean the sticky residue remaining from the paper used in packaging.


Step 5: Apply rubber cement to your leaves
I found the leaves I loved the best. Some certainly looked better than others.
I then applied a small amount of rubber cement to the back side of the leaf spine. Gently place the leaves in the arrangement you prefer, directly on the glass.
Step 6: Gently place the top sheet of glass over the leaves
Document frames work perfectly for this! The frames come with two sheet of glass. I really wanted this look versus using a white or even colored backing behind the leaves.
But, if you prefer having a white/colored background, you could easily grab a regular frame and use a paper color of your choice under the leaves.
It’s your pressed leaves project, make it your own! 😉
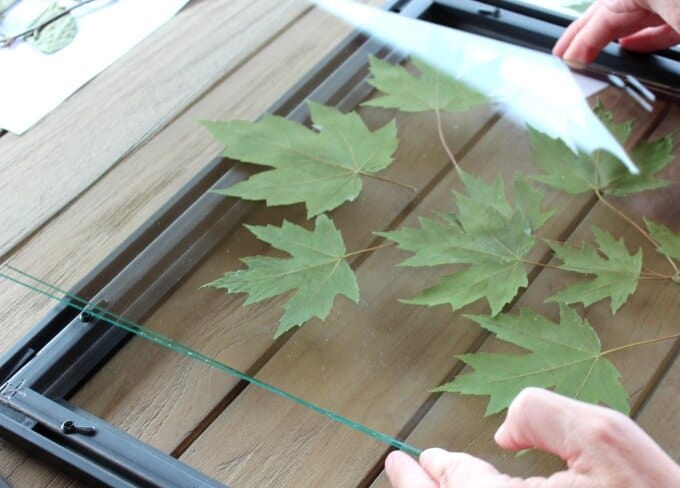
Reassembling the frame took a bit of care. I ended up getting finger prints everywhere!
I tried really hard to remove all of the fingerprints from the insides of the sheets of glass and handle primarily on the edges and outsides.
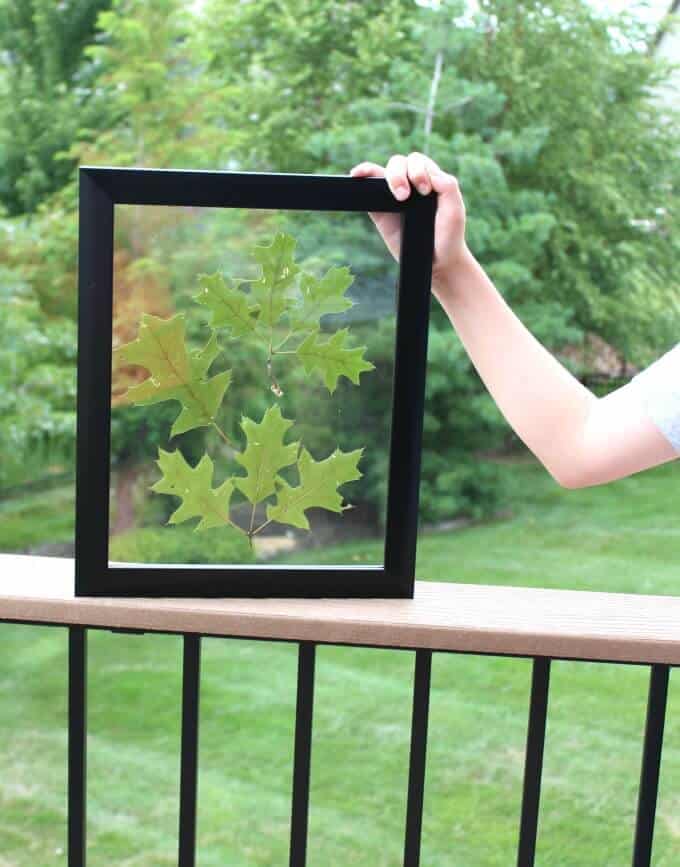
Pressed leaves in document frames!
I have several places I am considering hanging these beauties! Meaningful home decor is my favorite! Knowing these leaves are from some of our favorite trees makes them super special.
My son gets the credit for the majority of my outdoor photos in this post. He is almost 14 and any 1:1 time I get with him is precious. For whatever reason, he asked if he could help me! Be still my heart.
Do you have any trees you’d love to try this with? Share with me in the comments below!
If you want other ways to add meaningful home decor into your own home, you might like these:
- Repurpose a Vintage Window
- Paint Old Frames to Update Your Decor
- How to Create A Gallery Wall that is Personal to You
I’m so glad you are here!
PIN How to Press leaves to your favorite Pinterest board:
Try your own pressed leaves art project with leaves from trees you love!
You’ll be glad you did;-)


I have some old fern leaves pressed in a frame that my husband’s grandfather picked years ago. It’s a great way to add some natural elements to a space. Love it!
That is so special! I love that. As I’ve mentioned, decor that’s meaningful is the best!
I love this idea! I have been wanting to press some flowers but didn’t really know what to do with them, but I love the document frames!
Thanks! I’m glad I came across the document frames. They made the entire project easier!
What a great idea! These seem simple and inexpensive, yet are beautiful! I like the frames you chose, too, that leave the centers transparent. I think I’ll try this with some fall leaves!
Thanks, Amy! The frames were only $5.00 at Walmart!
Fabulous idea! I absolutely love fall colors. I hope I can remember to do this when the leaves turn! Thanks for the inspiration!
Yes, Jenifer! I’d like to grab some more then, too! 🍁
Love this idea for decorating a house or even an office. I remember doing thes projects as a kid. We used to make them and then make bookmarks, frame them and even make them into gift cards. We used to be so creative, not sure why we aren’t anymore! Thank for this reminder and for your post.
D, xo || from https://livedreamcreate-d.com
I completely understand feeling like we aren’t creative when we become adults. We have to make time for our creativity, though! It’s good for the soul!
What a great idea! And they look amazing! So fun!
Thanks so much, Lara!
oh my gosh this is such a interesting post! I will have to try this! You’re so right Joanna Gaines does know how to inspire! Thanks for sharing!!
Mich | simplymich.com
Thanks, Michelle! I hope you’re inspired;-)