DIY Ghost Garland: Easy Halloween Decoration
Garlands are one of my favorite ways to add a quick seasonal touch to any space, and this ghost garland is no exception. It’s simple, fun, and instantly gives your home a festive Halloween feel without being over the top.
You can make ghost garland spooky, playful, or even give it a more vintage vibe depending on the colors you choose. I used a mix of neutral cardstock for mine, which kept it subtle and elegant while still feeling perfectly Halloween-ready.

This garland is great for decorating for a Halloween house party, sprucing up your mantle, or just a fun weekend craft. It’s an easy DIY that brings big impact with minimal supplies. Plus, it’s relatively inexpensive to make!
Get more fall craft ideas here!
Supplies You’ll Need
This project only requires a few basics, most of which you probably already have on hand. I kept mine simple with neutral shades, but you can easily swap in traditional black and white or even bright colors if you want a more playful look.
Here’s what I used:
- Ghost outline (you can grab my printable for this!)
- Cardstock in black, beige, and gray
- Jute twine (or any string/ribbon you prefer)
- Scissors
- Glue stick
- Hole punch
- Painter’s tape (for hanging on the mantle without leaving marks)
That’s it!
Just a handful of supplies, and you’re ready to make a garland that you can hang up in minutes.
Ghost Garland Supplies


The above links are from Amazon and would be great additions to your craft supplies!
Step-by-Step Instructions (Ghost Garland DIY)
Making this ghost garland couldn’t be easier, and it comes together pretty quickly once your supplies are ready. Here’s exactly how I put mine together:
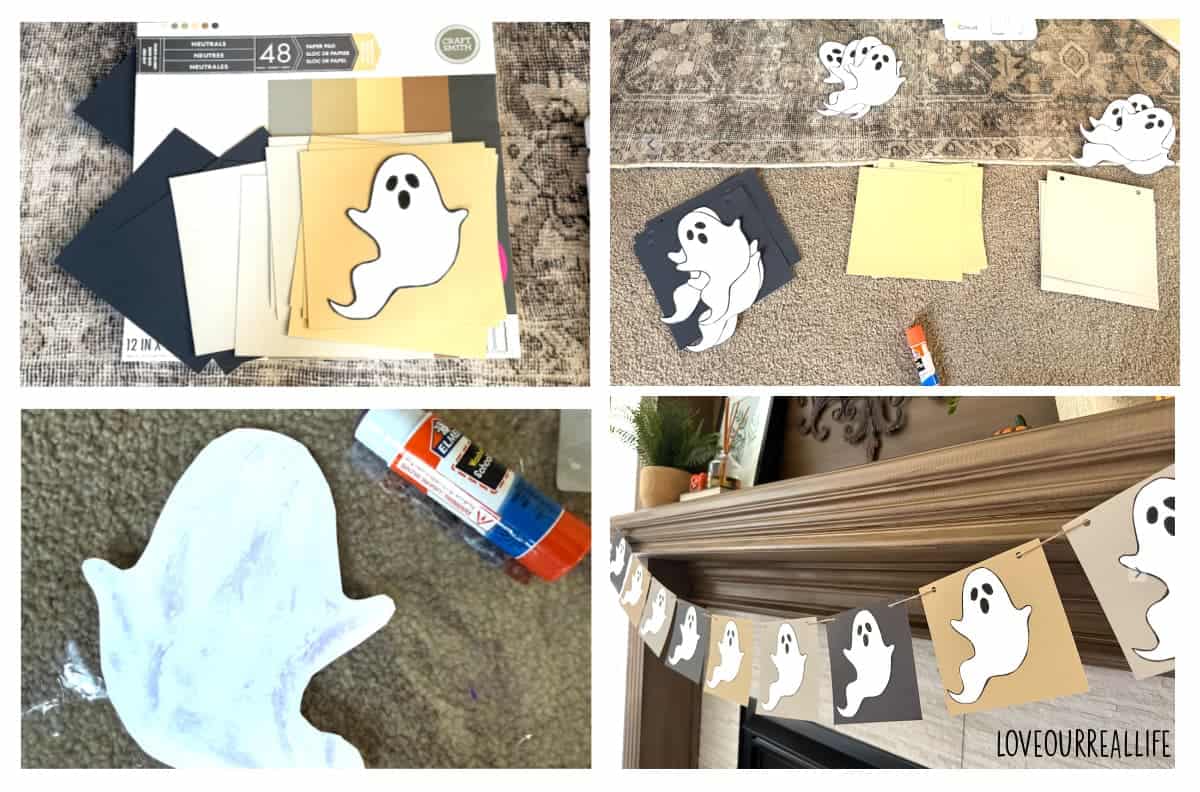
- Print and cut out the ghost outline. I used the printable from my ghost outline post (you can grab it too if you’d like a ready-to-go template).
- Prepare the cardstock. Cut your cardstock into pieces just slightly larger than the ghost silhouette. This gives each ghost a nice “framed” look once glued down. Use scissors or paper cutter to cut the card stock to the size you prefer.
- Glue the ghosts onto the cardstock. I alternated black, gold, and gray cardstock for a simple pattern. A glue stick works perfectly here, but you could use whatever adhesive you have on hand.
- Punch holes for stringing. Use a hole punch in the top left and right corners of each cardstock piece.
- String the garland. Thread your jute twine through the holes, keeping your color pattern consistent as you go.
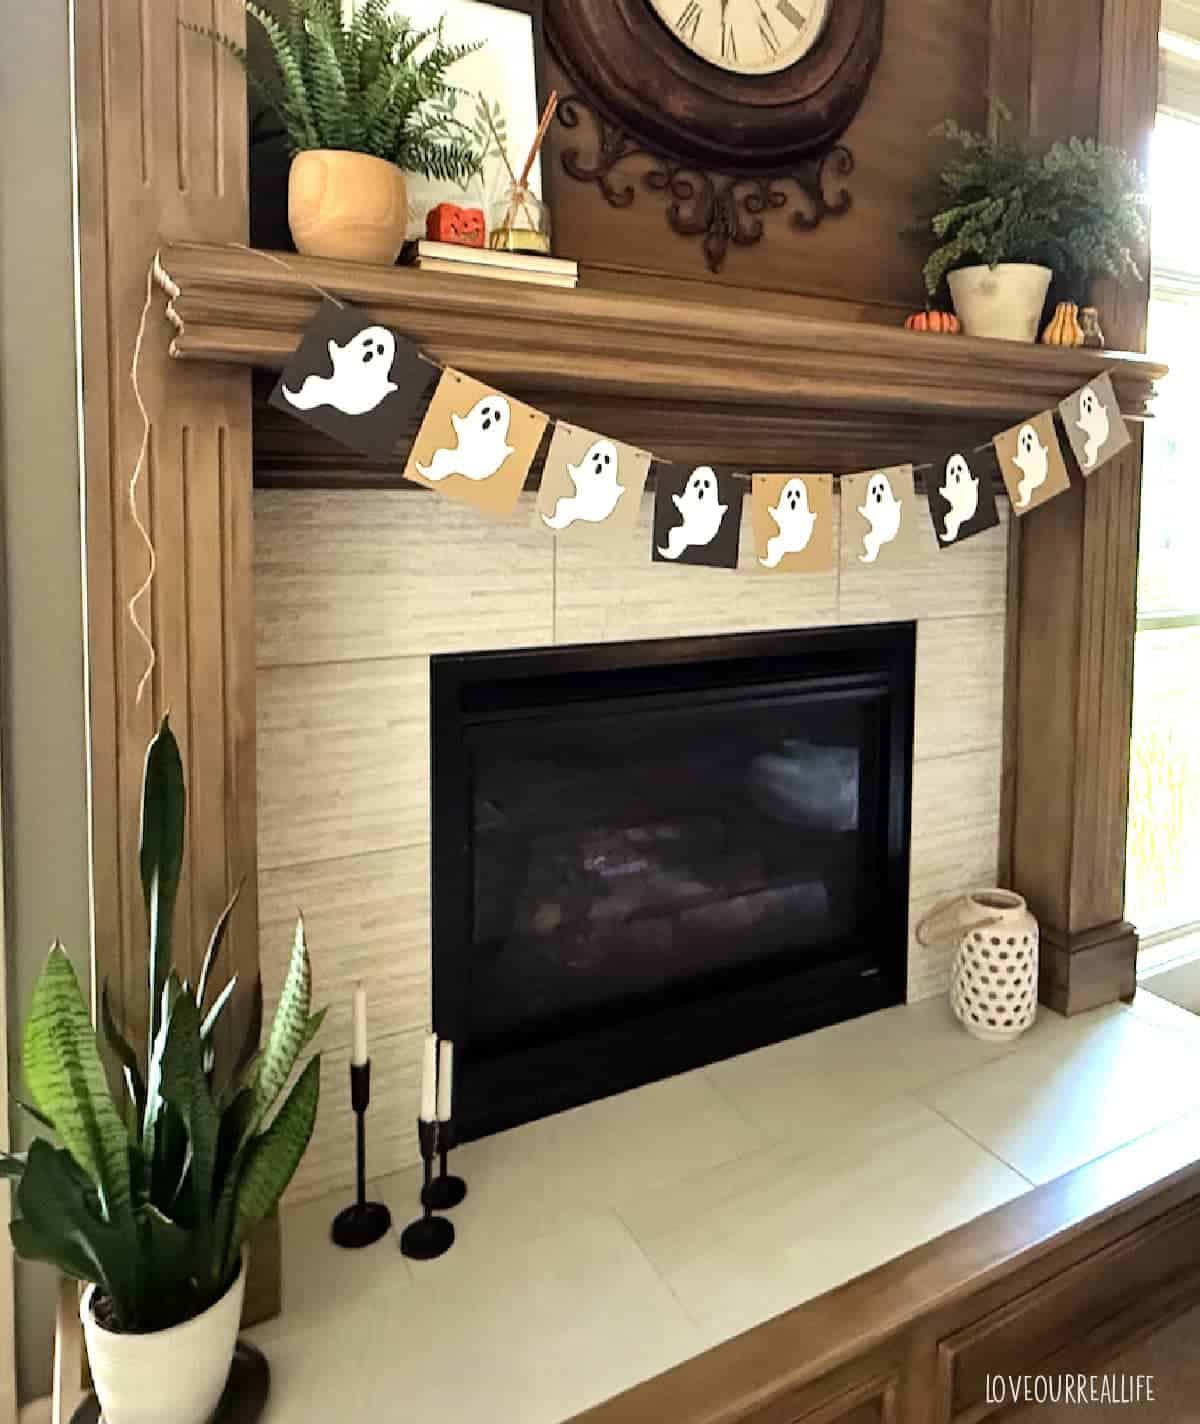
- Hang it up. I draped mine across the mantle and secured it with painter’s tape so it was easy to adjust and didn’t leave marks.
Just a few steps and you’ve got a fun Halloween decoration ready to display.
Styling Ideas for Your Ghost Garland
Keep your ghost garland simple and fun, or dress it up for a more elegant vibe. A few ideas to try:
- Classic Spooky Look: Stick with black and white cardstock and pair your garland with a simple bat garland for a traditional Halloween feel.
- Vintage Halloween Decorations: Use aged or tea-stained paper for your ghost backing and pair with muted candles or pumpkins for a nostalgic touch.
- Elegant Halloween Decor: Metallic cardstock (like gold or silver) instantly elevates the look. Layer the ghost garland with simple string lights for a chic effect.
- Doorway Statement: Use your garland as a Halloween door decoration by draping it over an entryway or front porch.
- Party Ready: If you’re hosting a Halloween house party, hang multiple strands together to create a backdrop behind a buffet or snack table.
Experiment with a few different looks!
Tips & Variations
Once you’ve mastered this ghost garland, it’s easy to switch things up for a different seasonal look or to create a layered effect with multiple garlands. A few fun variations to try:
- Pumpkin Garland: Use my pumpkin stencil printable and mix in a row of pumpkins between your ghosts for a classic fall vibe.
- Bat Garland: Try my bat printable and layer it with the ghost garland for a spooky-cute Halloween combo.
- Fall Leaves Garland: My fall leaves are perfect if you want a more autumnal look that carries beyond Halloween. Pairing leaves with ghosts gives a nice blend of cozy and festive.
- Mini Garlands: Scale the stencils down and make smaller garlands for kids’ rooms, bookshelves, or even table decor.
- Layered Display: Hang two or three garlands together (ghosts, bats, leaves) to create a fuller, more eye-catching decoration.
These variations let you get the most out of one simple idea. Decorate your whole house with garlands that tie together without all looking the same.
Conclusion
This ghost garland is such an easy DIY that brings a lot of charm to your Halloween decorating.
With just a few supplies and a little bit of time, you can create something that feels handmade and special, whether you want it spooky, playful, or even a little elegant.
I love that it works just as well for a cozy mantle display as it does for a Halloween house party backdrop or even a welcoming touch on your doorway. And with the simple stencil variations, you can take this same idea and make garlands for the whole season.
I’d love to hear how you styled yours!
Get Access to the FREE Printables Library
When you join our newsletter!