How to Paint Cabinet Hardware – Easy, Fast, Step by Step
Need to paint cabinet hardware? Whether to spruce up a kitchen or bath, or to give furniture a fresh new look, a coat of paint on cabinet hardware is one of the easiest and least expensive ways to beautify almost any room in the house.

Get more painting tips and furniture updates here.
To paint cabinet hardware, you must remove the hardware and clean it well. After ample dry time, apply 3-4 thin coats of spray paint. Allow 48 hours for dry time, then reattach.
That’s a fairly simplified version of how to do it, but it is truly very easy!
New hardware can be really expensive. Using a little DIY with paint on old cabinet hardware can save you some real money while allowing the original hardware to get a new life!
Can You Paint Cabinet Hardware?
Yes, you can paint cabinet hardware. Paint is a great way to give update old hardware and avoid to cost of purchasing new.
With a few simple steps, you can successfully paint old hardware that will be durable and beautiful.
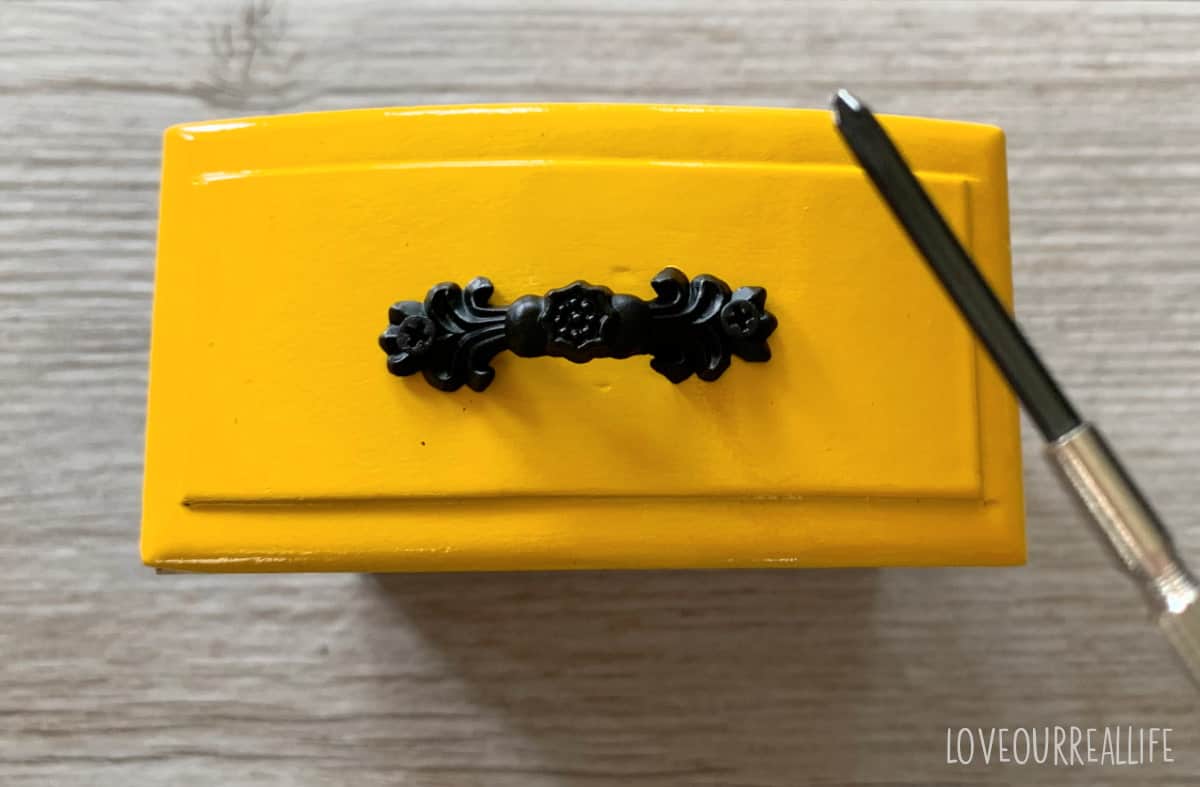
Many of the images in this post are from when I spray painted the hardware on a jewelry box makeover, but I’ve done this for several cabinet and furniture projects with good success.
Remove Hardware for Painting
Whether you are painting kitchen cabinet hardware, hardware from bathroom cabinets or even on household furniture, it will need to be removed prior to painting.
Cabinet door hinges, cabinet knobs, or door handles are removed with a screwdriver.
Most pulls and knobs require a phillips screwdriver, but just in case yours are different, have a flat head screwdriver handy.
It can be easy to misplace screws, so be deliberate when removing. Stick them in a cardboard box or piece of foam as you remove them.
Make sure you wipe any dirt from the surface of the screws and clean as needed prior to painting.
How Do You Prepare Hardware for Painting?
Before painting nearly anything, including hardware for cabinets, furniture, drawer pulls, etc., it is important to make sure that the surface is ready to accept paint.
Depending on the specific type of paint you use (more on that later), there are occasionally a few of the prep steps you can skip.
But, generally speaking, the following preparations are necessary to get the old hardware ready for paint and to ensure durability.
- Wipe away all dirt and dust from hardware.
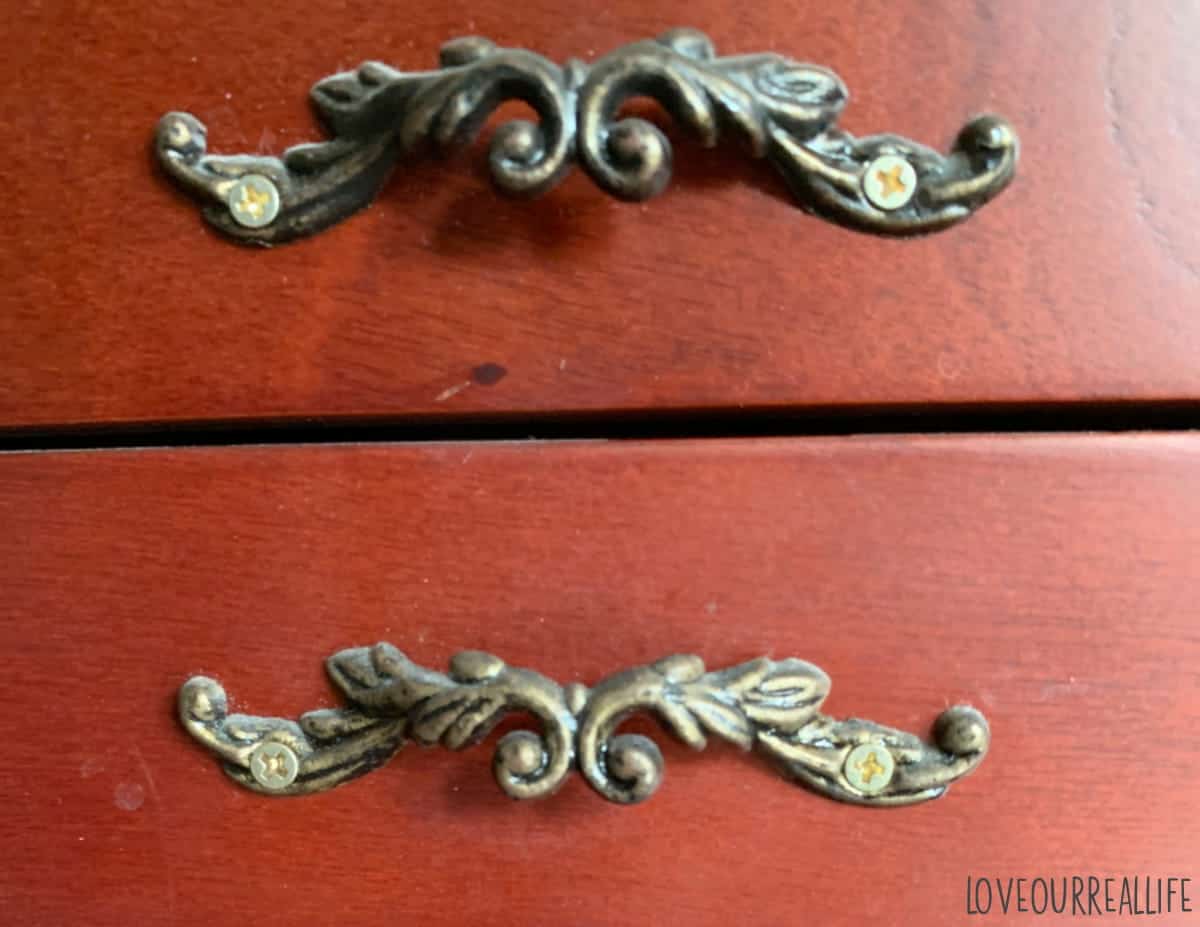
- If the knobs/pulls/hinges were painted previously and you note chipping paint, the old paint will need to be removed for a smooth finish.
- Use a degreaser to clean and remove all grease from hardware as needed (such as kitchen handles).
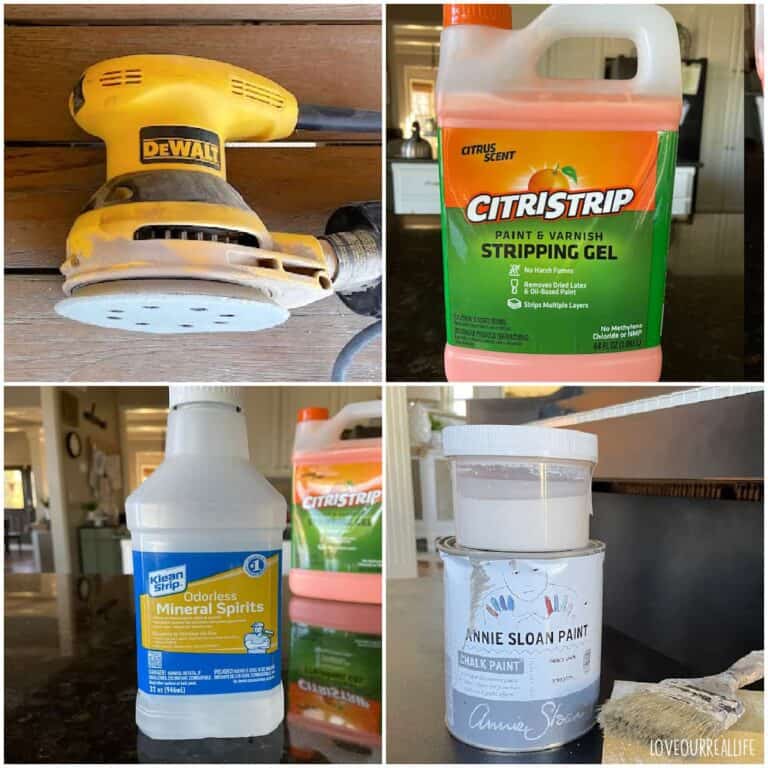
How to Strip Paint from Old Hardware
Stripping the paint from previously painted hardware isn’t always necessary.
If the old paint is not chipping and is in good shape, you can just paint over it in the color of your choice after a thorough cleaning.
However, as I mentioned earlier, if you notice a lot of chips and peeling paint, it will need addressed prior to adding more paint over top the old paint.
If there are just minimal chips, use steel wool or fine grit sandpaper to smooth the surface. Use caution though as this could scratch the surface and leave grooves that could be visible after painting.
However, if the paint is chipping badly it is best to take the time to strip it before repainting.
Options for stripping the paint:
- use a utility knife to scrape away chipping paint
- soak in dish soap and very warm water or even hot water
- use a paint stripper such as Citristrip
After removing the majority of the paint use a brush sponge to remove any additional flaking pieces.
When the paint is adequately removed from the furniture hardware, it is time to clean it.
How Do you Clean Old Hardware Before Painting?
For the majority of paints, the following steps should be used to clean cabinets knobs, pulls, hinges or other hardware prior to painting.
Simply wiping away any dirt could be all that is required.
But, if the hardware was used in the kitchen where it was in contact with grease or if it received daily use, it will likely need a degreaser.
Soak the old hardware in hot soapy water and scrub with a degreaser such as Barkeepers Friend. Another option for a good degreaser is the Heirloom Traditions Paint Deglosser/Degreaser.
It is really good stuff!
This process is very similar to removing the old paint. So, if you already had to complete that step, you may be good to go.
RELATED: Heirloom Traditions All in One Paint Review
Do You Need to Sand Hardware Before Painting?
Sanding old hardware prior to painting is only necessary if you need to smooth out the surface.
Some examples of when to sand the hardware is if there are very minor scratches or paint chips from previous paint that need to be smoothed down.
Keep in mind that sanding the surface slightly can help rough it up to accept paint more easily. So, if your surface is slick, you may wish to use a very fine grit sandpaper prior to painting.
Be sure to wipe away any dust made from sanding.
RELATED: How to Choose the Best Size Knobs and Pulls for Cabinets
What Kind of Paint Do You Use on Hardware?
Can you spray paint metal hardware? Yes, spray paint is my absolute favorite way to paint hardware. It is so much easier to get in all of the nooks and crannies and can allow you to paint from various angles.
The spray paint finish you select is a matter of personal preference, but I think a satin finish hides smudges and fingerprints well. Satin is my usual go to sheen for hardware.
Priming the hardware is VERY helpful to ensure durability. But, I also love to save time whenever possible. This is why I select spray paint with a build in primer. This allows you to avoid the need for a primer coat and just jump right in and spray paint hardware!
The paint and primer combination also do not require an additional topcoat. Another time saver.
My top picks for spray paint brands when painting hardware:
Another option that works well is Rust-Oleum Protective Enamel. However note this does require an additional primer and top coat. So, for ease of use, I would select one of the other options.
How to Paint Cabinet Hardware
Now that you have cleaned you hardware, you are ready to spray paint.
How do you paint cabinet hinges, kitchen cabinet handles, metal knobs, or any other piece of hardware? Well, in my opinion, the actual painting is the fastest part of the process.
Place all of the hardware out on a piece of cardboard, allowing space between for easier painting.
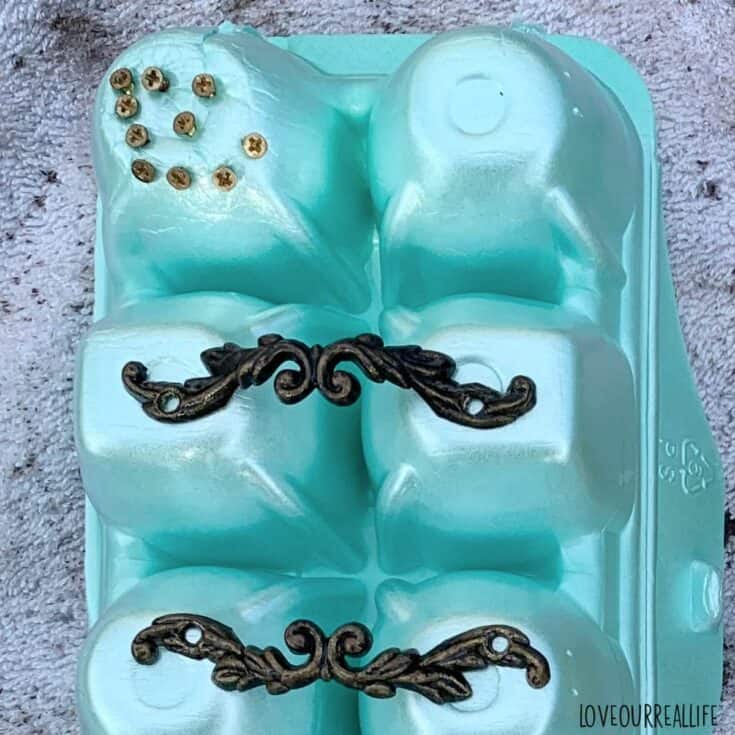
For painting the screws, I have found that it is easiest to push screws slightly into a styrofoam egg carton. This allows you to paint all angles and the styrofoam hold the screws in place.
On the hardware itself, spray paint the underside first and allow ample dry time between coats. Once it has completely dried, carefully turn the hardware over to paint to front.
Use very thin coats, allowing adequate dry time between each coat. For full coverage, you will need ~3-4 thin coats.
Allow 48 hours of dry time/ cure time after painting prior to reattaching.
RELATED: How to Paint Cabinets without Priming
How to paint cabinet hardware hinges?
The exact same process goes for painting cabinet hinges. Thin coats of spray paint with sufficient dry time between coats are necessary for full coverage with optimal durability.
Hinges require a good amount of toughing when reattaching, also wait at least 48 hours of dry time prior to reattaching.
RELATED: Is Brushed Nickel Going Out of Style?
FAQS
If you are placing hardware on newly painted cabinets, wait a minimum of 48 hours after your final coat is completed on the cabinets or furniture before reattaching the hardware.
This allows the cabinet or furniture more time to cure and will in turn be less likely to scratch.
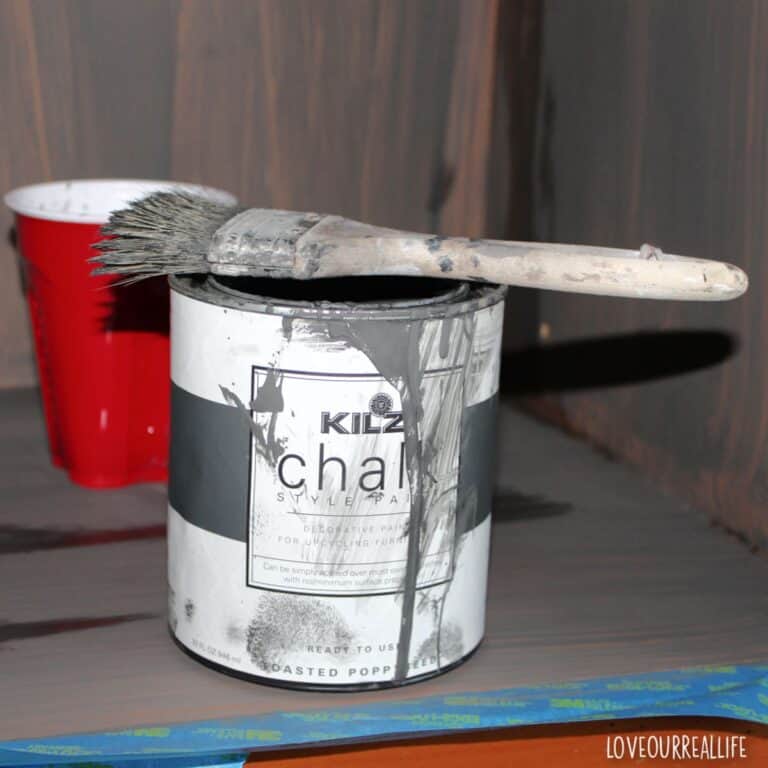
Yes, you can use chalk paint for updating cabinet hardware. However, note it will be more prone to chipping than most spray paints. Chalk paint also requires a top coat for improved durability.
You can paint over already painted metal. If the hardware is not chipping, it only requires a thorough cleaning prior to painting. However, if significant chipping and flaking of the paint are noted, you will need to strip away the majority of the paint.
Black is a popular color for cabinet hardware. If this is your color of choice, you will need to follow the general steps of cleaning the hardware, then selecting a quality spray paint in black. Thin coats are recommended (3-4) with thorough dry time between coats. Let the spray paint cure /dry for 48 hours prior to re-attaching the hardware.
Other Painting Projects with Spray Paint
I’ve used spray paint on countless projects over the years to update our home, interior and exterior projects. Spray paint is a great way to get a project done quickly for a smooth and beautiful finish.
A few of my favorite spray paint projects include:
- The Best Spray Paint for Outdoor Metal Furniture
- Easy Instructions to Paint Outdoor Furniture
- How to Spray Paint a Decorative Lantern
How to Paint Cabinet Hardware - Tips for a Durable Finish
Follow these simple steps to paint your old cabinet hardware for an updated look without spending a lot of money.
Materials
- Degreaser
- Soap and water
- Brush
- Spray paint
- Egg carton (styrofoam)
- Piece of cardboard
Tools
- Screwdriver - phillips
Instructions
- Remove all hardware from the cabinet or furniture piece. Use screwdriver to remove hardware. Stick the screws in a piece of foam or styrofoam egg carton so they do not get misplaced.
- Clean hardware. Wipe away any visible dirt or dust. Use warm soap and water to clean old hardware. Use a degreaser for hardware that has been in the kitchen or exposed to grease. Allow to thoroughly dry.
- Remove any peeling old paint. If the hardware was painted previously, you will need to ensure the surface is smooth prior to painting over old paint. If paint is chipping, this will need to be removed by scraping old paint, sanding area, or using a paint stripper. Paint can also be removed by boiling hardware then peeling paint. If previous paint is still intact and not chipping, just clean and paint over it!
- Spray Paint Hardware. Place hardware on piece of cardboard with adequate space between for good coverage of all angles. Using 3-4 thin coats, spray paint all screws, hinges, and hardware, ensuring you get all angles. Allow adequate dry time between (see can).
- Allow 48 hours dry time. Wait a full 48 hours if possible prior to re-attaching hardware to ensure curing/drying of hardware.
Notes
If hardware was painted previously, it does not necessarily mean it has to be stripped completely of paint. This is only needed if significant chipping or peeling is present. If only minor chipping is noted, use fine grit sandpaper to smooth surface.