How to Add an Iron On Christmas Design to a Facemask
Whether we like it or not, wearing face masks has become a part of our lives this past year. I’m trying really hard to find ways to make this yucky year feel a bit more positive. Sometimes it’s the little things that can spark joy for others. Hence iron on Christmas designs on face masks.
When using a cutting machine, creating an iron-on decal is a simple way to personalize your face mask this holiday season, or frankly, any time. IF you don’t have a cutting machine (Silhouette Cameo or Cricut), ask around; I bet a you have a friend that does. OR, see below where I link to cute iron on decals you can purchase on Amazon.
Making an iron on decal with heat transfer vinyl is a quick project. Select a design of choice (saying or image), use cutting machine to cut out design, then iron/press the design onto the face mask. This project can be completed in 15 minutes or less.

Get more Christmas crafts here.
If you do not have a cutting machine (Silhouette Cameo or Cricut), you can find a wide variety of Christmas related iron on decals on Amazon that you can use on your plain face masks to add a little Christmas spirit.
Can you put HTV (heat transfer vinyl) on face masks?
First things first. I’ve read a lot of controversy on the safety of using heat transfer vinyl on face masks.
Yes, you can use heat transfer vinyl on face masks. Siser, a company that makes vinyl for projects such as this, reports they have done extensive research and “found there is no immediate danger to applying HTV to the front (mouth and nose areas) of the mask.”
I prefer to put my iron on decal on the far side of the mask where it isn’t directly over the mouth or nose. But if you have concerns, by all means, go with your gut.
Materials for Iron On Decal for Face Mask
- Heat transfer vinyl (I prefer Siser EasyWeed)
- Cutting machine (mine is a Silhouette Cameo 3)
- Face mask (a plain color would work best for this project)
- Scissors
- Weeding tool
- Iron
- Parchment paper or teflon sheet (I use parchment paper and it works just fine)
Instructions for applying an iron on decal (heat transfer vinyl) to a face mask:
1. Select Christmas Design for Mask
Finding a simple Christmas design you love is pretty simple. If you have a special Christmas song, use a line from that in your favorite font.
I recently made a pretty Christmas pillow with HTV using “Oh What Fun”. It turned out stinking cute, if I say so myself.
2. Use Cutting Machine to Cut out Design
Follow the cutting machine instructions for HTV. Ensure you use the mirror image so the design faces as it should once it is pressed onto your fabric.
3. Weed Away the Unwanted Vinyl from to Applying
I tend to use simple designs as I don’t love to weed! If you are not familiar with a cutting machine “weeding” simply means that you use a weeding tool or hook (see below) to weed away the unnecessary vinyl from the design.
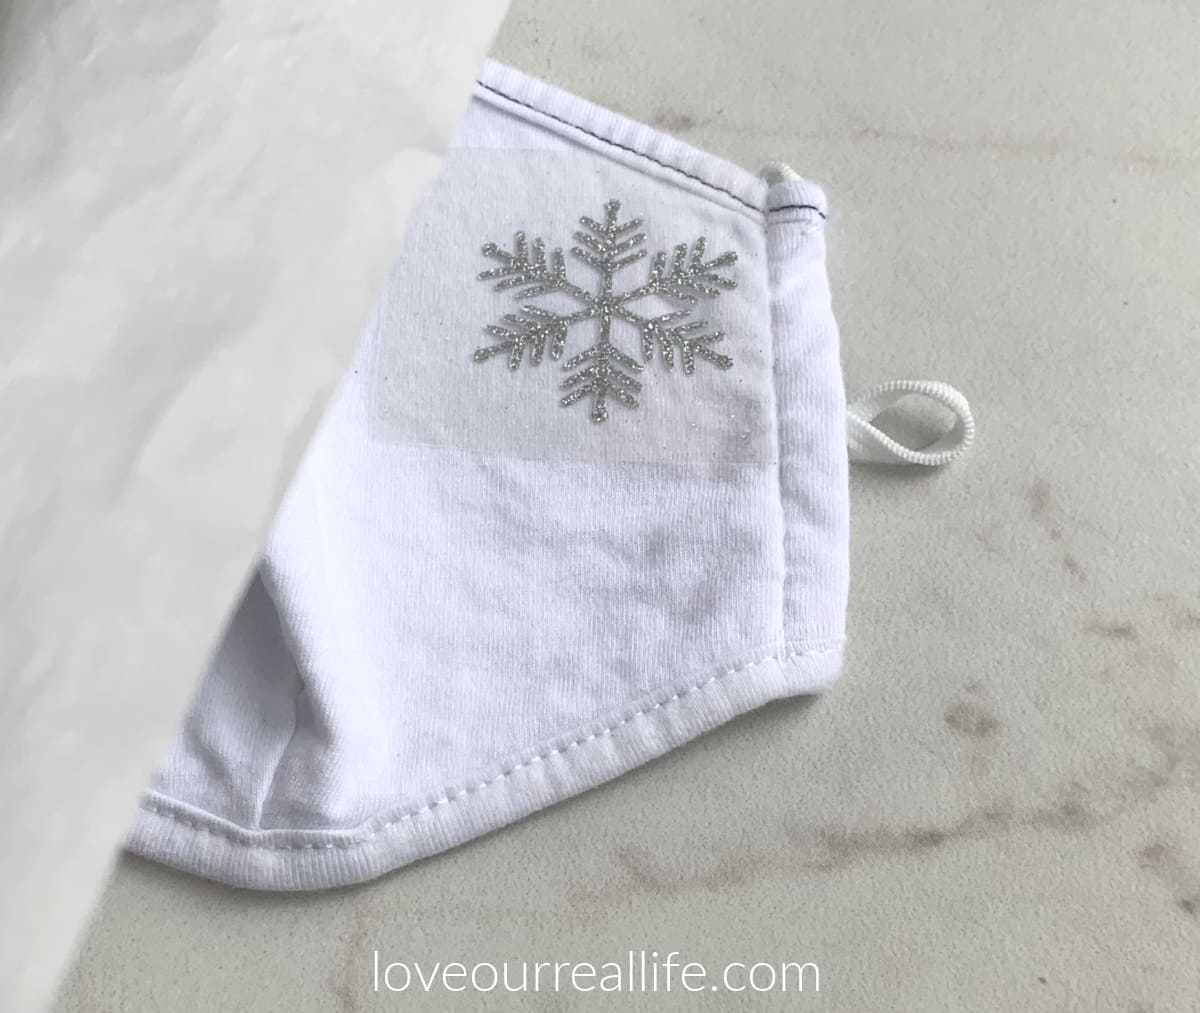
This simple snowflake was in glitter HTV and I was able to weed it in no time at all!

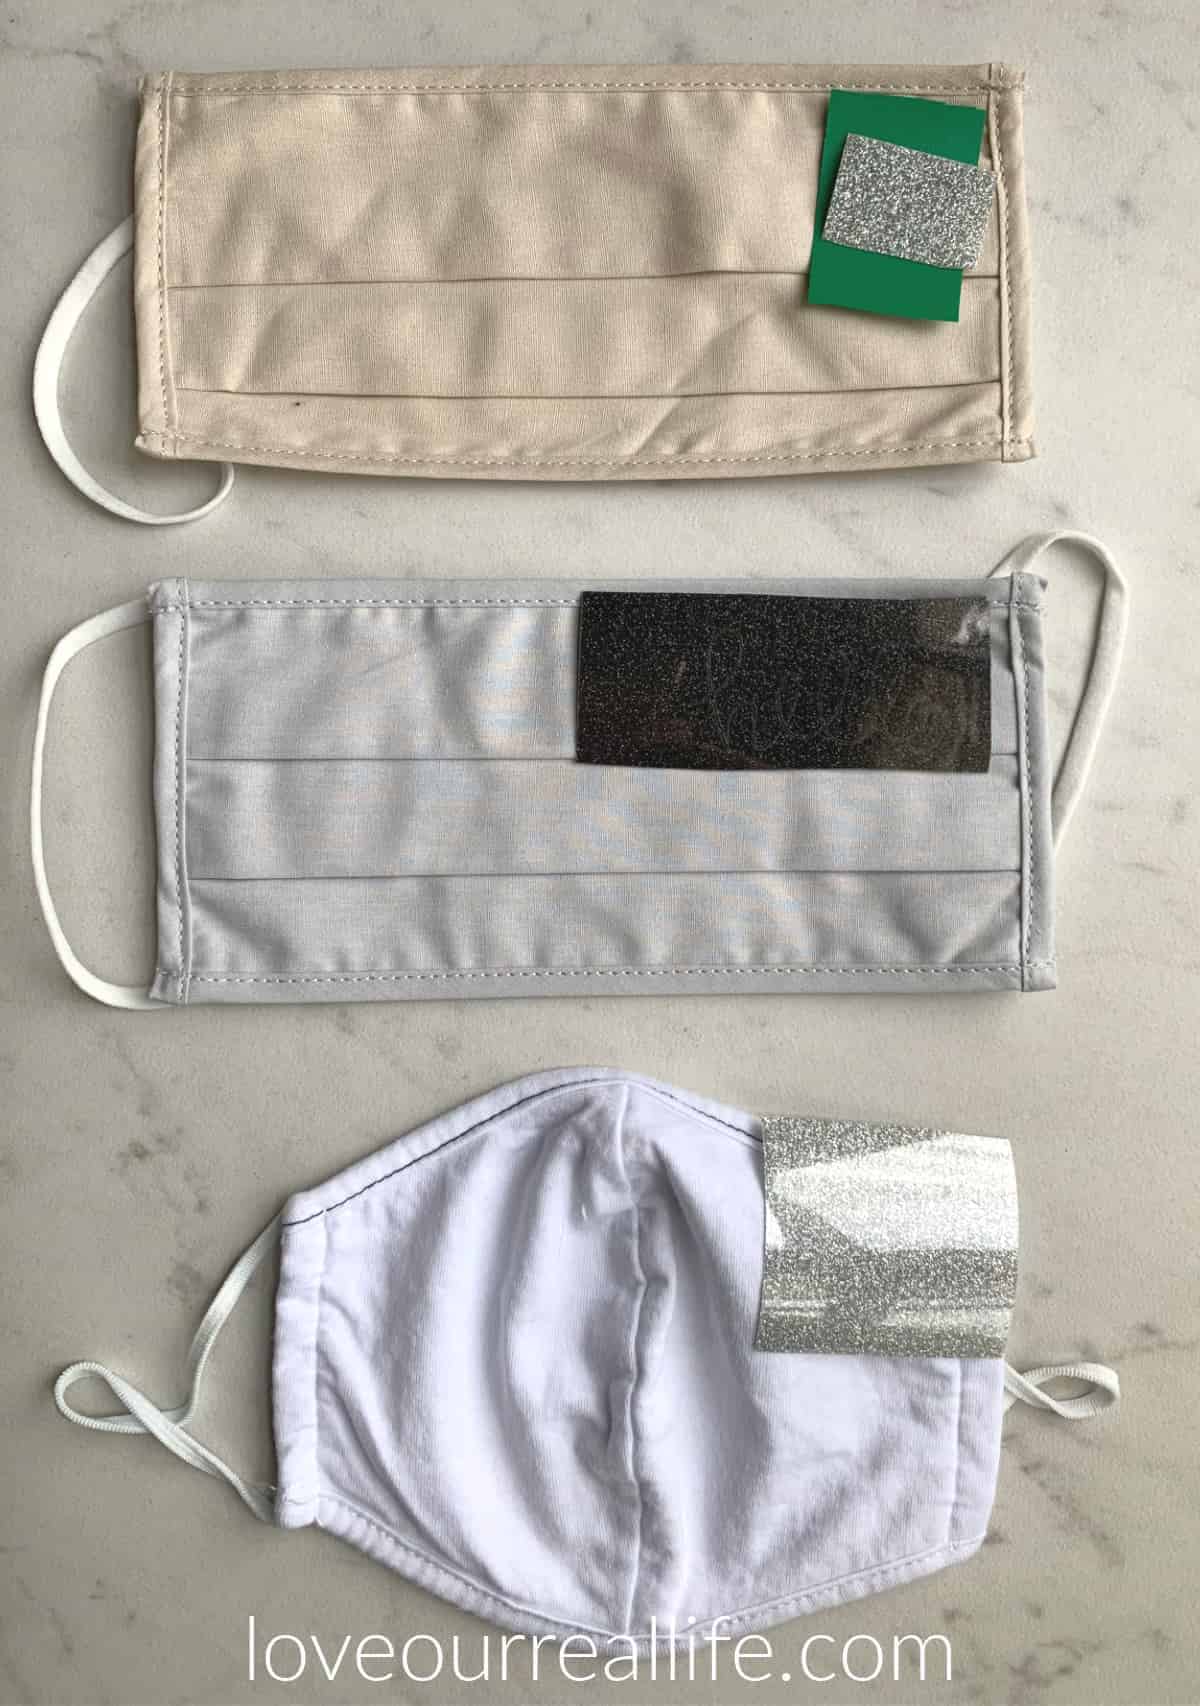
4. Determine Placement of Design on Mask
As I mentioned above, I like simple designs on the side of my mask. You do what works best for you and your design.
5. Cover Vinyl with Parchment Paper
Parchment paper helps seal iron-on transfers onto fabric. Parchment paper allows for a nice, smooth transfer, plus it’s easy to come by. Some people like to use teflon sheets for heat pressing projects, but I’ve always just stuck with parchment paper and have had no regrets.
I keep a sheet with my other vinyl supplies and I’ve used the exact same sheet SO many times and it still works great.
6. Press/Iron On the Vinyl Decal
I don’t do a ton of heat transfer vinyl projects, so I haven’t felt the need to invest in a heat press. An iron does require a good amount of pressure to ensure your vinyl adheres properly to your fabric.
When you have your design placed where you want it and it is covered with parchment paper, hold your hot iron on the design for ~30 seconds.
I use do this on the ground so I am able to use all of my body weight over the iron.

Attempt to peel the very edge of the carrier sheet to see if the design has fully transferred. If you notice edges of the vinyl have not fully adhered, complete this (iron-on) step again.
7. Peel away Carrier Sheet
After your design is securely in place, peel away the carrier sheet from the vinyl.
Be sure the carrier sheet is cool enough to touch! If not, just give it a few seconds and you should be good to go.
Peel away!

In the case of my Christmas tree, I had two layers of vinyl. If you select various colors for your design just repeat the steps with each color until your design in complete.

AND…that is it!
8. Wash as Normal
Once you have the vinyl adhered on the fabric, you can wash your mask just as you normally would!
On occasion, I notice the edges of some of my heat transfer vinyl projects might start to peel up a bit.
If this happens, just throw the parchment paper over your design and hold a hot iron over your vinyl with lots of pressure as you did above and you will be good to go!

Other Projects Using Vinyl:
- Christmas Pillow Cover Tutorial
- St Patricks Day Sign using HTV on Reverse Canvas
- Reverse Canvas: What are They and How Do You Make Them?
- Buffalo Plaid Embroidery Hoop Ornament
- Time Zone Wall Clocks
Don’t forget to PIN THIS to your favorite Pinterest board!