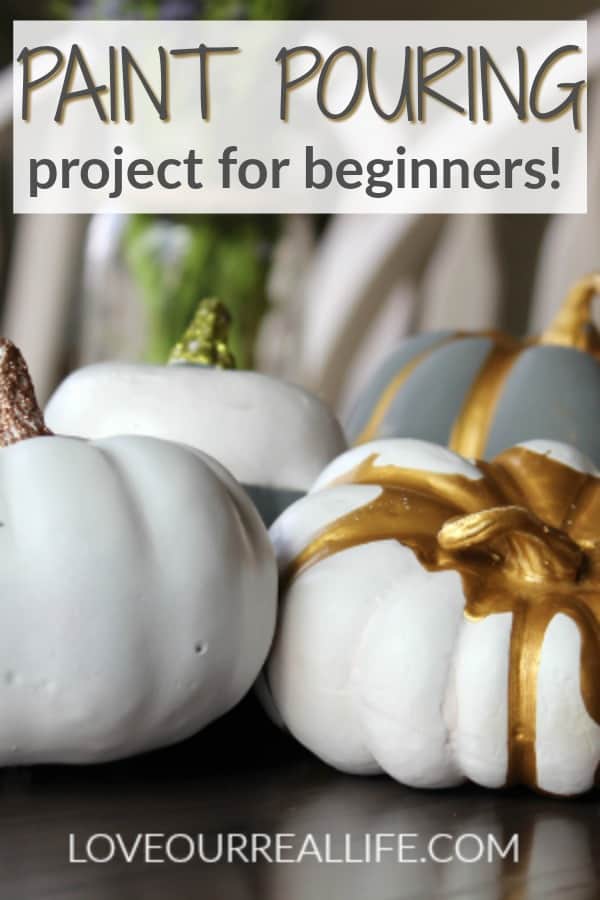
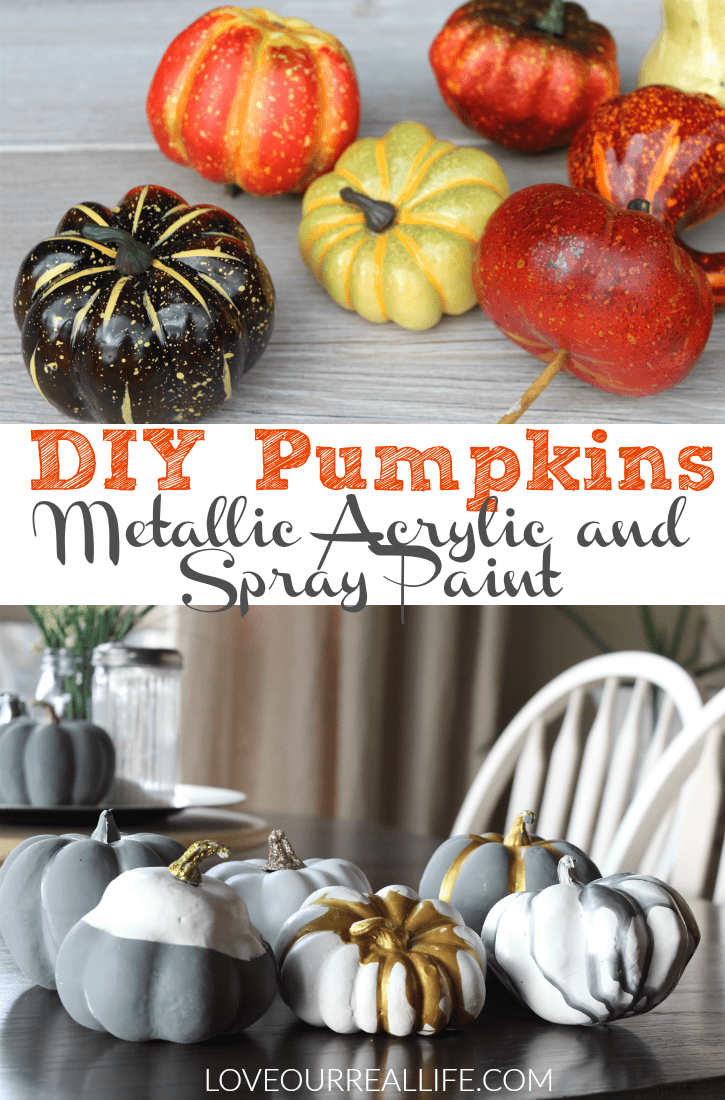
How to Paint Plastic Pumpkins: DIY Fall Decor
Looking for tips how to paint plastic pumpkins? Painting cheap plastic pumpkins is a fun way to turn Dollar store fake pumpkins into something beautiful. If you need creative ideas for DIY projects this fall, painting faux pumpkins with metallic acrylic paint and spray paint is the perfect project for you to try!
I was hoping to make these cheap, plastic pumpkins look a bit more classy so I could use them in my fall home decor. In my opinion, this project did just that!
Get more fall diy and craft ideas here!
Pumpkin Painting Ideas:
This post contains affiliate links which means I will make a commission should you purchase something through one of my links.
Supplies for Painting Pumpkins:
- Plastic pumpkins (You could use real pumpkins, too! – Dollar Tree pumpkins are great for this project)
- Spray paint (I used Krylon Matte White and Krylon Gray Primer. The links attached are not the exact paints, but close. Frankly, any white or gray paint would work well, just be sure to get a matte finish if you want them to look similar to mine) You might also consider black spray paint. Peruse the spray paint aisle and just find your favorite color and go with it.
- Metallic Acrylic Paint (I used Folk Art Metallic Sterling Silver and Folk Art Metallic Gold).
- Glitter glue or alternatively you could use Mod Podge and Glitter
- Small paint brushes
- Painter’s tape
- Drop cloth
- A damp paper towel to clean up messes as needed.
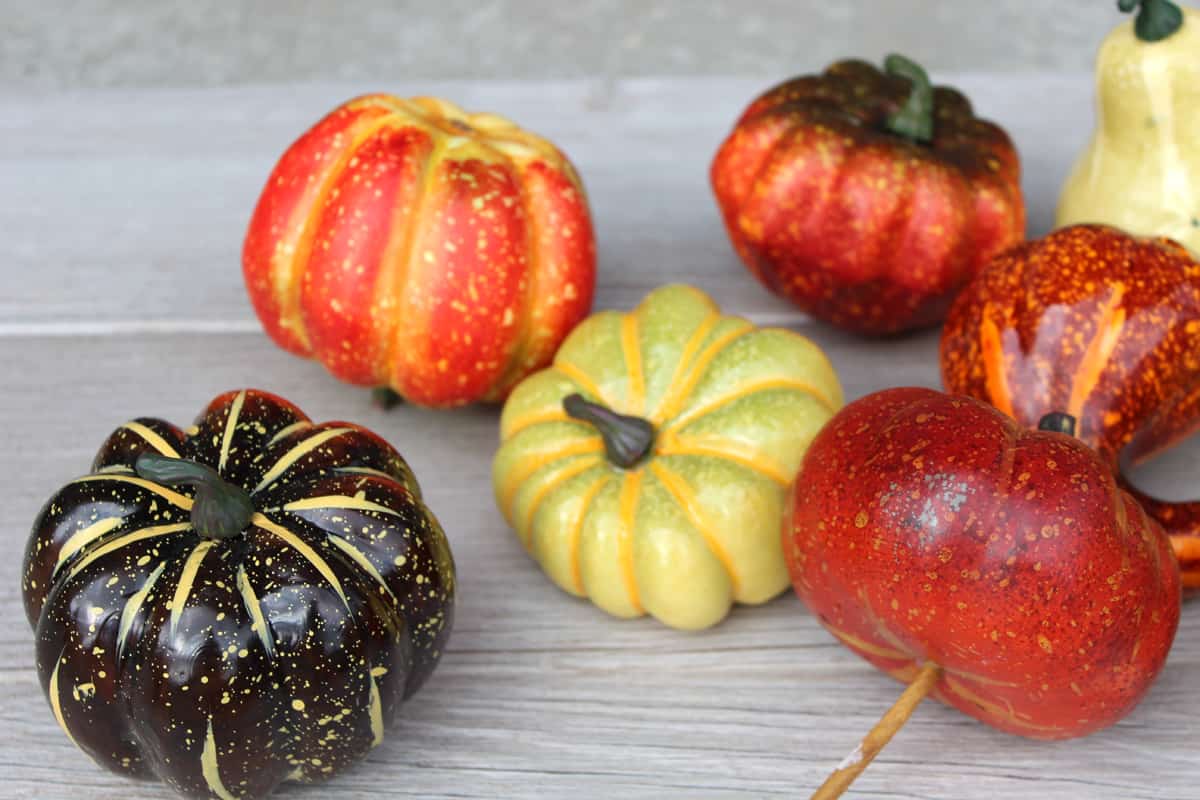
My BEFORE pumpkins:
Related: More Painted Pumpkins!
How to Paint Pumpkins:
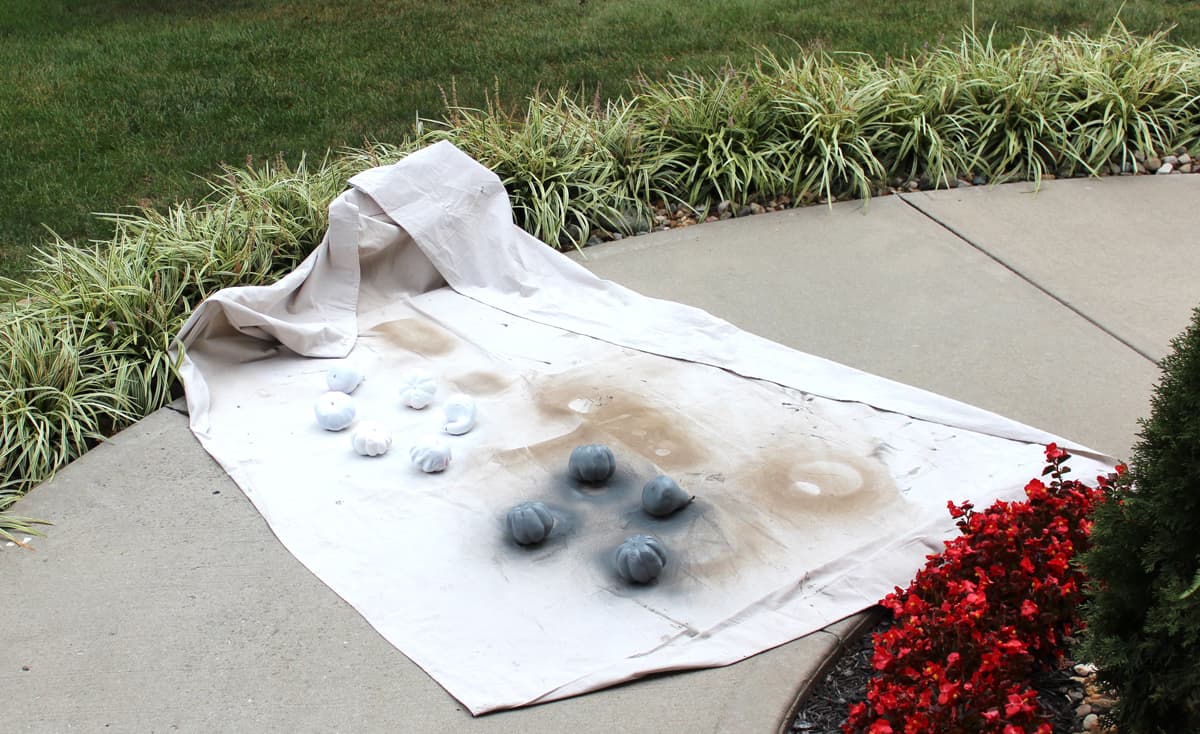
The first step is to protect your working area with a drop cloth. I did most of my work on my front porch because I wanted good air circulation while using paint.
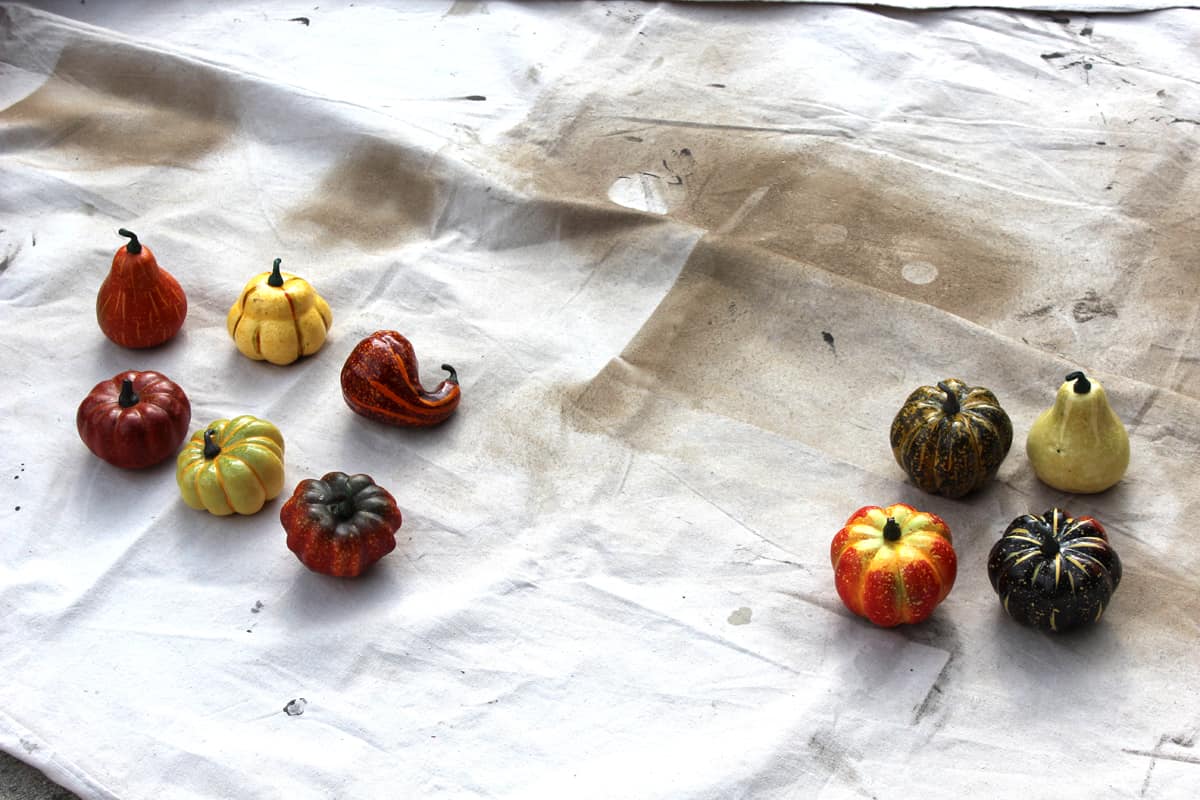
You can see these are about as cheap quality as they come. I got these smaller pumpkins at the end of the fall season last year when they had seasonal decor on sale.
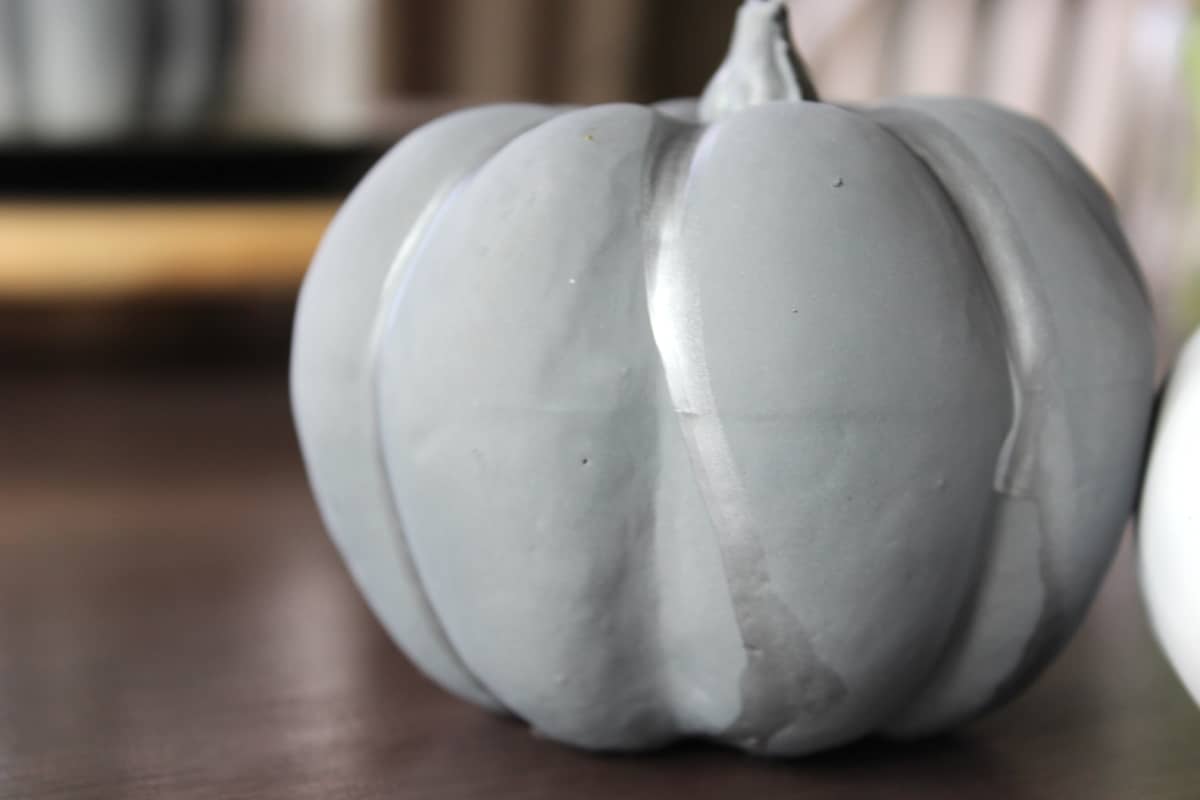
My goal was the have a few different shades of pumpkins, gray and white pumpkins, so I used gray and white spray paint. With the first coat, paint the entire pumpkin with a light coat.
After the first coat has dried turn the pumpkins as needed to ensure good coverage of the top of the pumpkin, bottom of the pumpkin, back of your pumpkin, etc.
The second coat was a quick step to get a better coverage. 2-3 layers of paint will do the job.
If using more paint colors, allow a little extra time as each can of spray paint must be adequately shaken before use.
RELATED: 72+ Fun Fall Activities for Families

I separated my pumpkins so I could paint some white and the others gray. 2-3 coats of paint (light) were used.
TIP: Another easy way to quickly paint pumpkins would be to use white craft paint or whatever color you prefer. DIY hand painting of the pumpkins using a craft brush wouldn’t take very long if you already had the paint on hand.
RELATED: Fall Color Palettes for A Cozy Fall Space
My Supplies:
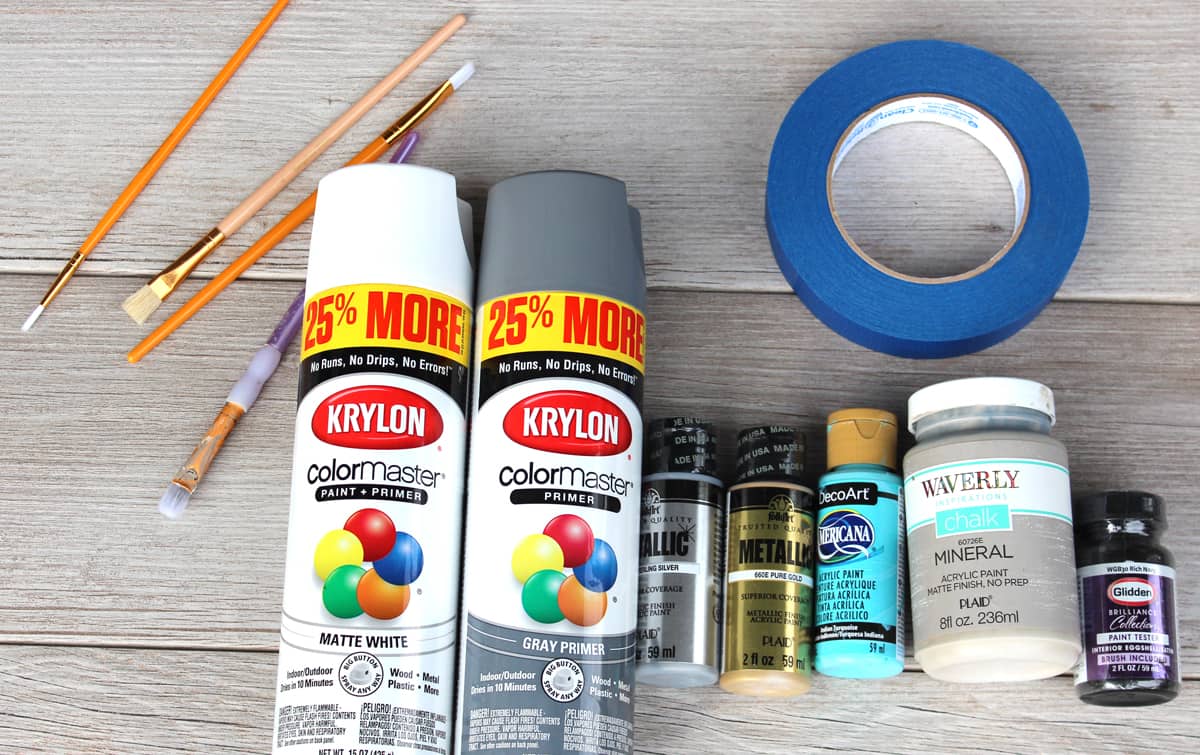
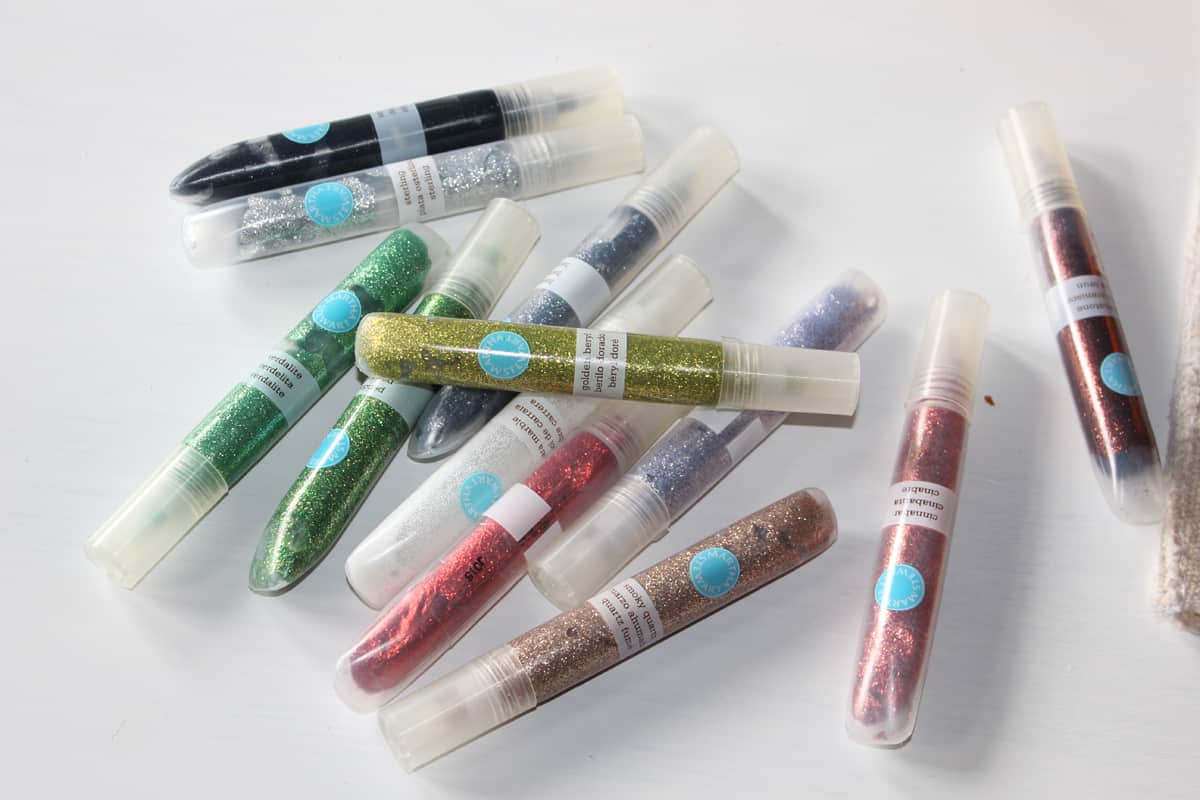
I didn’t end up using all of the paints I first intended. The metallic silver and gold acrylic paints looked great to me, so I just stuck with those. Use ANY acrylic paint color you like!
You could also get really creative with other base color spray paint options. Chalk paint would work really well too for a base.
It took at least 10-15 minutes for each coat of spray paint to dry enough to handle lightly. Be patient! You’ll have to turn the pumpkins in various angles to ensure good coverage.
For some reason this picture made me laugh. My neighbors don’t even bat an eye anymore when I start dragging out my painter’s drop cloth!
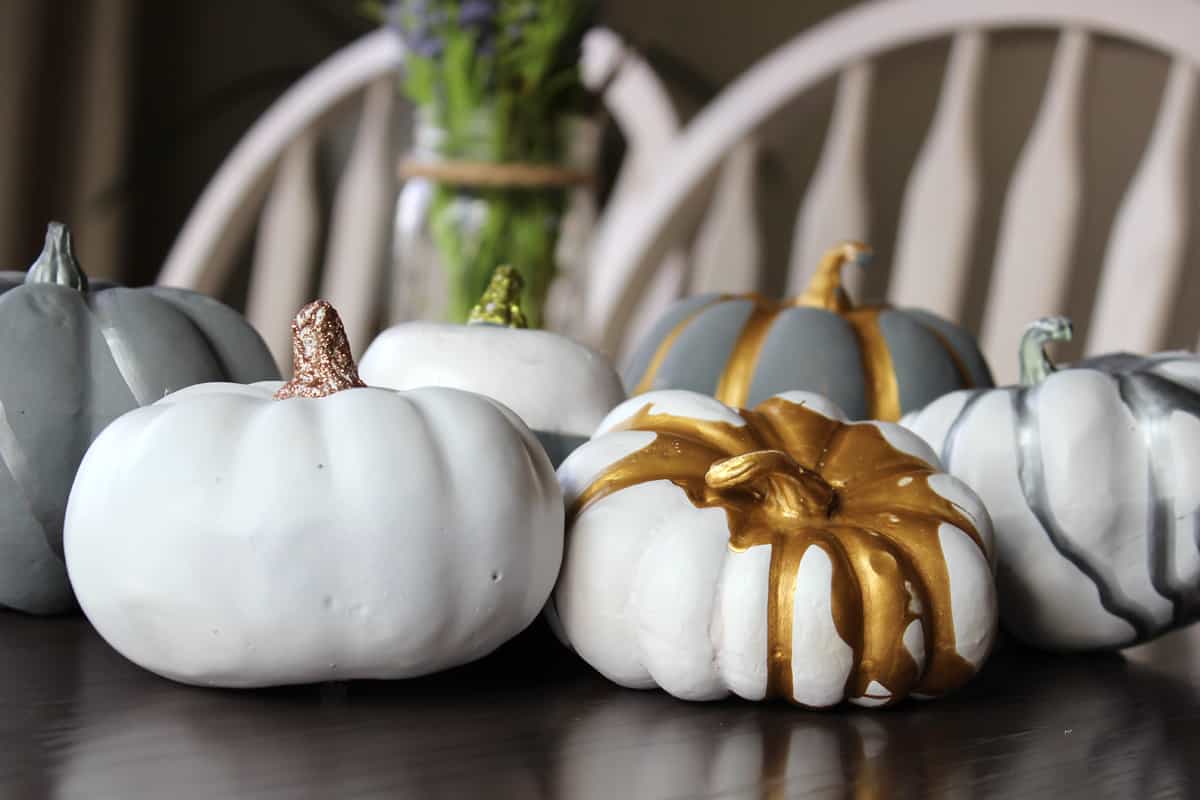
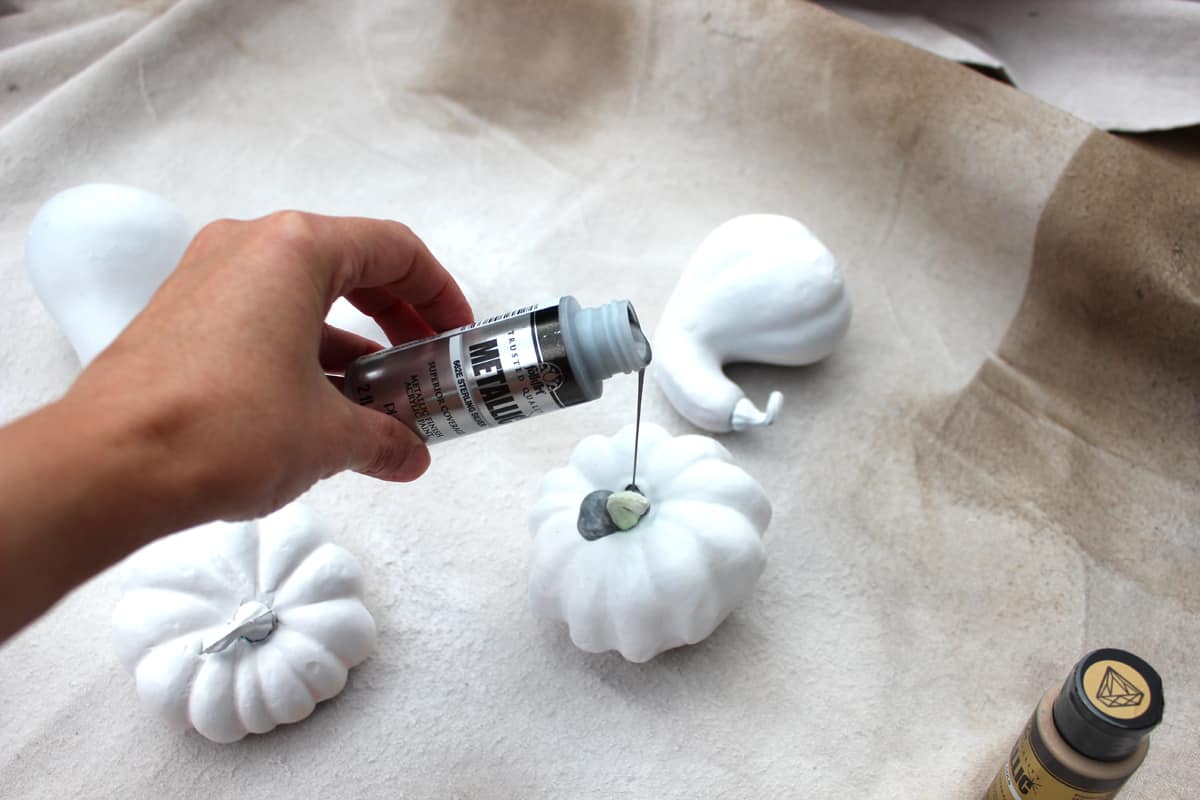
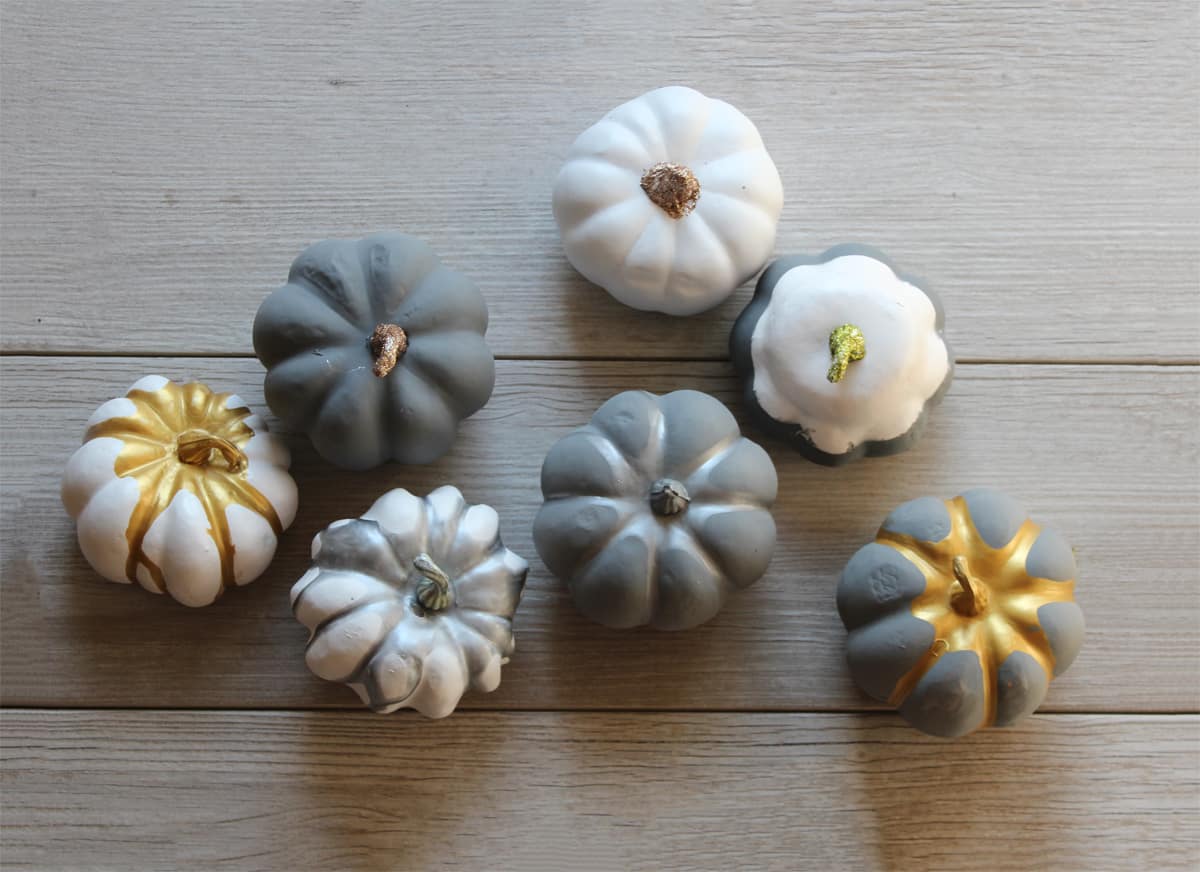
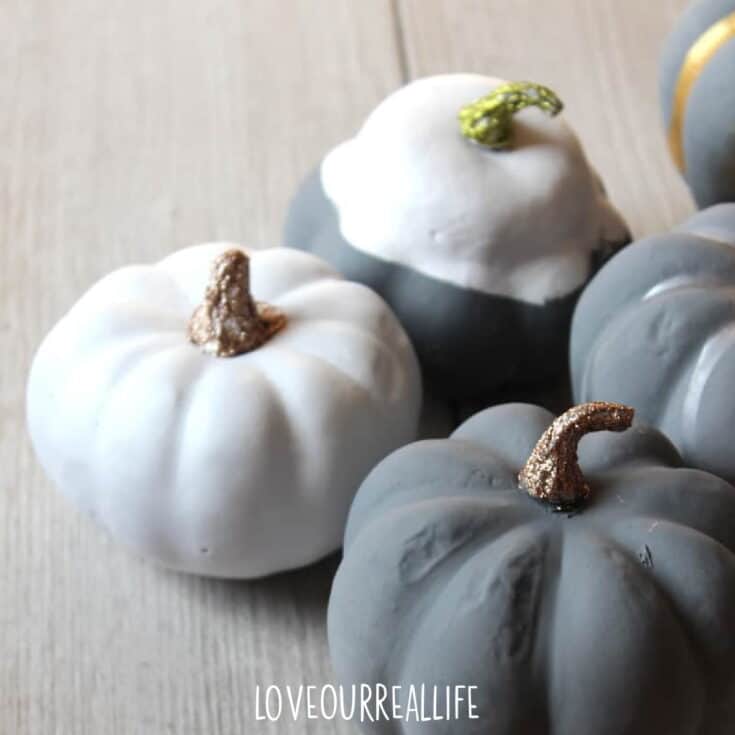
After the base coat is dry is when the fun begins! Pour a little acrylic paint onto the pumpkin around the stem, then turn in various directions to allow it to run down the sides.
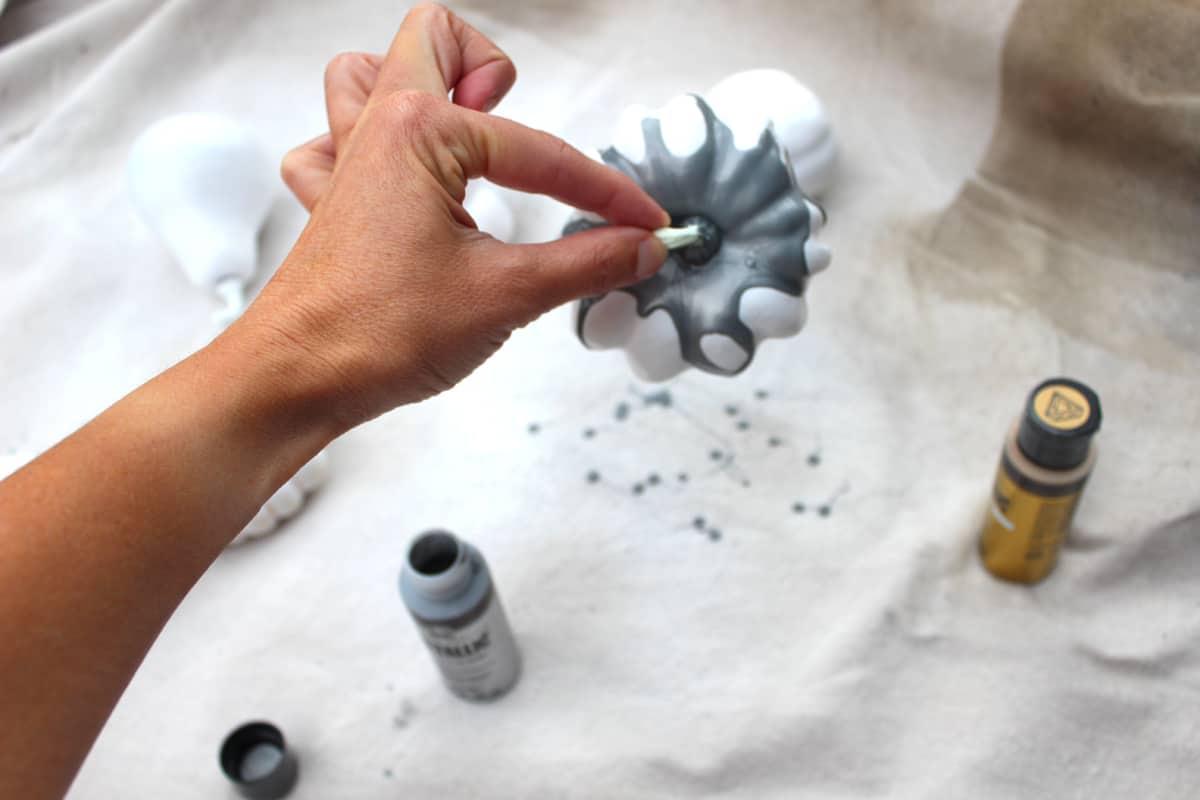
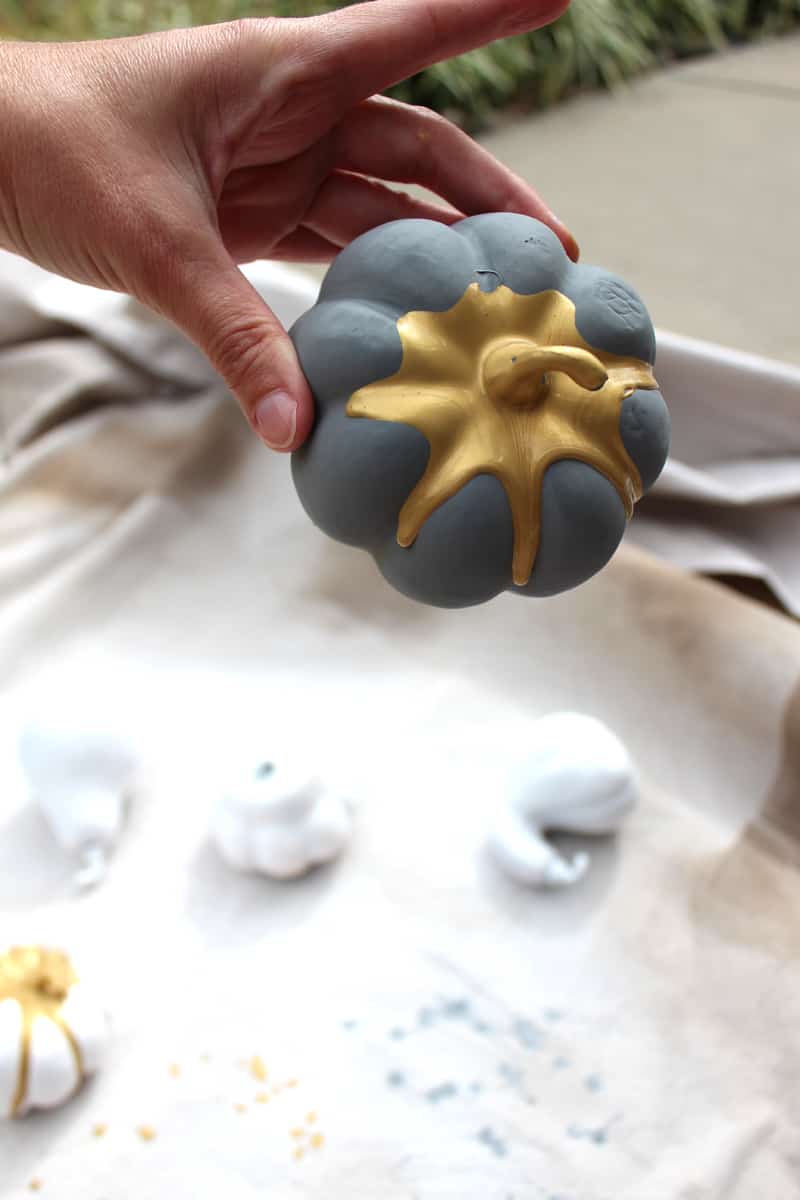
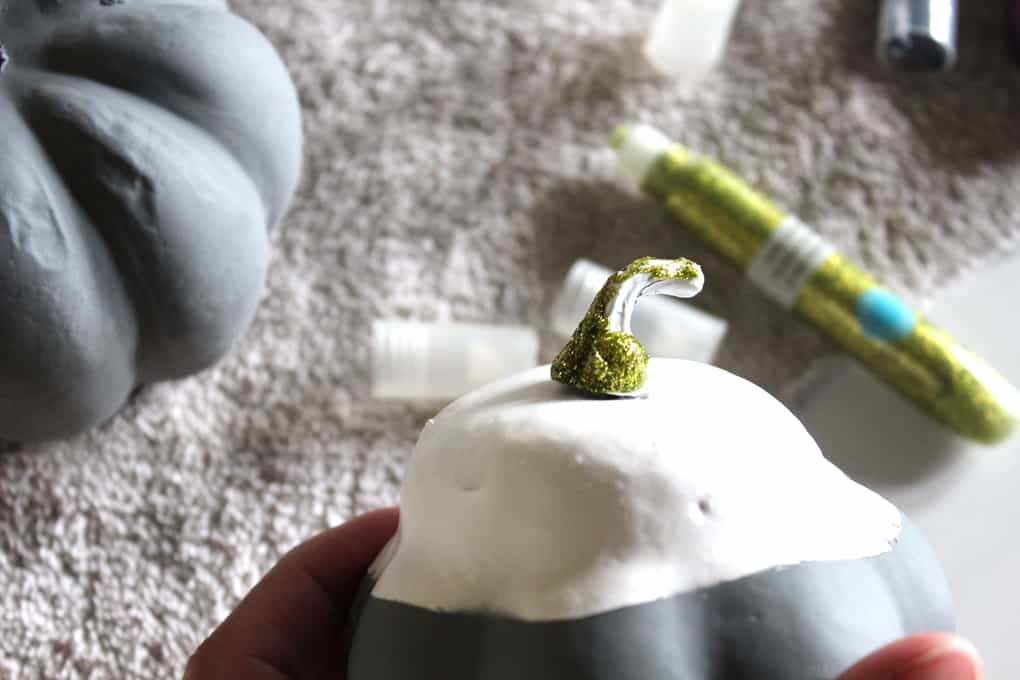
To finish the stems, I used a little bit of glitter glue to give it some extra pizzazz. Simply squeeze a dab onto the stem and use a small paint brush to cover the entire stem.
On the below pumpkin, I covered the top portion of a white pumpkin (I think this one is actually a plastic gourd) with painter’s tape and sprayed the bottom half gray.
Another option is to use real pumpkin stems. Real stems could be attached with hot glue and would be the perfect touch to give your pretty pumpkins a more realistic look! A pumpkin patch might be willing to part with pumpkin scraps (specifically the stems), so try there!
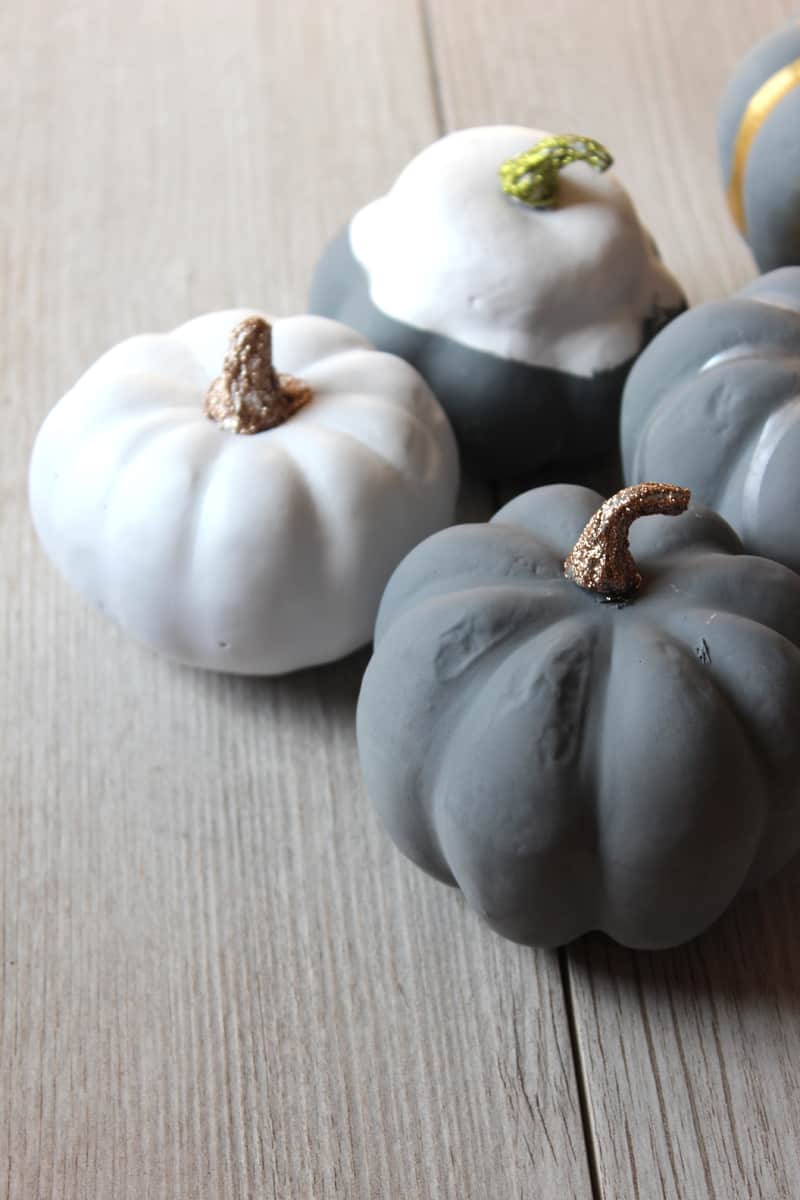
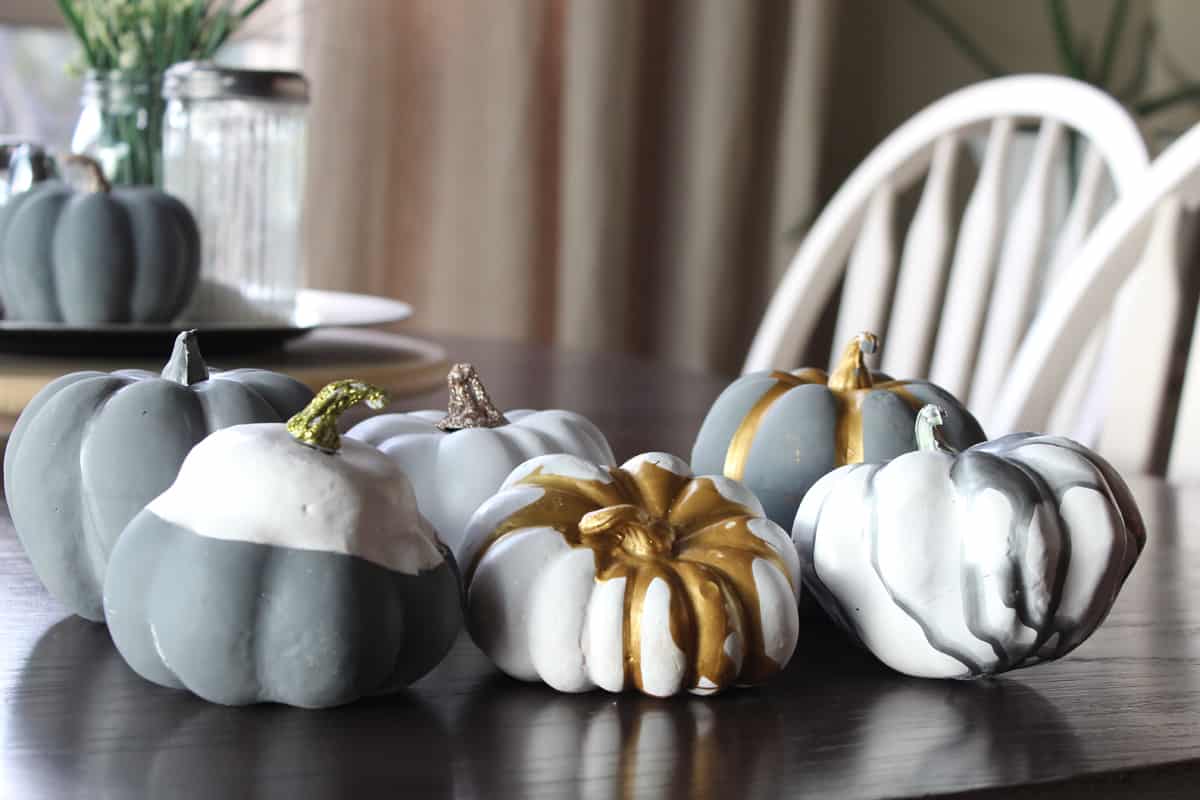
AFTER DIY Craft Pumpkins:
Conclusion
Create a small pumpkin vignette to display your new creation!
Try using your favorite fall colors, paint flowers, polka dots (for a polka dot pumpkin), or use a dry brush technique to give your pumpkin a vintage-inspired look.
The best part of this fun diy decor project is you can make your own pumpkins as unique as you want!
Create a variety of fall color pumpkins, grab some pumpkin spice treat, and have fun.
What do you think? I kinda love them! Grab a few of your old, faux craft pumpkins and gourds and give it a try. These fun DIY pumpkins would look beautiful on a Burlap Fringe Table Runner (post by Stone Gable – she has amazing tablescapes!).
Looking for more fall decor or recipe ideas?
- Wine Cork Pumpkin
- DIY Fall Wreath for the Front Door
- 10 Easy Fall Crafts and DIY Ideas
- How Long Does Pumpkin Pie Last in the Fridge?
How to Paint Plastic Pumpkins
How to paint faux pumpkins using spray paint (or craft paint, acrylic paint, or chalk paint) to add to your fall home decor.
Materials
- Plastic pumpkin(s)
- Paint (spray paint, chalk paint, acrylic paint, or craft paint)
- Metallic acrylic paint (optional)
- Glitter glue (optional)
Tools
- Drop cloth
- Painter's tape
- Small craft paint brush
- Damp paper towel
Instructions
- Protect work space with drop cloth.
- Paint plastic pumpkins with 2-3 coats of paint allowing adequate dry time between coats. Ensure all parts of pumpkin are covered.

- Decorate as you prefer with glitter or using a paint pour method.


- Create pumpkin vignette to display your fall decor!

Notes
If desired use a real pumpkin stem for a more realistic look for your faux painted pumpkin.


April, I really like the metallic and glitter accents on these pumpkins. Such a quick and easy fall DIY decor project. Thanks for the inspiration!
Thanks, Amanda!
Cute! I love the dripping effect of the gold on the white!
Thanks, Mary!
Those are adorable fall decor! I love how easy they are to make as well!
Thank you, Joanna! They were easy and fun!
What a great DIY for this fall! I have been thinking about fall decor and need to give this a try…yours turned out beautiful!
Thank you, Clair!
These are SO CUTE!! I’m pinning them right away! Spray Paint is LIFE! We are always spray painting things haha!
Thanks so much, Hanna! I think nearly all surfaces in my home have been touched by paint in some way or another…so I am in full agreement!
They look very pretty and artistic! Ava is in the middle of painting some real pumpkins white so we will have to try this!
Thanks, Jenifer! Ava always has a project going…I love it! You’ll have to show me how hers turn out😊
Oh my gosh! I love how adorable these pumpkins turned out!
Belle | One Awesome Momma
Thanks so much, Belle!
Those are so fun! I love how modern and fun they look 🙂 And such an easy project, too!
Thanks, Corey!
They look good. A different, upscale take on the plain white I have seen in the stores.
Thanks, Stephanie! They were fun to make too!