Wine Cork Pumpkin // Make Your Own with This Easy Tutorial
Happy Fall Y’all! I have a fun wine cork craft / pumpkin project to share with you today that is so much fun. It turned out even cuter than I imagined. Gather up lots of wine corks and let’s get started!

Get more ideas for fall diys and crafts here.
Steps for making your wine cork pumpkin:
This post contains affiliate links which means should you make a purchase after clicking through one of my links I might make a commission at no additional cost to you. See me full disclosure policy for details.
MATERIALS
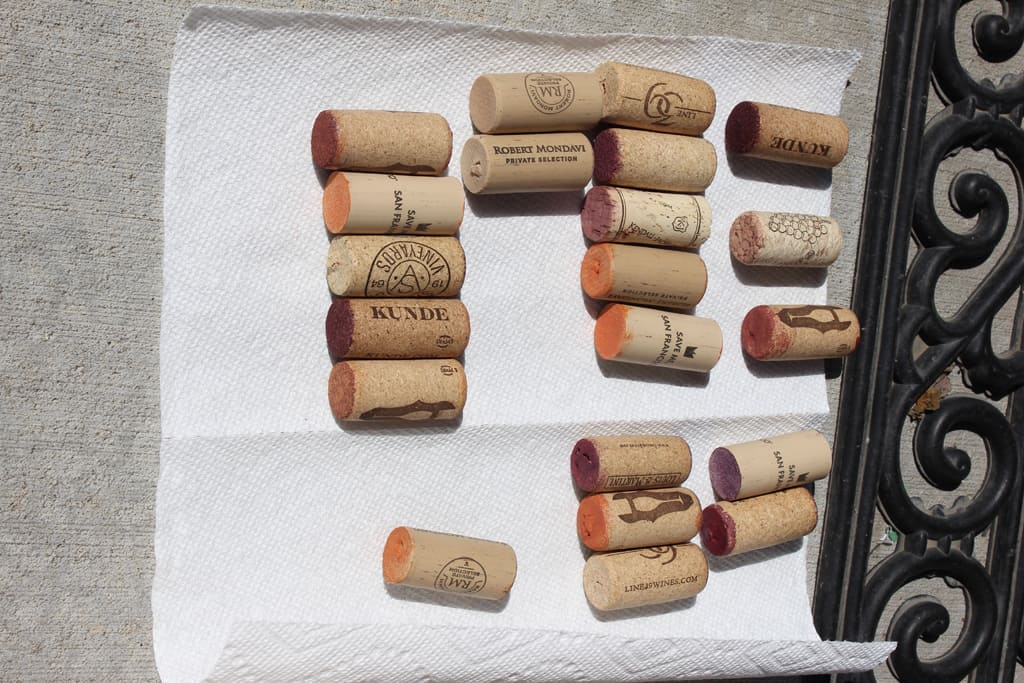
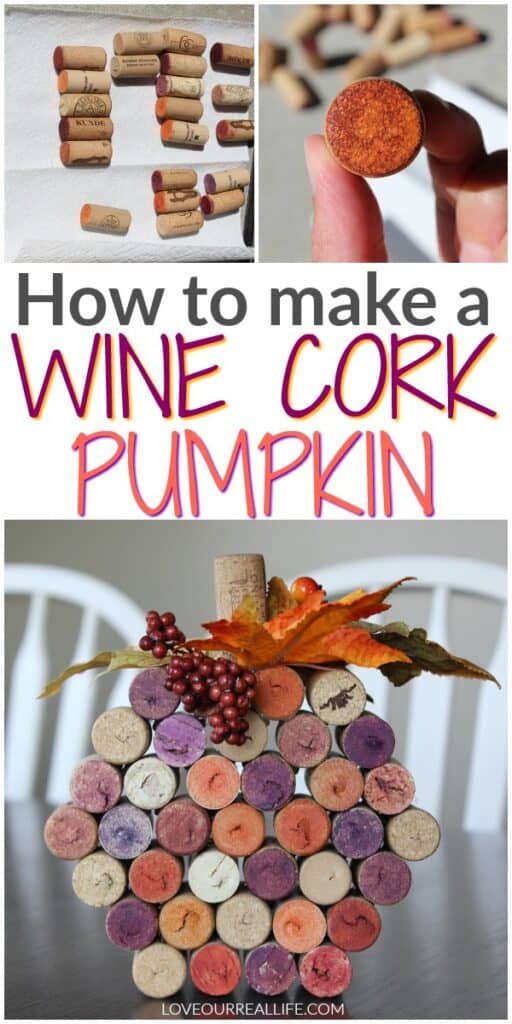
- Enough wine corks to make a cute little pumpkin (alternatively, you could just purchase craft wine corks. But, what’s the fun in that;-) – For reference I used 37 total corks for this small pumpkin, but for a bigger pumpkin you might just need to have another glass of wine or a lot of wine!
- craft paint (orange acrylic paint) and small paint brush or kids watercolor paints (I used some of my kids left overs from school and they worked great!)
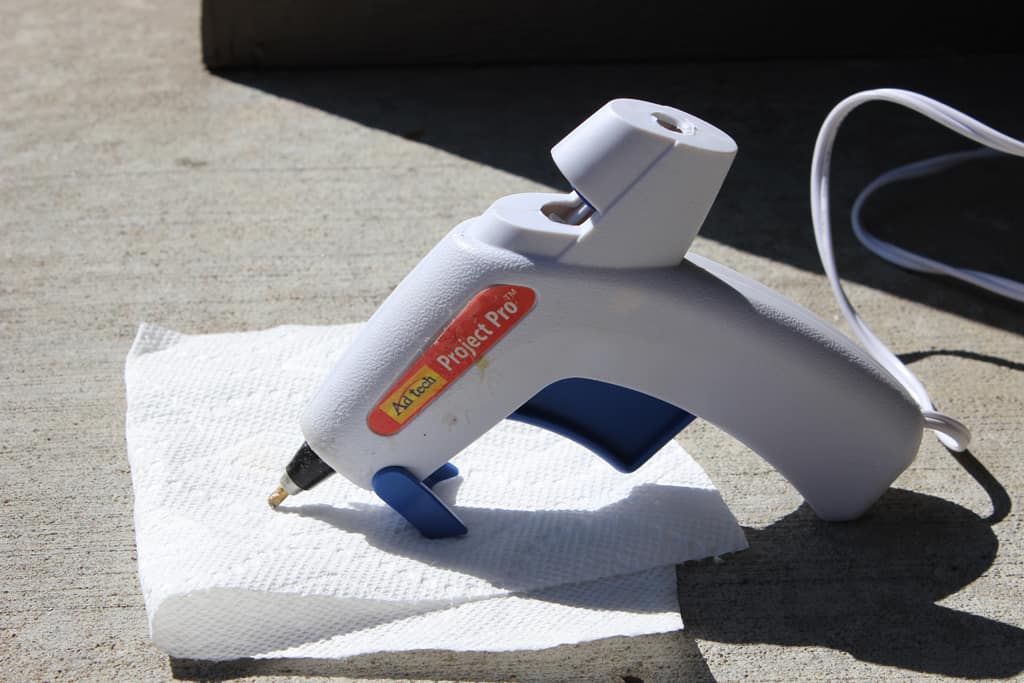
- Hot glue gun and glue sticks
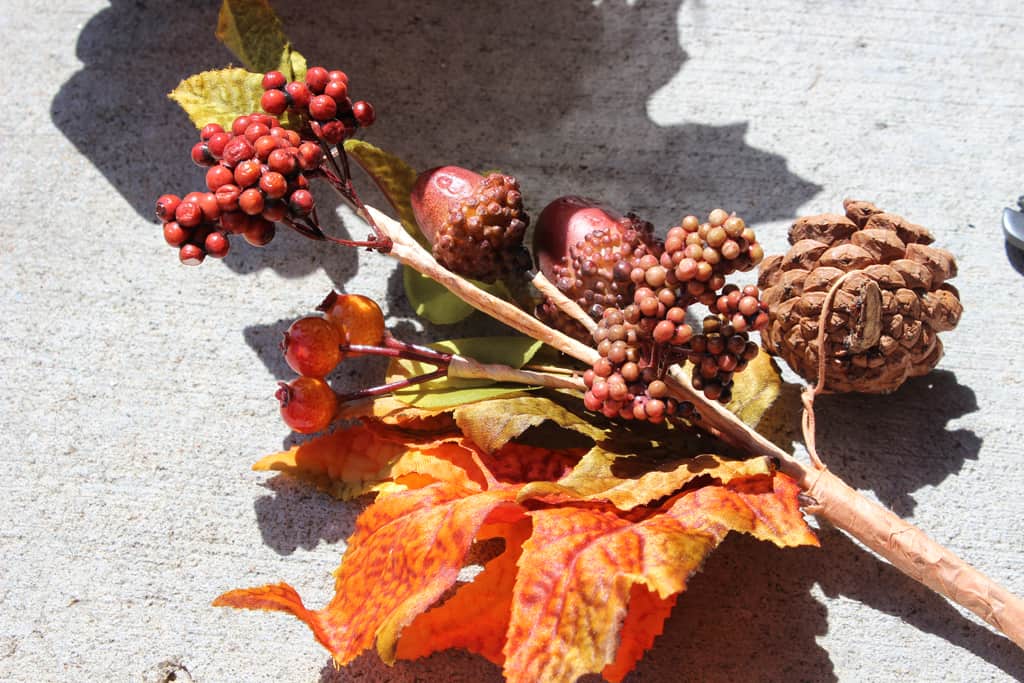
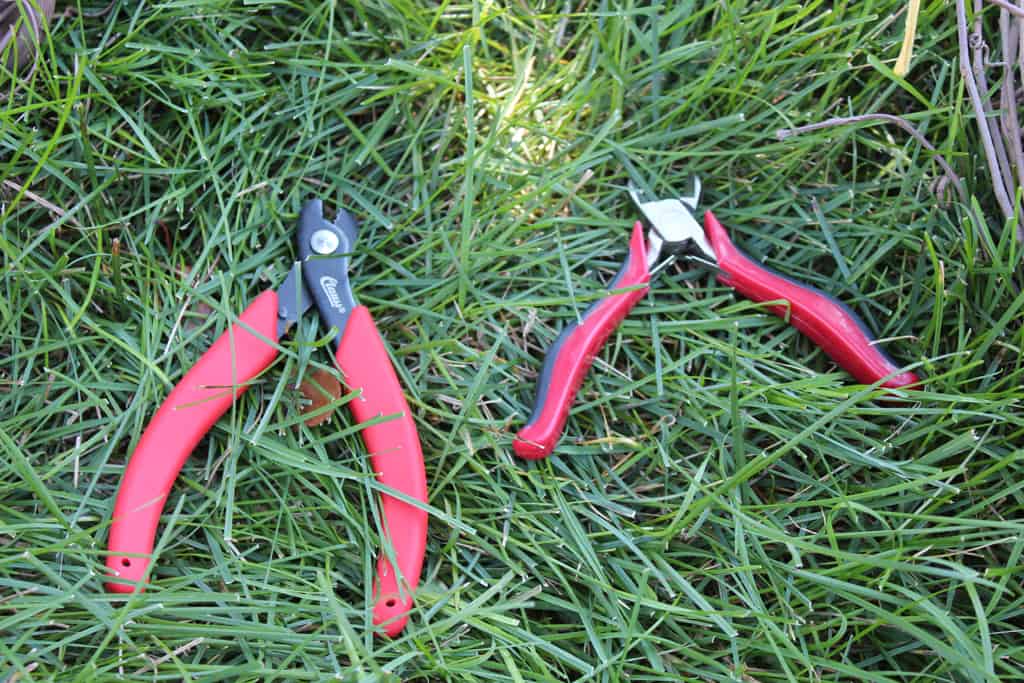
- Autumn floral stems of choice
- Floral wire cutter
1). Gather your supplies
Wine corks.
If you haven’t saved any over time, have a party and ask all of your guests to bring a bottle of wine or two! Afterward, you’ll be set. OR, just buy a bag of wine corks in the craft section;-).
I’ve also provided an Amazon link for wine corks should you wish to order some.
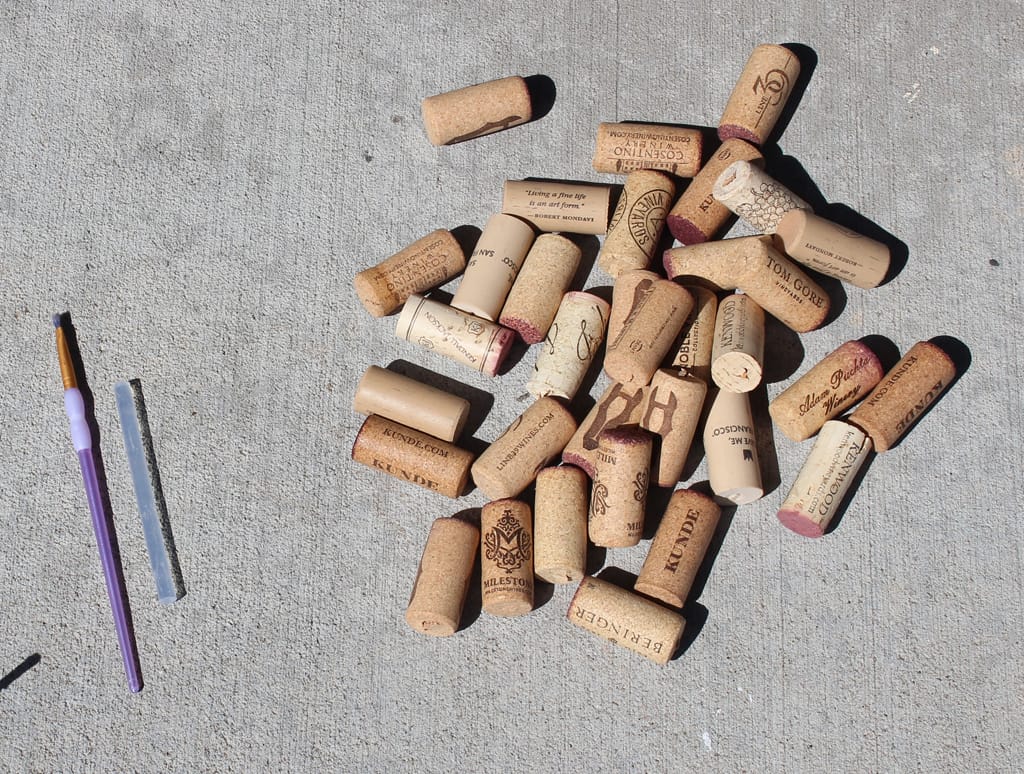
Mine is from Walmart, but I attached a link to one on Amazon that gets good reviews.
Watercolor paint.
I was actually planning on using some acrylic craft paint, but I couldn’t find any orange at my house. I came across these watercolor paints and they worked great. If you have young children, chances are good you have this exact same palette somewhere!
The colors worked perfectly for this project.
RELATED: 72+ Fun Fall Activities for Families
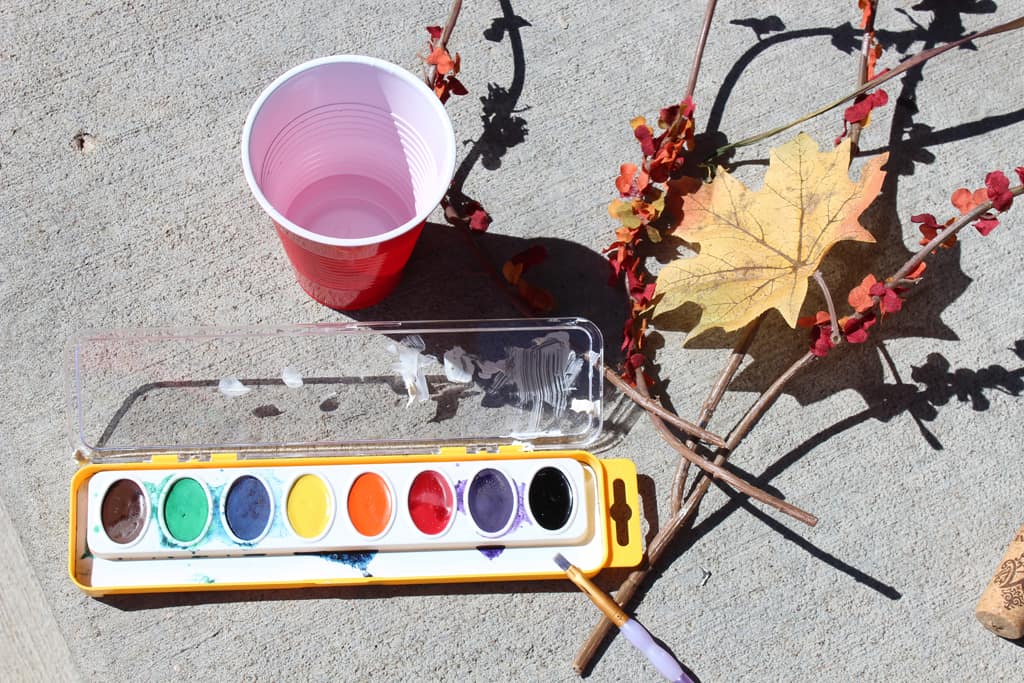
Cup of water
(If using watercolor paints)
Autumn Floral Stems of choice for top of pumpkin
2). Paint your wine corks
This was so easy! If you have corks from a red wine, they will already have a beautiful red/purple color.
Try to ensure both sides of the cork are a similar color so the pumpkin looks great from any angle.
I left some plain, others I painted red, purple, and of course, plenty were painted orange.

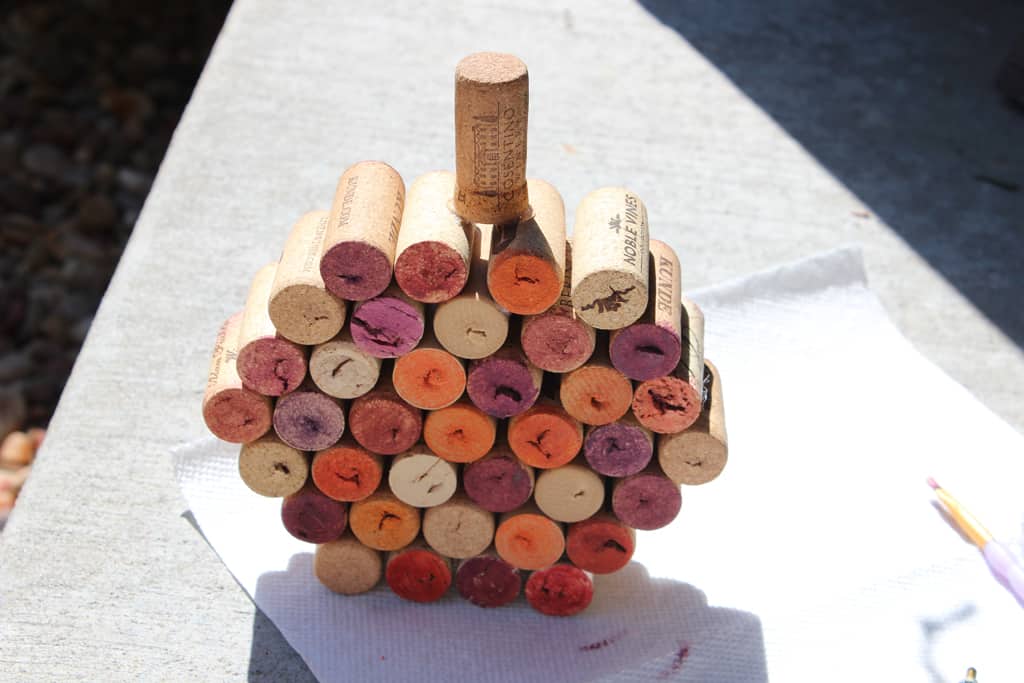
3. Glue wine corks in pumpkin shape
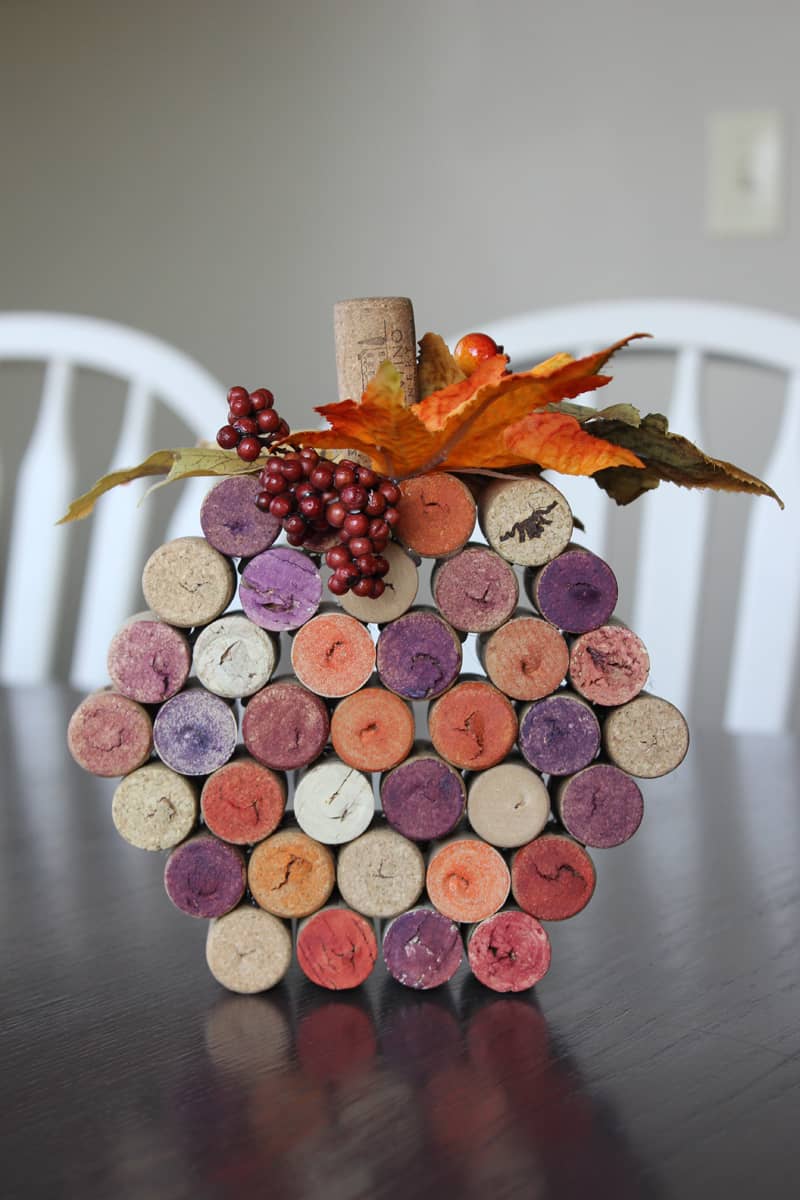
For the first row, I hot glued a row of four corks to make the bottom row.
After applying a line of hot glue, I held them in place for a few seconds to allow the glue to set and they were good to go.
On the second row there were five corks, then on the next row were six corks, with the middle row containing seven corks.
After the center row, six corks, five corks, and four corks for the top row.
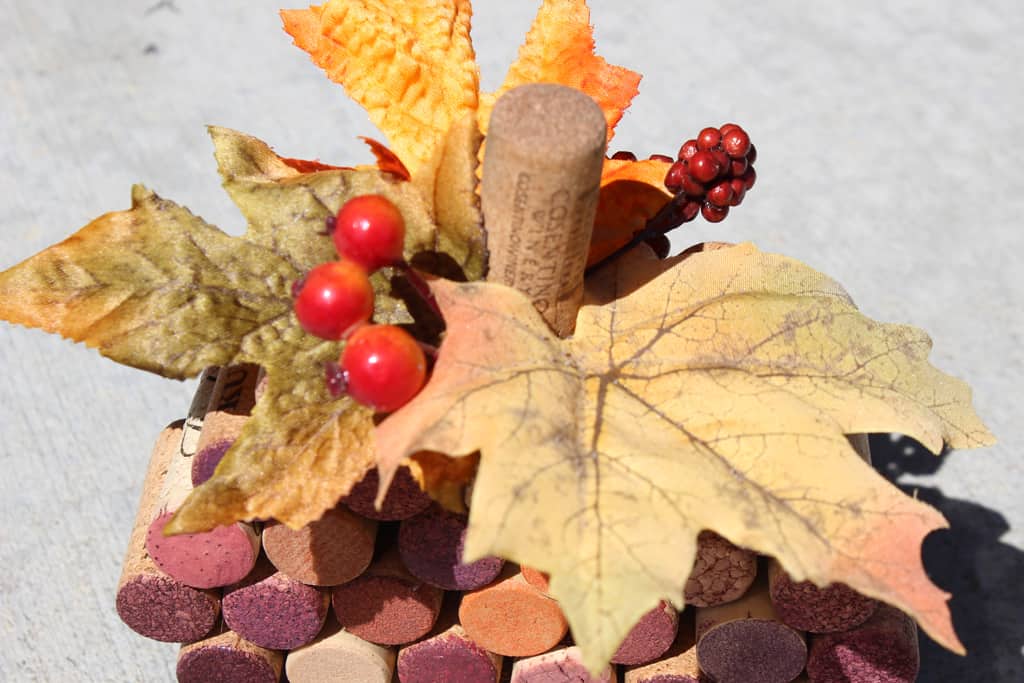
On the top of your pumpkin, a dab of hot glue can be added to a plain cork in the middle of the row for the pumpkin stem.
So easy!
I tried to keep the end of the cork that had a corkscrew hole facing the same direction. Probably not necessary, but this project was so simple, I had to find a way to complicate it a little bit!
The red wine stain on the old wine corks made beautiful purple colors for the adorable pumpkins.
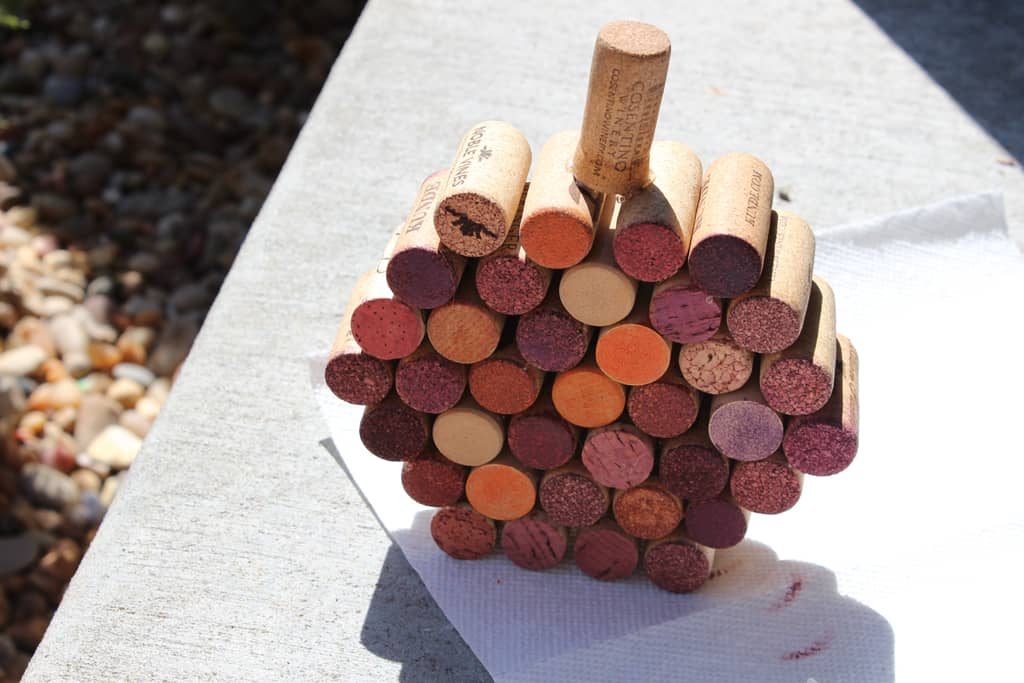
4. Add Floral Stems to Top of Pumpkin
Use wire cutters to trim the autumn florals, then hot glue to decorate the stem.
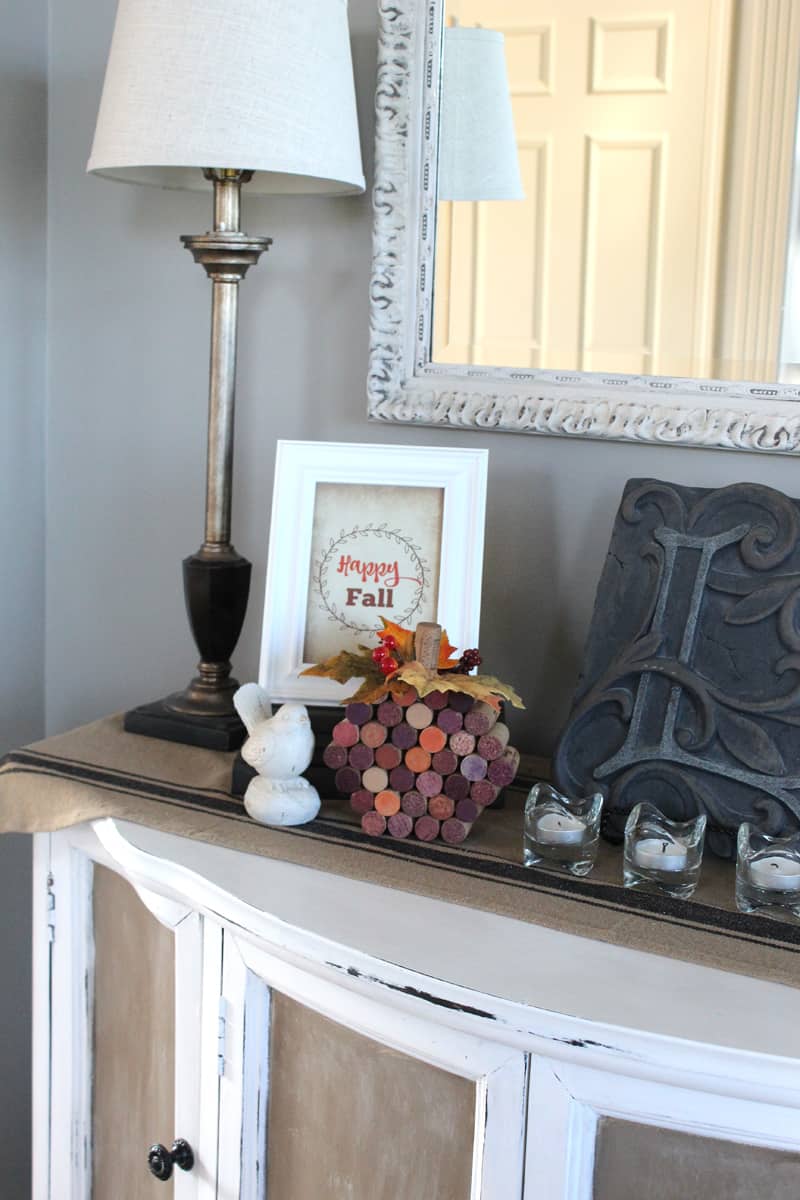
Step back and admire your pretty wine cork pumpkin!
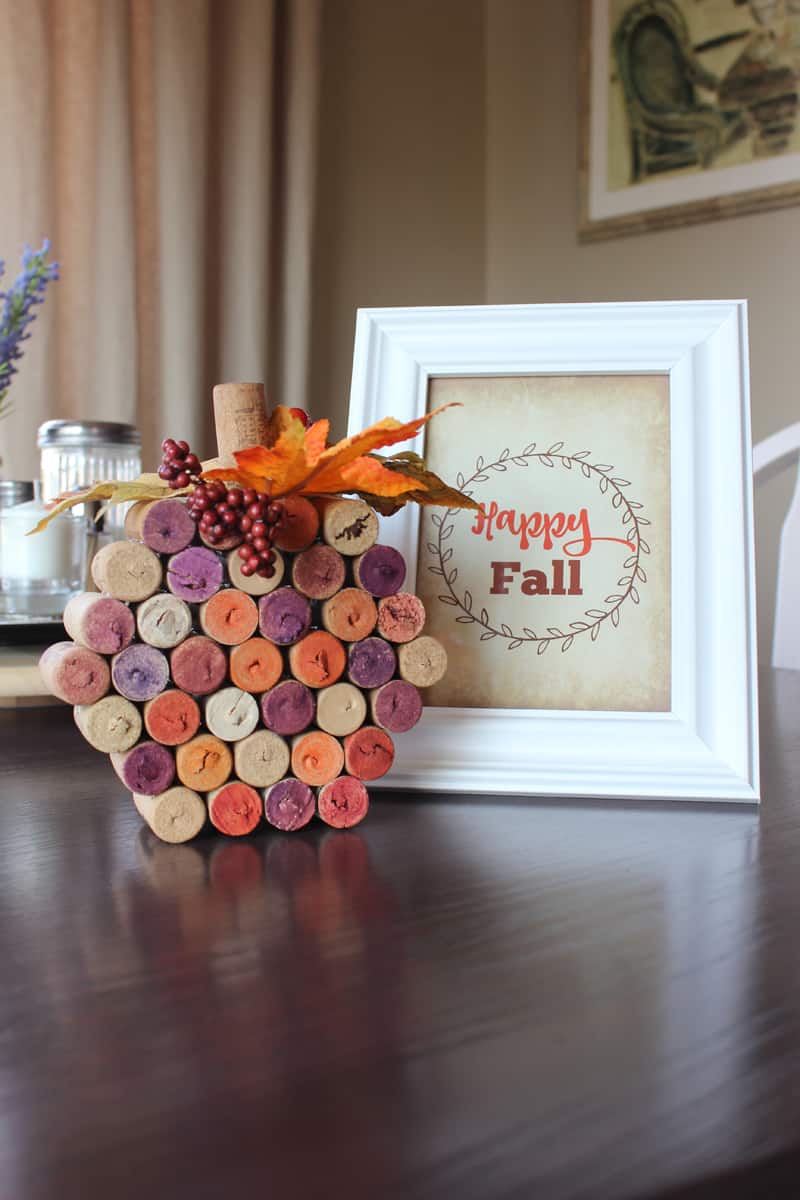
Did you notice my “Happy Fall” sign? I created that printable to add to my decor and popped it in a 5×7 frame.
Do you want one too?
Click on the image below and grab one today!

Thanks for reading Love Our Real Life for this fun wine cork pumpkin project!
The fall season is a favorite and these cute little pumpkins will be the perfect addition to your fall decor. Now, get busy making your wine cork pumpkin.
Depending on the number of corks you’ve saved, you may end up with different sizes. You can follow the wine cork pumpkin tutorial to make a large pumpkin or a small one!
For best results, complete diy projects such as this with friends! Making simple wine cork pumpkins is a fun way to enjoy a craft night with some girlfriends AND come home with a cute decor item!
Related Reading:
- DIY Pumpkins with Metallic Acrylic Paint and Spray Paint
- String Art Project, The Complete Beginner’s Guide
- How to Stencil on a Terra Cotta Pot
- DIY Coasters
- When to Decorate for Fall
How to Make A Wine Cork Pumpkin: Easy Fall DIY

Use old wine corks for this easy DIY fall craft. It is the perfect activity for girls night out.
Materials
- Wine corks
- Fall floral stems
- water color paints (optional) and small craft brush
- Hot glue
Tools
- Hot glue gun
- Wire cutters
Instructions
- Paint wine corks. If the ends of the wine corks are naturally stained from wines, there is no need to paint! If a little color is needed (i.e., purples, reds, oranges), kids watercolor paints work great for this. Only a little bit of paint is required. Let dry (5 minutes is fine!).
- Glue wine corks in pumpkin shape. Using a hot glue gun, glue the wine corks together in shape of a pumpkin. On this particular pumpkin, I started with 4 corks on the bottom layer, then 5, then 6, then 7 in the middle layer. Then I worked back down (6, then 5, then 4). See a picture of the final pumpkin if needed for clarity.
- Glue cork standing upright to top for "stem". Don't forget to add the stem to the top of the pumpkin. Add it will a bit of hot glue.
- Attach fall floral stems. Use wire cutters to trim fall floral stems and attach with hot glue. Hot glue will dry in a matter of minutes.
Notes
• 37 wine corks were used for this wine cork pumpkin.
• Ensure painted ends of corks are all facing same direction.
• For variance, mix the reds, purples, and orange corks throughout the pumpkin.
Recommended Products
As an Amazon Associate and member of other affiliate programs, I earn from qualifying purchases.


Could this get any cuter!
Thank you!
This is such a cute idea! So festive and will work great all fall long!
Thank you, Brittany!
This pretty much just means I need to start drinking more wine so I can create this! 🙂
Thanks, Corey! There is no better time than the present!