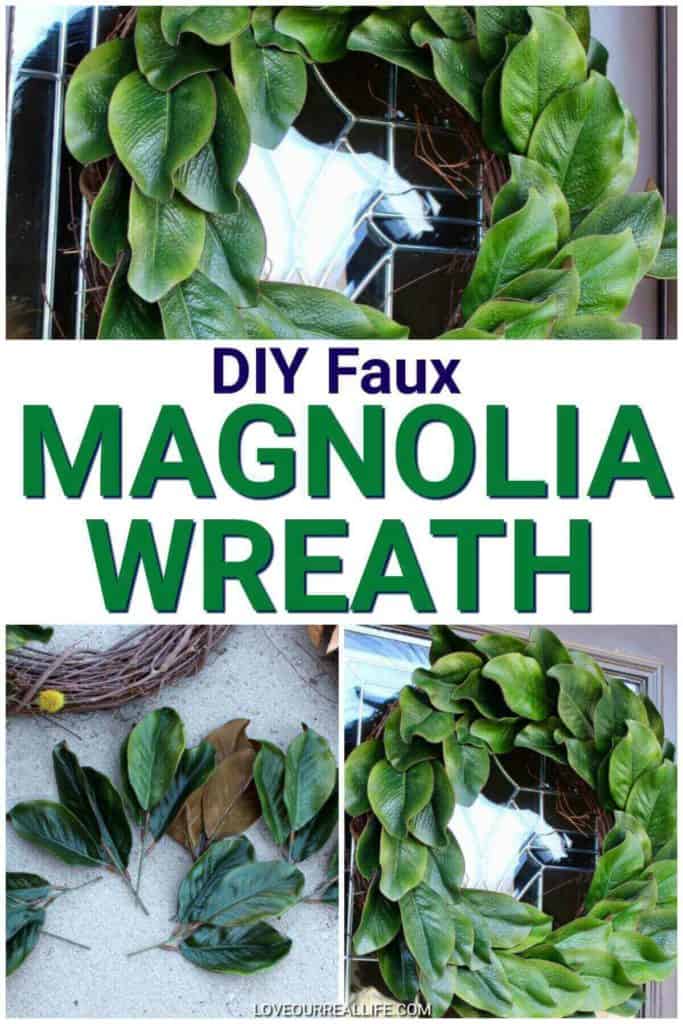
Magnolia Wreath DIY: Make Your Own in Minutes
Magnolia wreaths are gorgeous, but can be incredibly expensive. After a quick trip to Hobby Lobby and/or a shopping trip on Amazon, this Magnolia Wreath DIY can be yours for around $20.00 compared to $95.00 or more. Seriously.

Check out more diy home decor projects here.
Leaf Wreath DIY
This project was easy and fast. I completed the entire wreath in 15-20 minutes!
This DIY magnolia wreath using faux cut magnolia stems is an excellent alternative to a fresh magnolia wreath.
I’m all about saving money while also adding a touch of greenery and charm to our home. I recently created an air plant terrarium that we are really enjoying!
Another way we’ve added a touch of greenery to our home is with leaves taken from our backyard, dried, pressed then framed!
I’m still deciding where I want to display this. I have a few places I think would be perfect, including a candle centerpiece. I might just have to make more!
This post contains affiliate links. This means should you click through one of my links and make a purchase, I will receive a commission at no additional cost to you. Please see my Disclosure Policy below.
Supplies Needed
1. Floral Wire Cutters
2. Grape Vine Wreath (I got mine at Hobby Lobby for $7.99. I don’t think these go on sale, so you could use the 40% off coupon.) You could consider using a foam wreath form, but I found the grapevine wreath worked great and was an inexpensive choice.
3. Magnolia leaves in floral bunch (Hobby Lobby alternates sale of these every other week. I picked up two bunches of faux magnolia leaves.
Let’s Get Started!
Steps
Gather all of your supplies ready
Gather magnolia bunches, wire cutters to cut through the floral stems, and the grapevine wreath.
As mentioned use could use other wreath forms, including a straw wreath form, but I find a grapevine wreath looks really nice. Plus it is so easy to get the floral stems to stay without the need for floral wire.
Having all of your supplies ready to go before you start makes the entire project go more quickly.
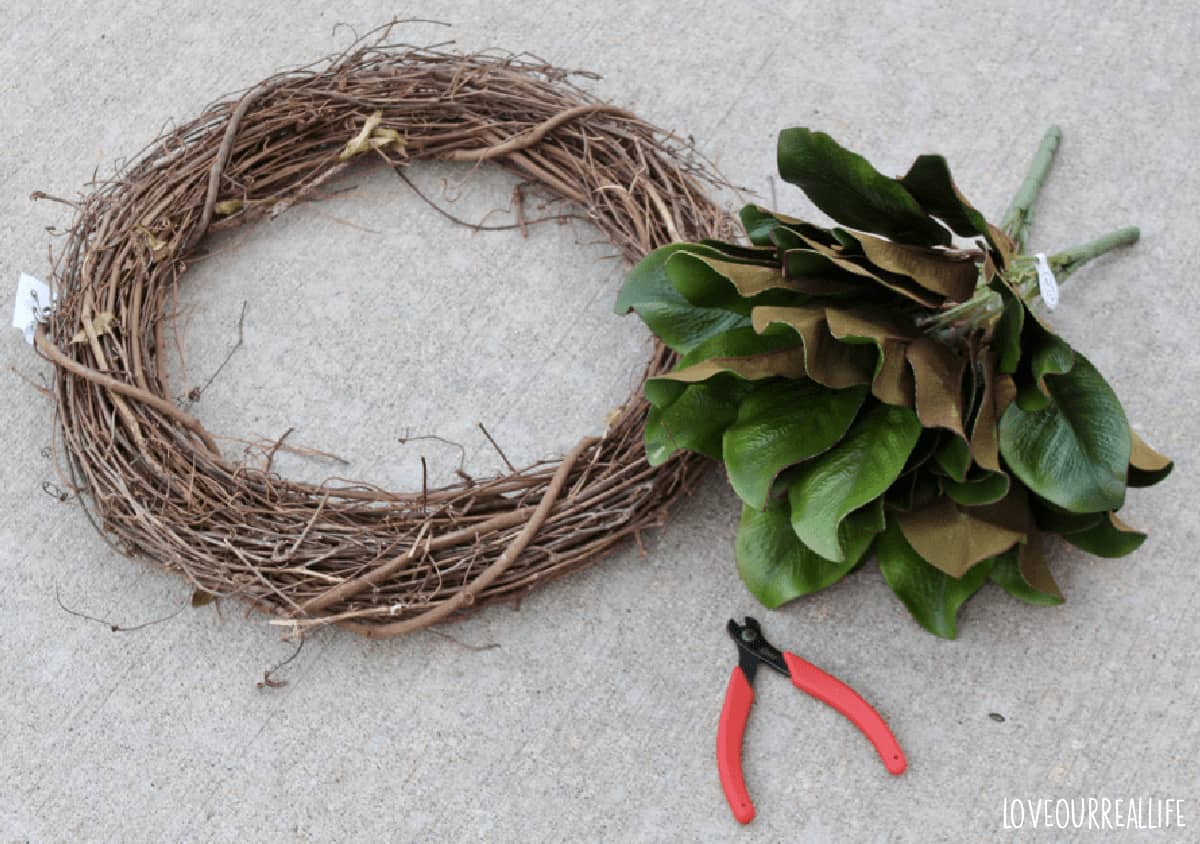
Supplies: Grapevine wreath, floral wire cutters, magnolia leaves floral bunch
Clip each stem at the base
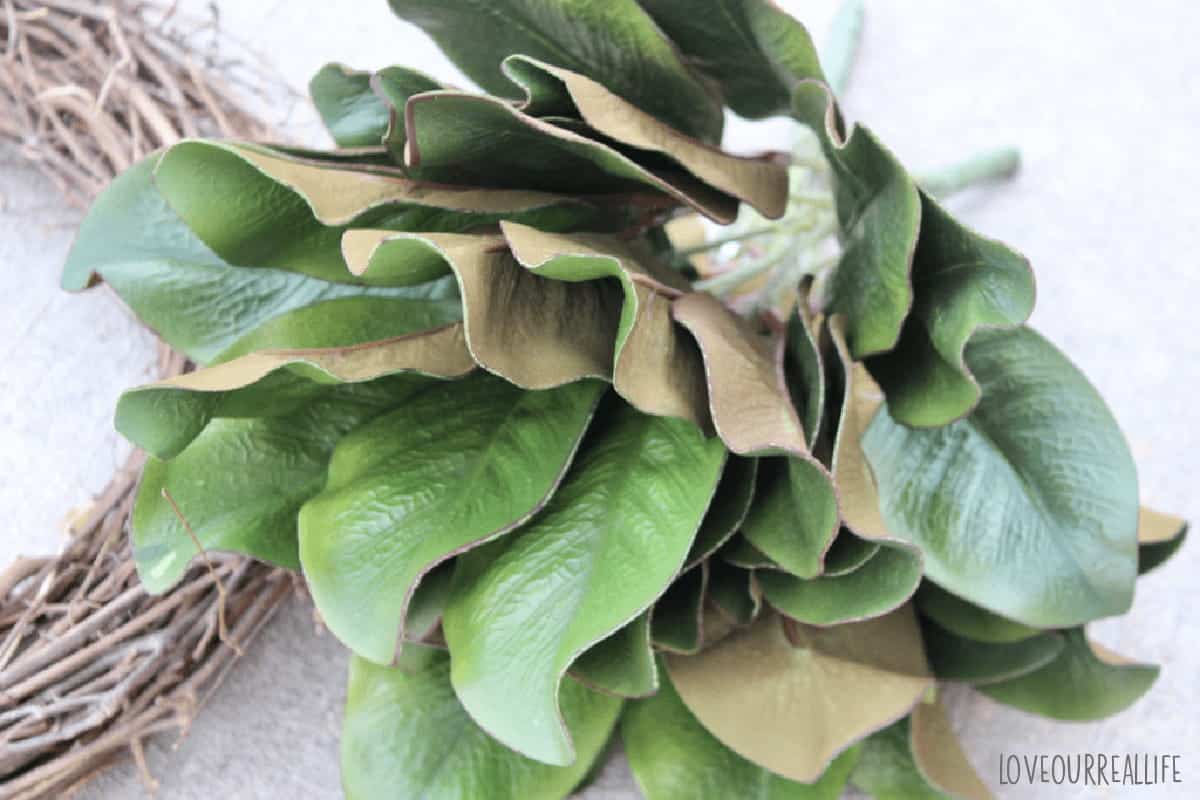
Each floral bundle will have several magnolia stems you will be able to use.
Clip the individual stems of leaf bunches.
The bunches I found were comprised of mid-sized magnolia leaves. If you have larger leaves included in your bunches, plan on spacing them out as needed to ensure the wreath is symmetrical.
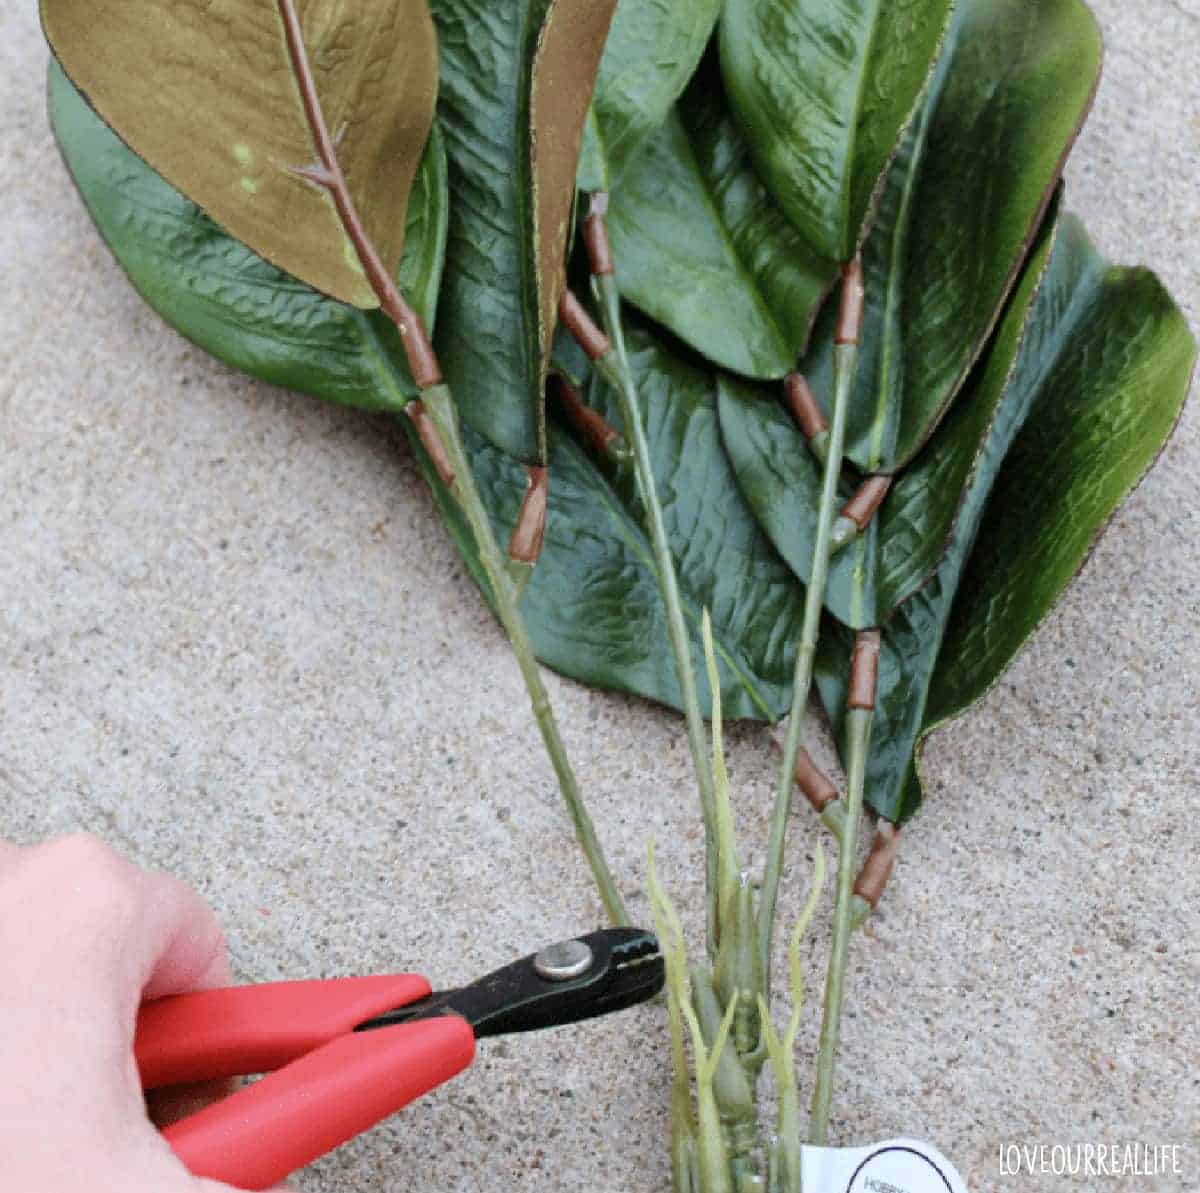
Trim each stem near the base of the bunch. The stem will be pushed into the grape vine wreath.
Push the stems deep into the wreath.
No need to use hot glue or even a piece of florist wire!
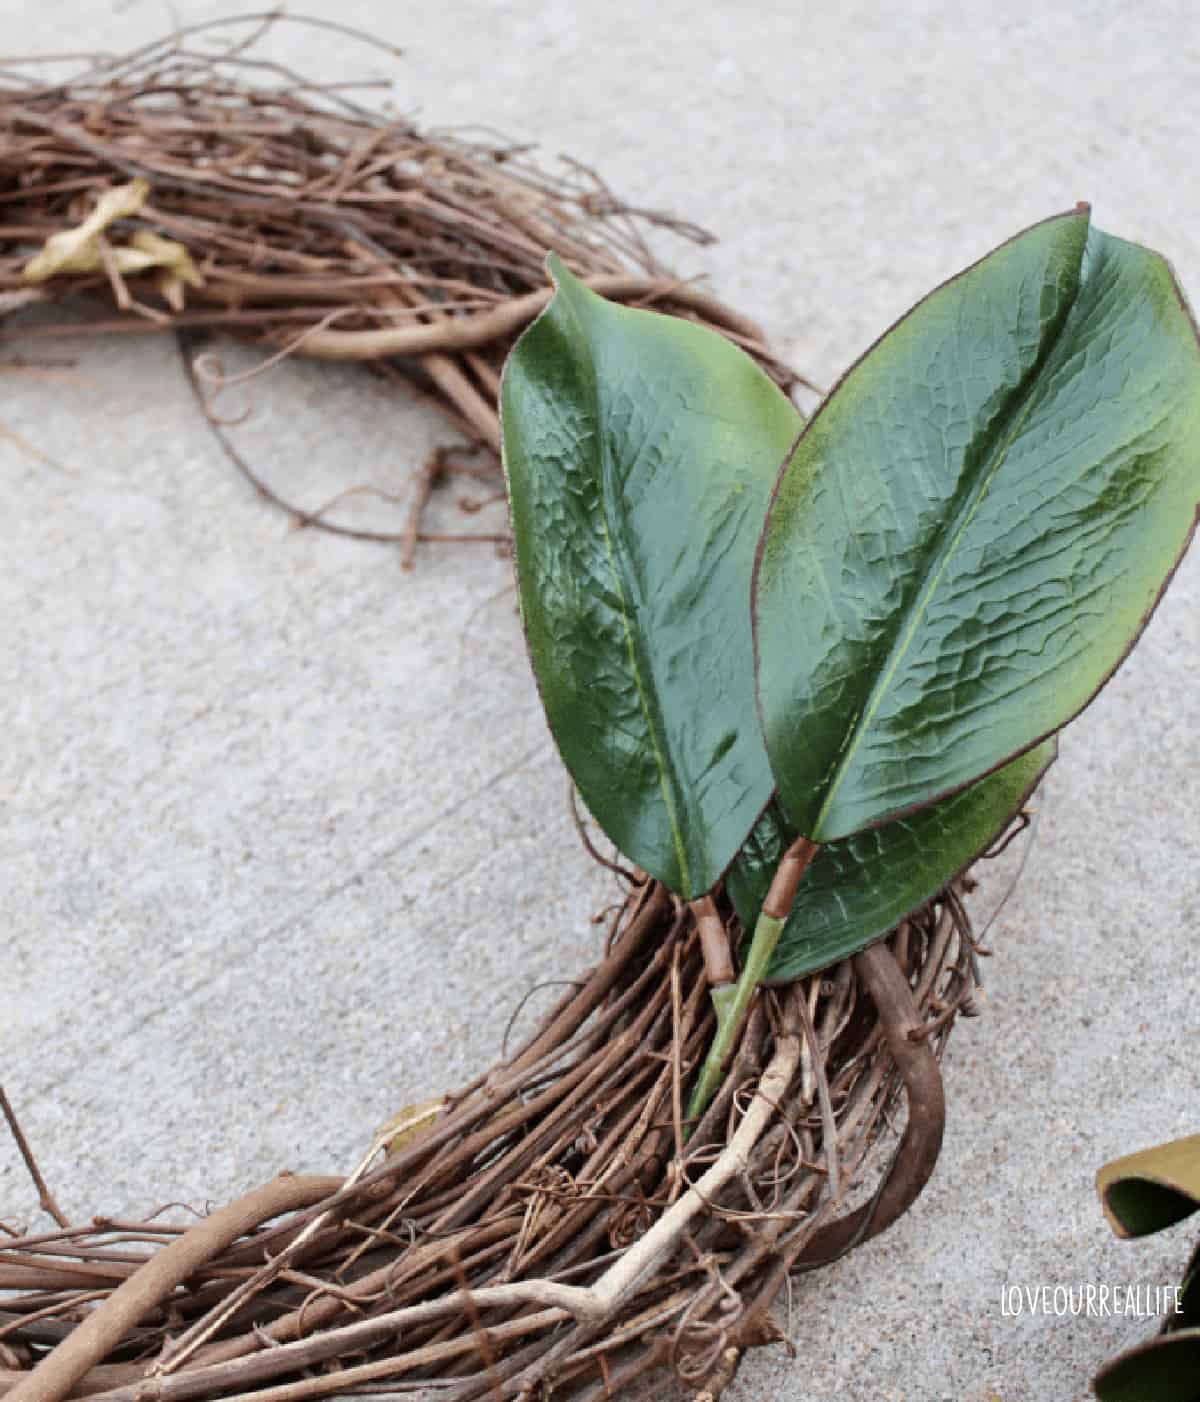
If you tuck the wire stem into the grapevine wreath, it will stay, especially if your wreath lives indoors.
Occasionally peak at the back of the wreath and trim any extra long floral stems that are sticking out.
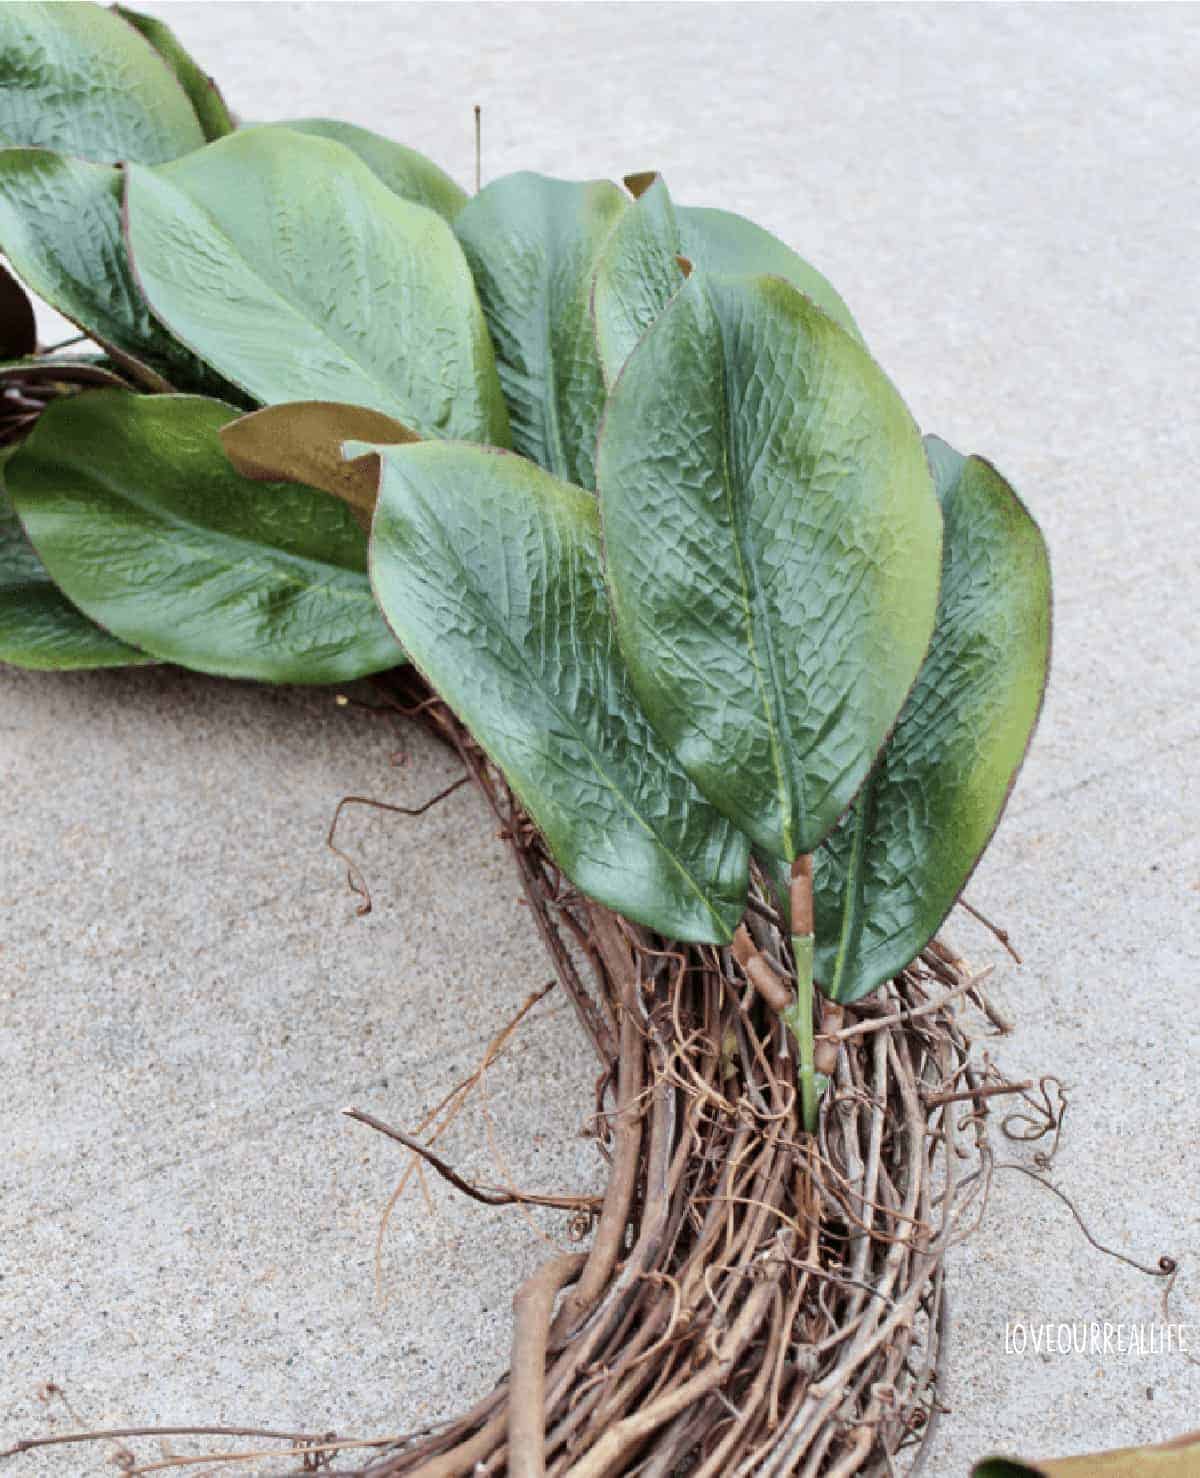
Continue placing magnolia leaves around the entire perimeter of the wreath
Continue placing stems around in same direction, approximately 1 1/2 to 2 inches apart until you have gone completely around the wreath.
Push stems into wreath approximately 1 1/2-2 inches apart, shaping the leaves as you go.
You could even turn some of the leaves around to show the brown side to make your wreath look more authentic, like a fresh magnolia leaf wreath.
For a look of the dried leaves, turn the leaves to show the underside when inserting into wreath. This will give the wreath more of a fall, Thanksgiving, or traditional Christmas wreath look.
Continue placing stems all around wreath in the same direction.
As I mentioned I didn’t feel the need to secure the leaves in the grapevine wreath.
But if you are concerned, you could always periodically wrap floral wire around the stems once inserting them in the wreath.
Or, use a hot glue gun or fern pins to secure the stems as needed.
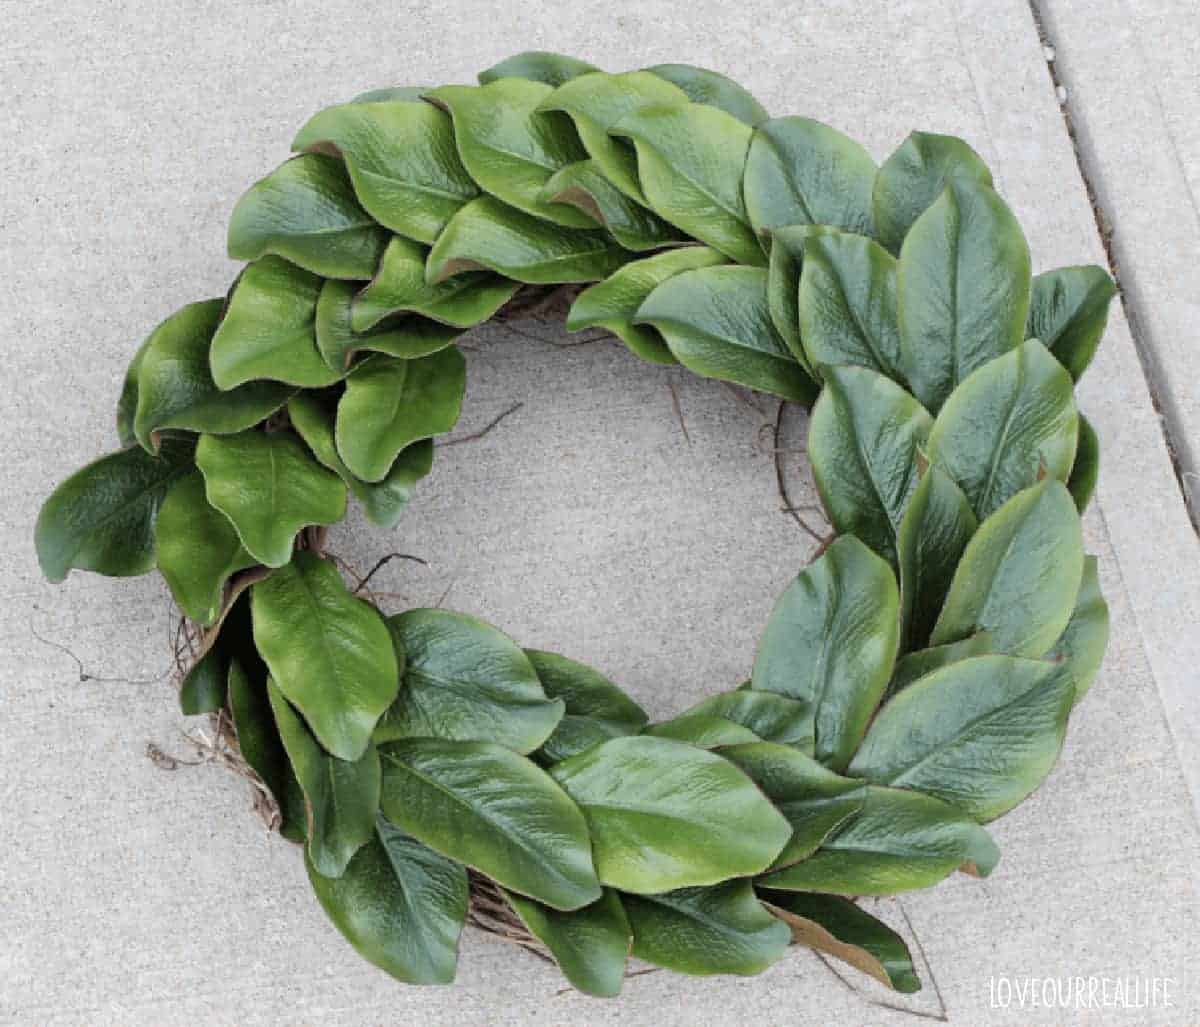
Voila! After a little shaping, you’re done!
Add pine cones, bows, ribbon, or other accessories if you want to spice it up a bit. This easy diy magnolia wreath can be personalized however you’d like it!
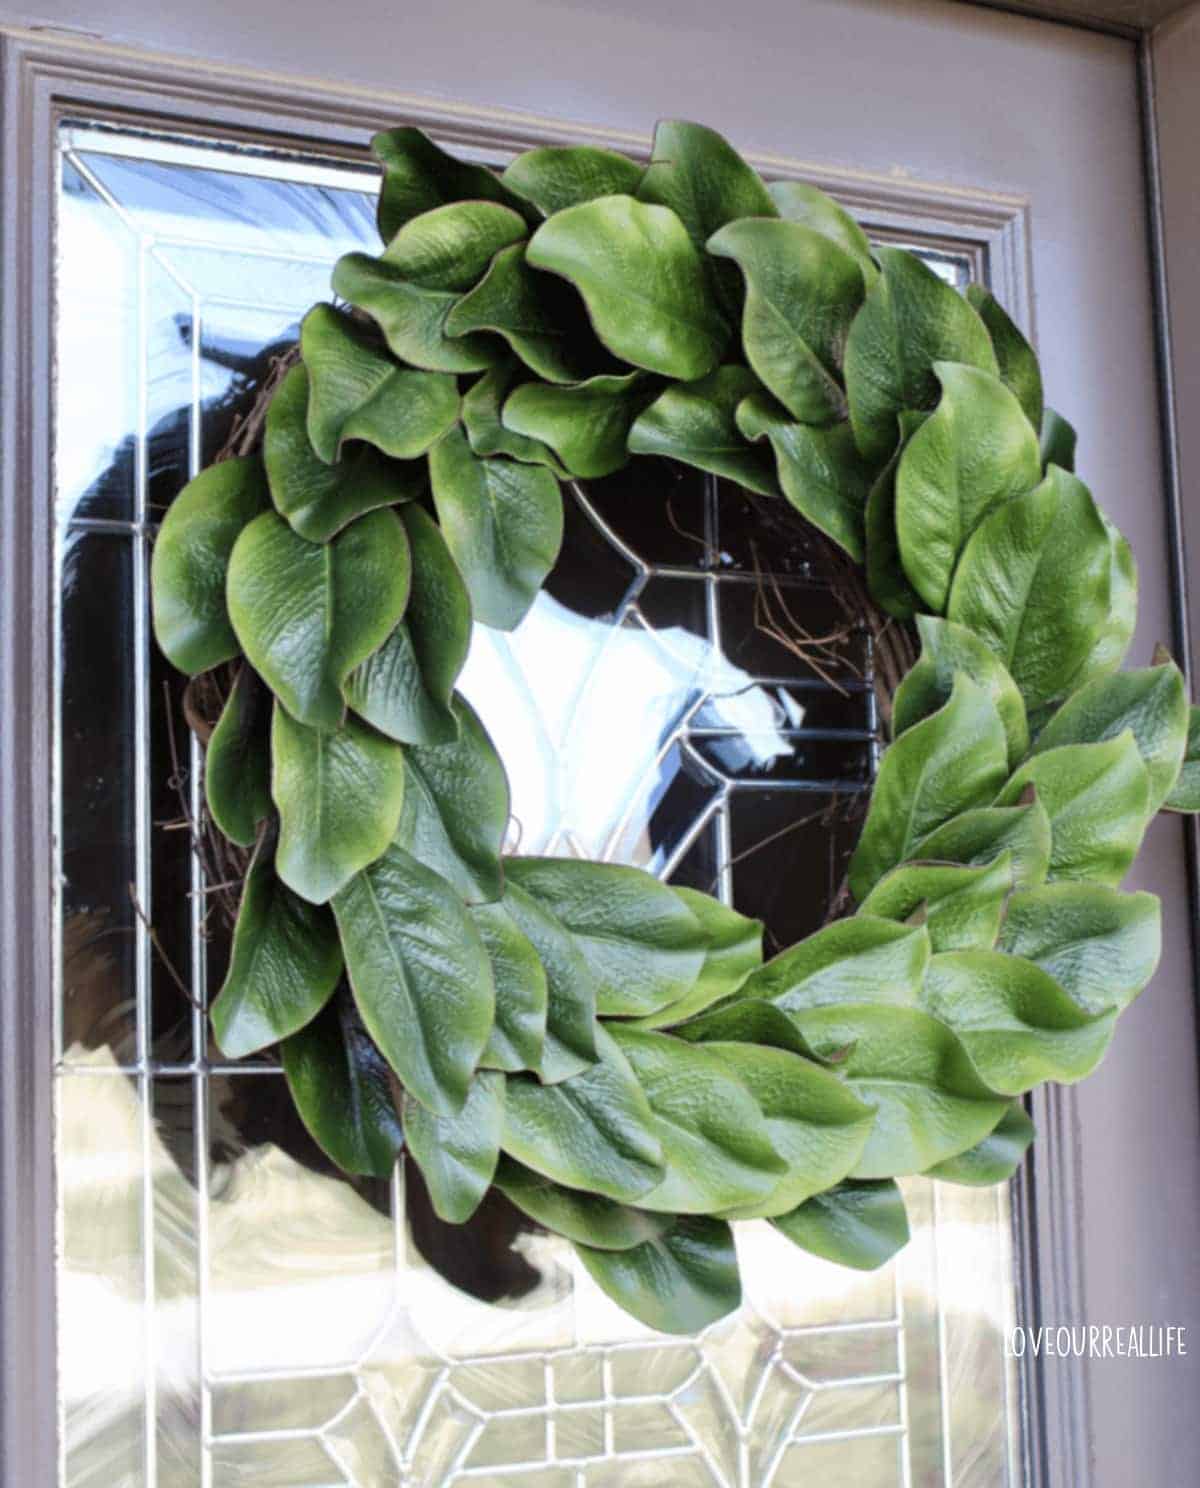
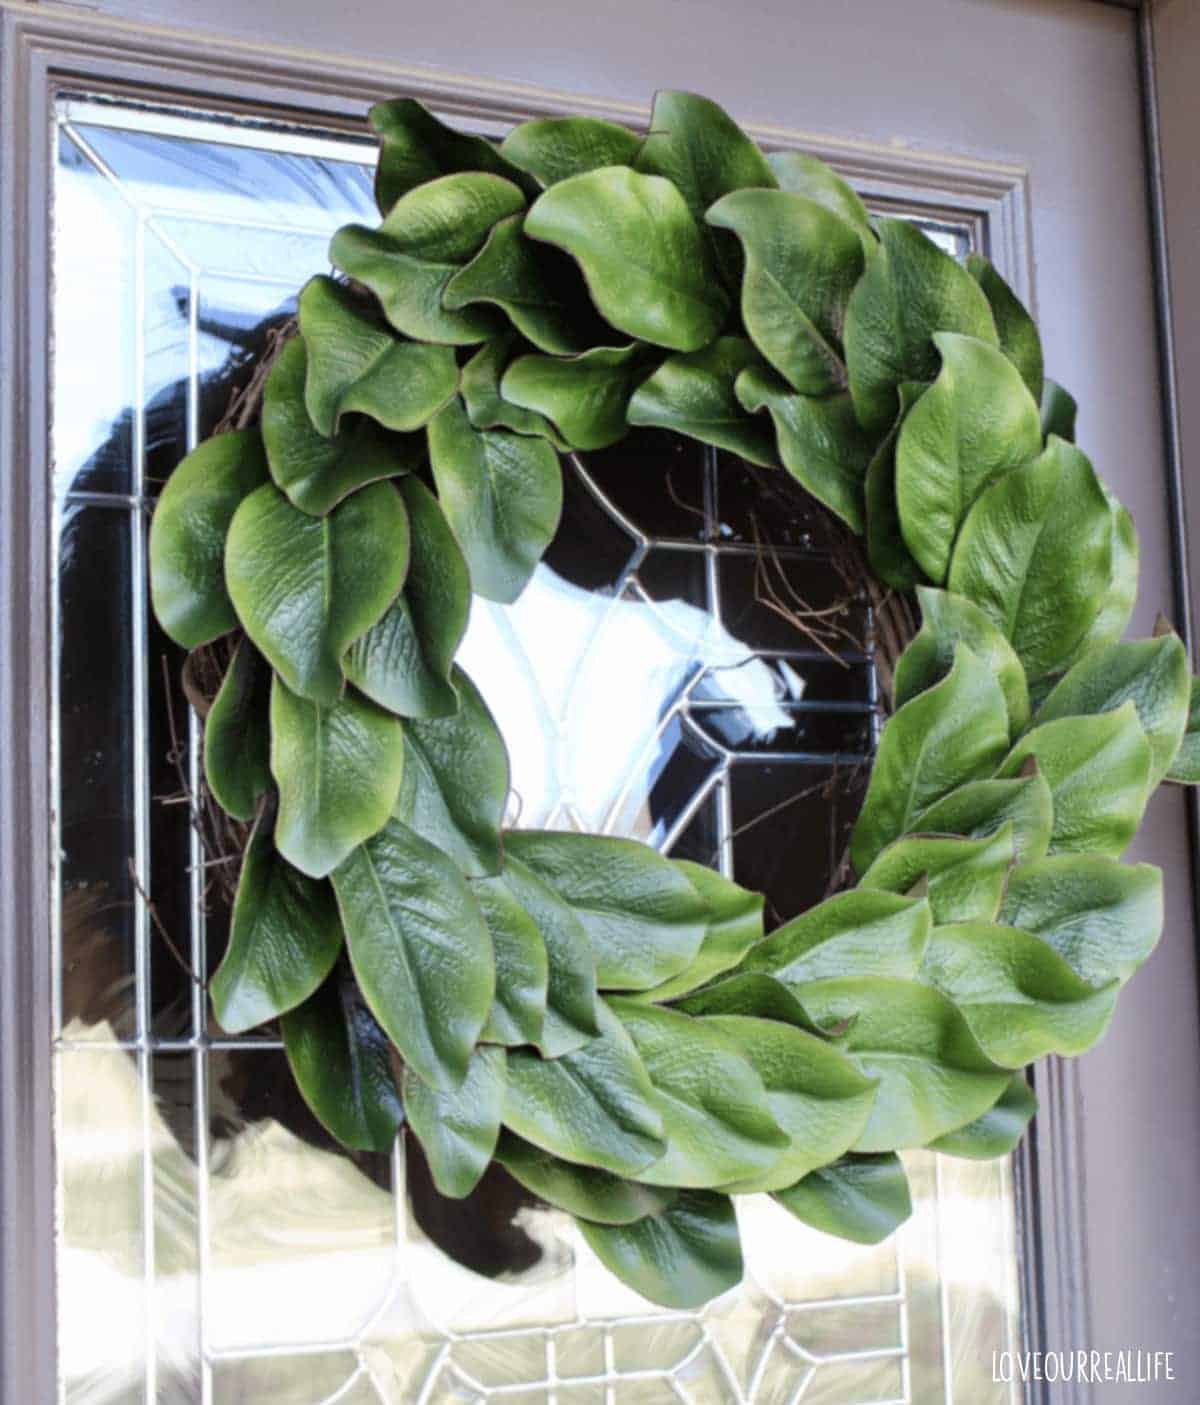
I thought about using this wreath for the front door, but I have double doors and I didn’t get enough supplies for two identical wreaths.
For you visual learners, you can see how I made a very similar wreath using this same process in the video below:
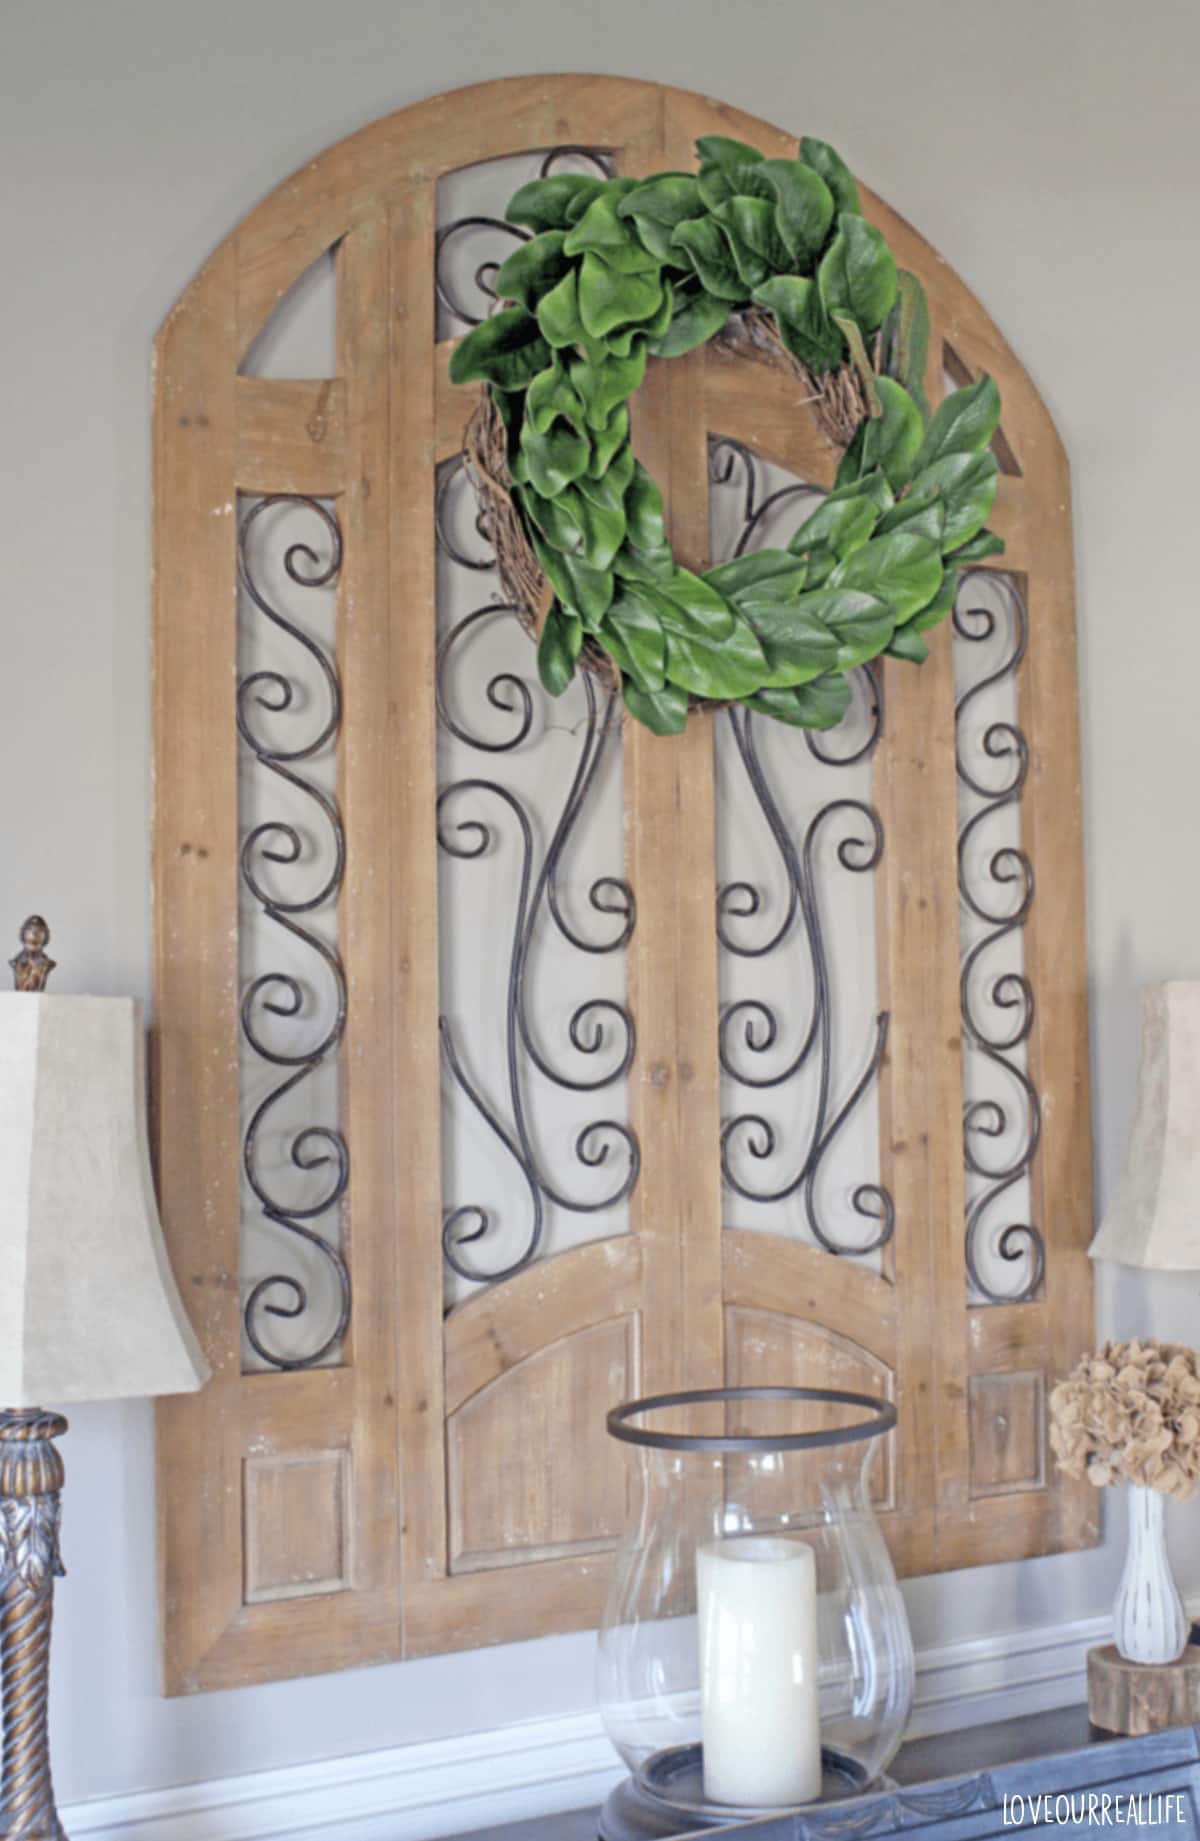
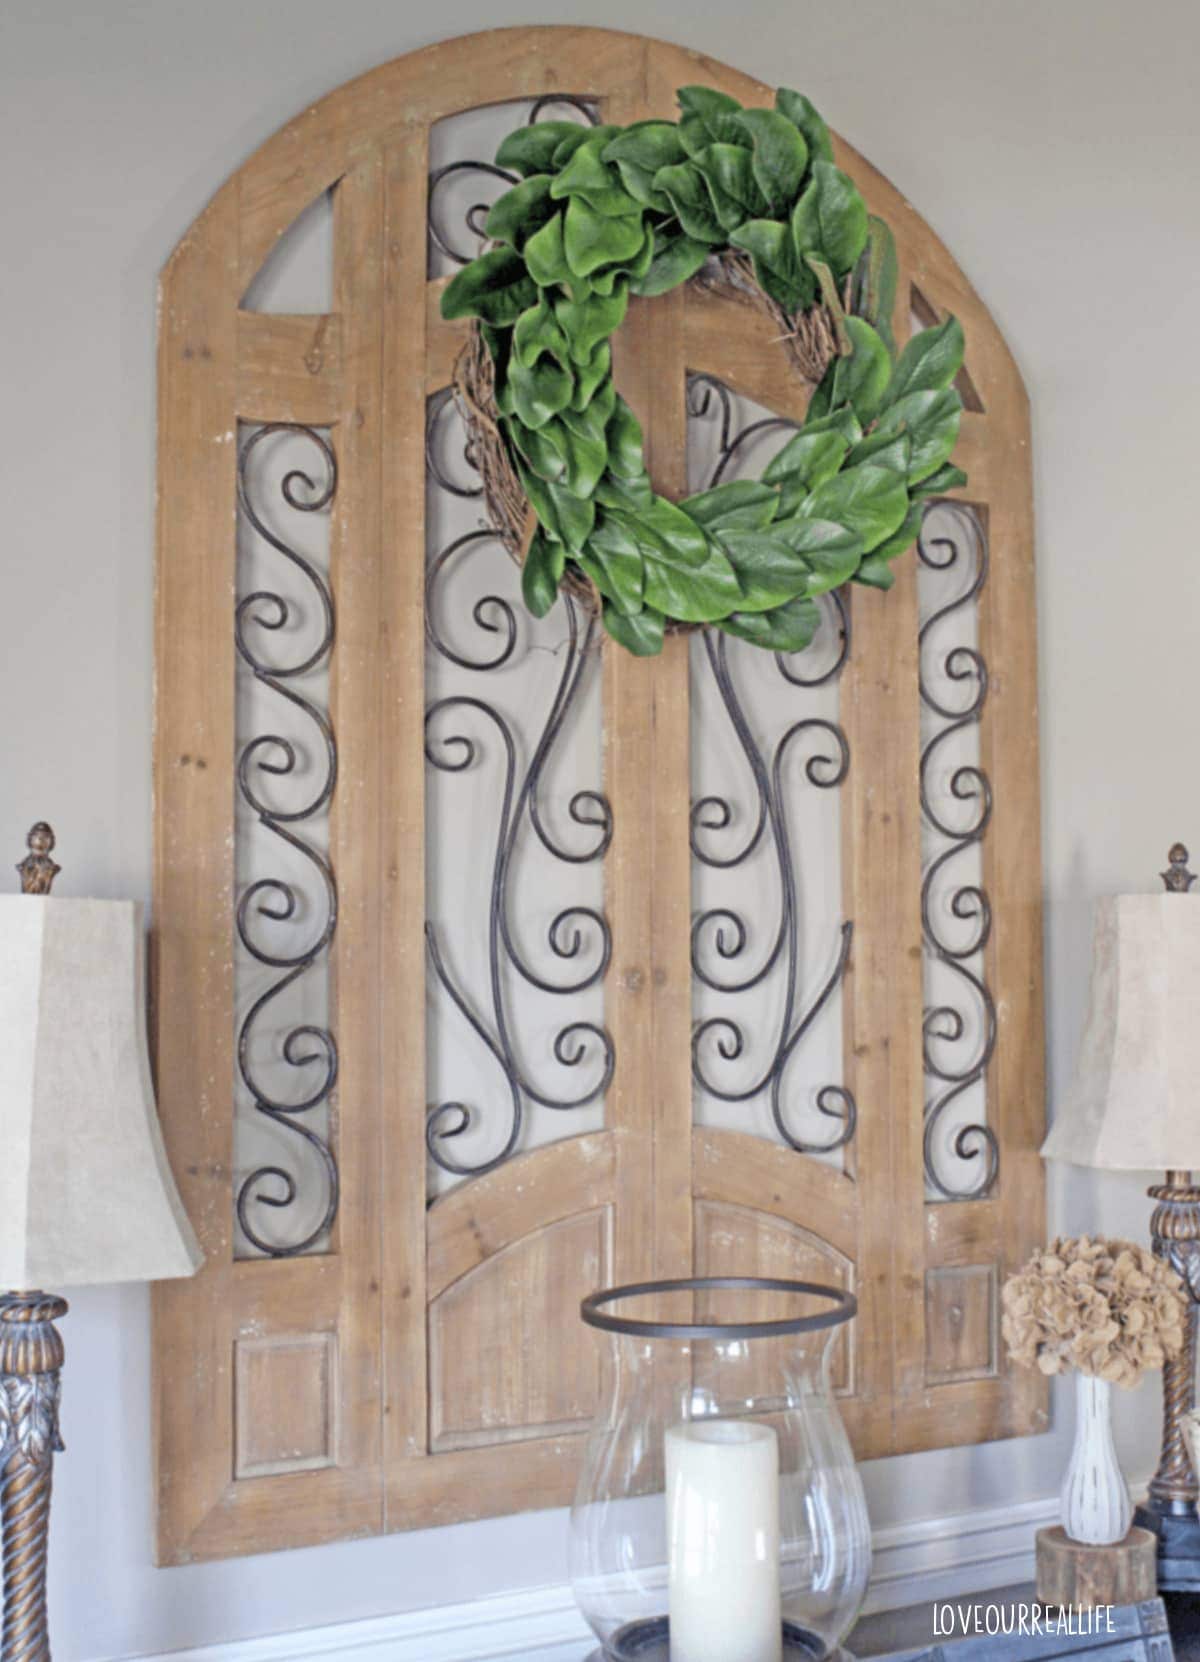
So for now, the below picture shows where I opted to locate this beauty:
I love it!
I’ll bend a few of the stems to spread out the leaves a bit more. When I get a moment, I also will move the wreath down a little on this wooden/iron wall decor as it’s a little too high. But for now, above our pretty painted piano is where it stays:)
Have you made any wreaths lately? Leave me a note below to share your own wreath project or to just say hello!
If you don’t live in Texas or have a magnolia tree in your own backyard, this faux magnolia leaf wreath using floral stems is so easy to make.
The total time spent making the wreath was about 20 minutes.
Have a great day!
More Favorites
Home Decor DIYs and Other Latest Craft Projects

Don’t forget to PIN IT for later!


This wreath looks great! Thanks for the idea.
Thank you!
Beautiful!
Thanks, sweet friend!
Love this April!!! I have been looking all over for a cheaper Magnolia look alike and haven’t found anything!! I will definetly be doing this!!!
I’m so glad, Katie! It was very easy and fairly inexpensive when considering the alternatives. If you try it, post a picture here! Happy wreath making!
Love this!
Thank you!
That is adorable. You could even add an L in the middle of it to personalize it.
Great idea, Michele!