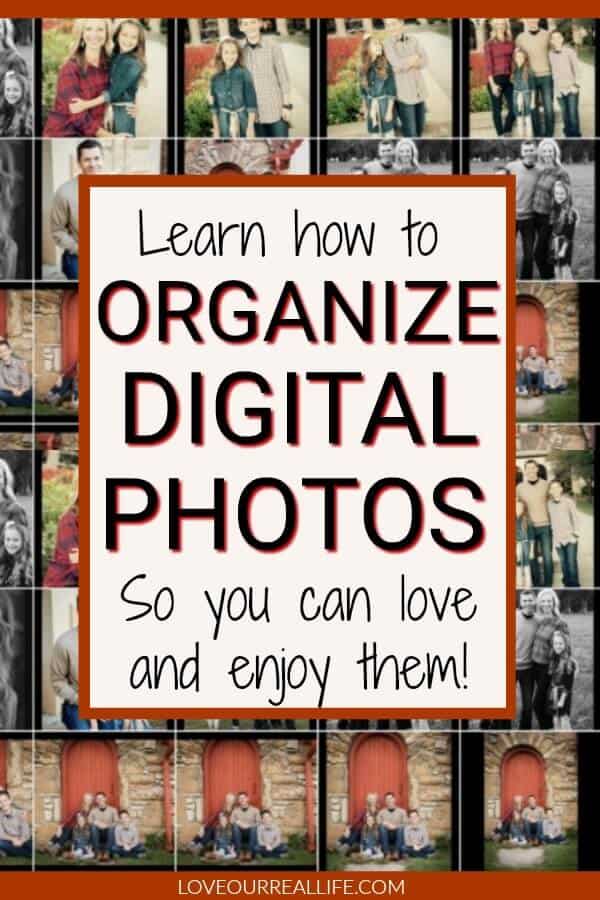
How to Organize Your Digital Photos and Love Them!
Finding a system to organize your digital photos is not easy. Many people have hundreds, or even thousands of photos on their iphones or in their iCloud. Are you wondering what in the world to do with them? I have some solutions!
See more home organization ideas here.
I’m thrilled to join some talented blogging friends in this photo organization process. Take a moment to read more about their ideas:
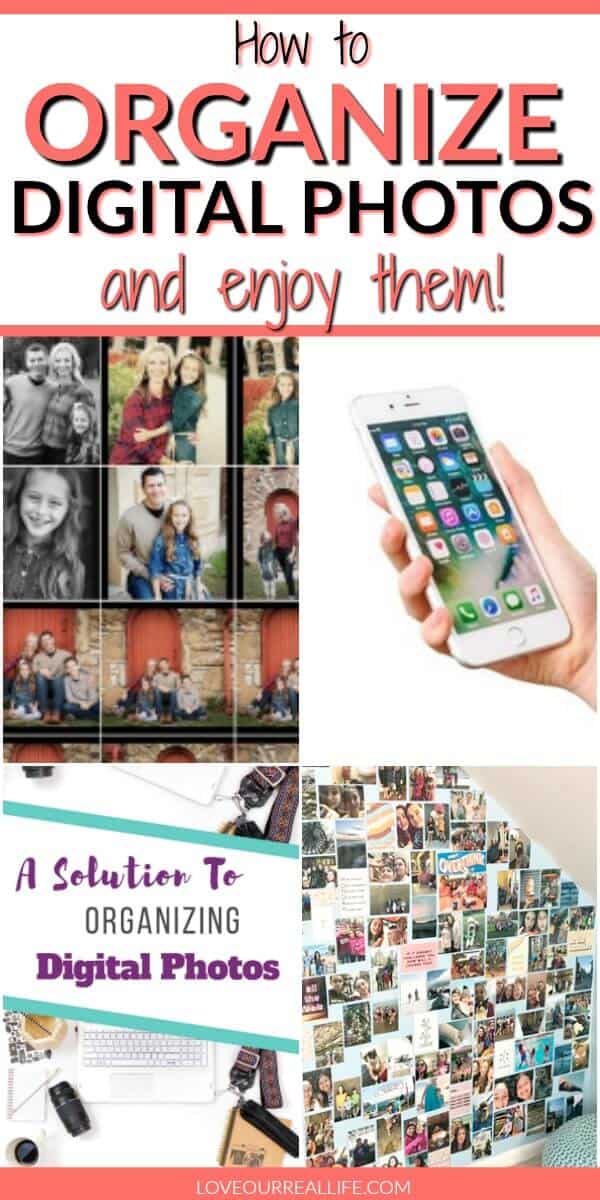
Morgan: Get Those Trapped Pictures Off Your iPhone
Amanda: A Solution to Organizing Your Digital Photos
Jaclyn: Creative Photo Display Ideas
If you are stopping by after visiting one of their blogs, I’m glad you are here! Let’s get into my tips to help you take charge of your digital photo clutter.
Photographs are meant to be a visual display of all the joyful events in our lives.
But, with our phones being constantly available to snap a picture at any given moment, it’s easy to collect A TON of photos that you will likely never look at ever again.
So how do you get all of those pictures organized?
1. Just Start
As simple as that sounds, it’s true.
It can be incredibly overwhelming to look at all of your photos. Seriously, just start.
Devote one – two days, depending on the number of photos you have, to sort through and organize all of your photos.
Fully commit to getting it done or it will be a lingering task that is seemingly never ending.
Ask me how I know!
Once I made a real commitment to tackle my photos, I was able to knock it out relatively quickly.
Keep in mind, you might have to have a loose organization system for previous years if you have YEARS worth of photos to organize. This could mean thousands of pictures.
You can develop a solid system of organization with all future pictures.
Don’t get bogged down by the daunting task of naming every single photo from 2010 until present. If you attempt to do this, you will end up quitting and never get through the process.
I started by organizing my pictures that were on my computer first. We’ll get to iPhone/cell phone and hard copy photo organization later.
I have a mac, so I will provide details for that.
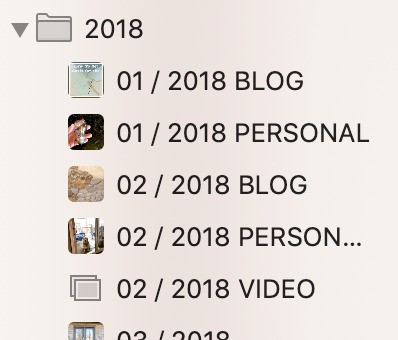
2. Organize your photos into albums and/or folders on your computer
You will need to establish a system that makes sense to you for past photos, but also going forward.
I searched high and low, and the system that made the best sense for me is this:
YEAR > MONTH > CATEGORY (I had three categories: blog, personal, video)
Some enjoy having a name of an event. If you prefer this, do it! It needs to work for you.
IF you have a manageable number of photos, you could certainly label each photo. I had too many to do this for all of my previous photos. But, this is likely how I will address photo organization going forward.
It would look like this:
YEAR > MONTH > CATEGORY > EVENT
Within each event I would name the photos using simply the event name, then giving each photo in that event a number. Example:
2019-10-HALLOWEEN-1
2019-10-HALLOWEEN-2
2019-10-HALLOWEEN-3
I say all of this to give you a guide. BUT, as I mentioned earlier, try not to overthink it.
Your sorting system needs to make sense to you, so you’ll actually stick with it, and be able to find pictures when needed.
Keep it simple.
Delete photos you do not need
You will most certainly come across photos that you have absolutely no need for.
Screen shots, duplicate photos, bad lighting, accidental burst photos, etc.
Delete them!
If you have 100 pictures of your child eating a cupcake, you can likely get rid of most of them.
Delete them!
The goal is preserving wonderful memories. You do not need (and dare I say want) to look through 100 photos of that one moment in time. If you have time to delete the unnecessary photos, do it!
Having TOO MANY pictures becomes a burden and it no longer feels special when you have to sort through all of the photos each time you are searching for something.
One more time, let me emphasize….DELETE THEM!
If you can purge some of the photos, do it.
Backup your photos
Once you have established your photo organization system, backing up your photos is critical!
Your photos are precious. So, I think it is important to have a couple of backup measures in place.
This is a lot of work, but once your systems are set, it becomes much easier. As mentioned before, making it a priority to backup your photos is key.
1. How to save your photos on an external hard drive
Purchase an external hard drive that is no less than 2TB. This will allow for plenty of space for your photo storage.
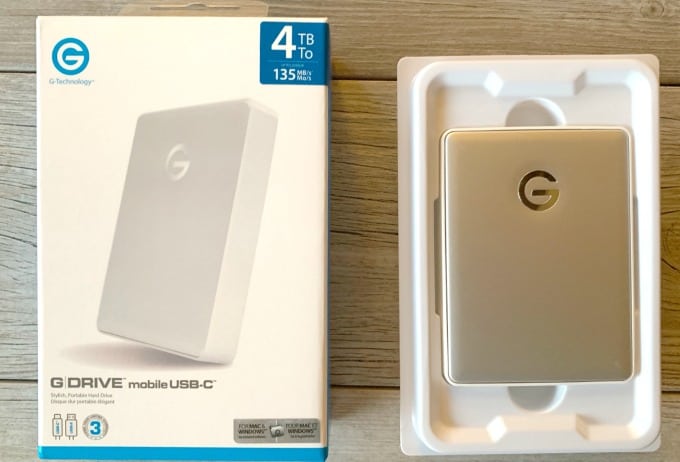
This hard drive should be exclusive for your photos and videos.
Some external hard drive suggestions:
– G – Technology 4TB G-Drive (this is what I use)
– Western Digital 2TB Elements Portable External Hard Drive
– Thunderbolt
Using an external hard drive is not complicated. Apple has a good tutorial for using an external hard drive with a Mac.
But, if you need a little more guidance, my friend Amanda has some easy-to-follow tips for using a hard drive for photo backups!
2. How to use an online backup service for your photos
There are a variety of online services available to backup your photos. Take a moment to research these as your decision could vary based on your needs.
The best programs with online backup services:
- Google Photos . Google Photos is a popular option. It has a free plan for unlimited storage for photos up to 16 megapixels and videos up to 1080p resolution. If this is exceeded, there are various paid plans to fit your needs.
- Amazon Prime Photos This is what I use because it is FREE for Amazon Prime members. If you have a Prime membership, this is a great option.
- DropBox. They also have free and paid plans.
There are many others, but these are the more commonly used services. Spend a little time investigating what works best for you and just do it.
Keep in mind, if you have a lot of photos, the backup will take a while.
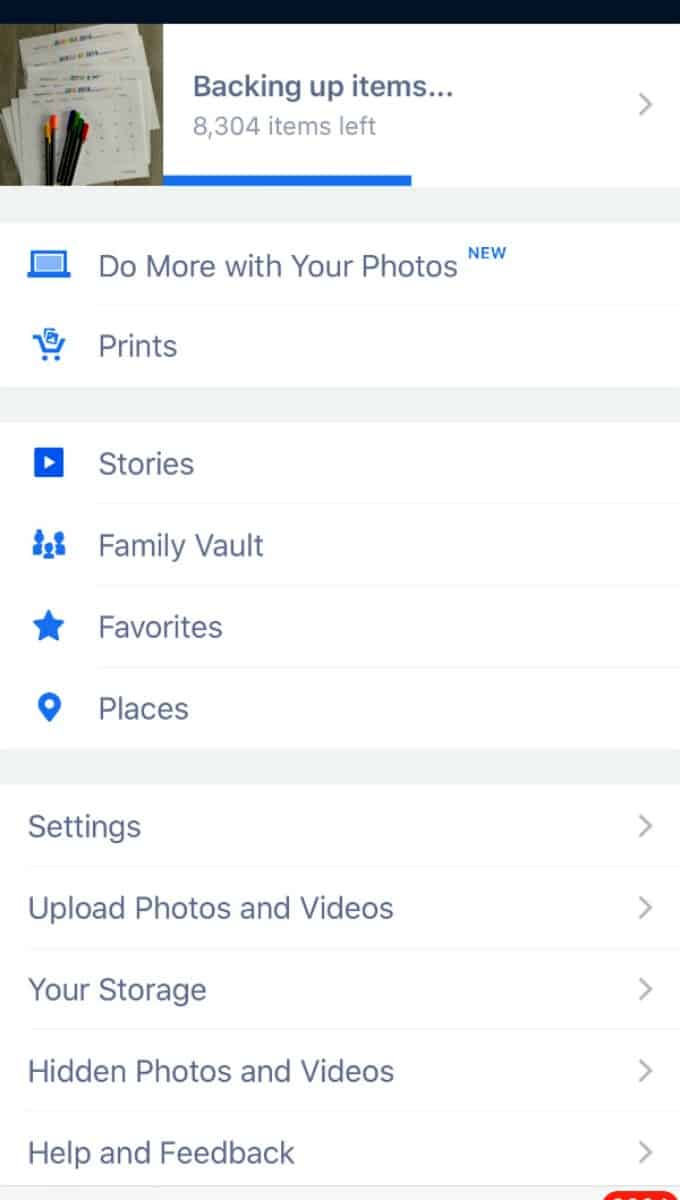
True confession, I had over 8,000 photos to backup and it took two days!
Going forward, make sure you adjust the settings to automatically backup and you will be good to go!
Schedule time to organize your photos going forward
You now have a clear system in place for organizing your photos on your computer. AND you have gone through and deleted unwanted photos. AND you have ensured your photos are safely backed up to an external hard drive as well as an online backup service.
Now what?
Going forward, schedule a time each AND EVERY month to sort through your photos and videos.
Put this on your calendar like you would any other appointment.
Plan for 1-2 hours of time going through your pictures and ensuring they are in appropriate files and are properly saved to your backup systems.
PRO TIP: When you have a few minutes of free time, go through photos and delete extra pictures you don’t need. This will save you time when you are doing your official photo organization each month!
What can you do with all of your photos after you have them organized
After spending so much time getting your photos organized, now the real fun begins!
You get to decide how use them in your life.
Here are a few options to show off your family and all of those beautiful shots you’ve taken!
1. Create a photobook
There are lots of different options out there for putting your beautiful photos into scrapbooks.
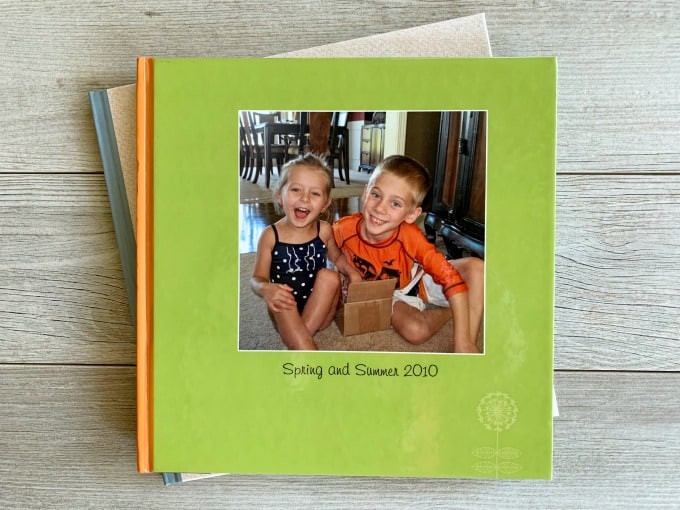
Now that your photos are well organized, it will be a lot easier to decide what photos are actually “scrapbook worthy”!
Make a list of photo books you would like to create and knock out a little at a time.
Once again, focus on going forward!
When you have time, you can always go back, but don’t stress about this.
Morgan has some great suggestions on getting photos directly from your iPhone to a photo book service!
PRO TIP: When going back to make older photo books, don’t try for perfect. Shutterfly has some fast and simple ways to create photo books!
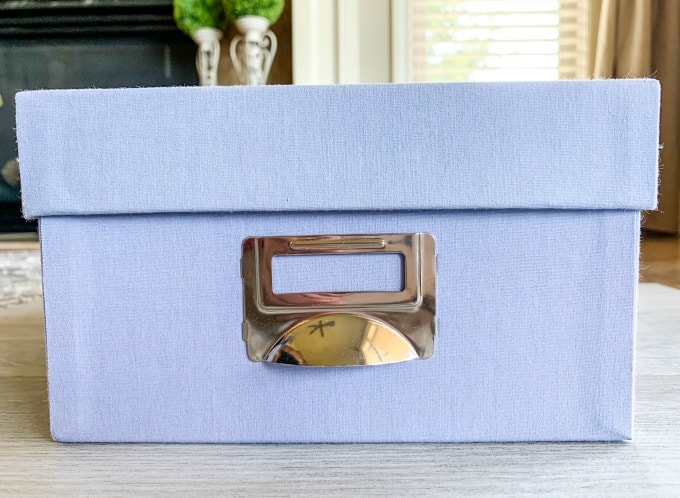
2. Print hard copies of photos and place in a photo box
Call me old fashioned, but I think it is fun to thumb through actual pictures.
When you are going through your photos each month, send your favorites to be printed so your family and guests can enjoy them!
There are lots of options out there for printing digital photos: Walgreens, CVS, WalMart, Shutterfly…just to name a few.
Find something that is CONVENIENT for you so you are more inclined to do it.
Once they are printed you can put them in a pretty photo storage box!
3. Update picture frames in your home
Take some time to do inventory of photo frames you already have displayed. Do any photos need to be replaced?
It’s great to have older photos, but it’s also nice to have more updated pictures in your home occasionally.
Use pictures that represent your family’s personality!
Have fun with this!
4. Make a gallery wall
I’m a huge fan of personalized home decor. Use your favorite photos to make a large gallery wall display to show off your family.
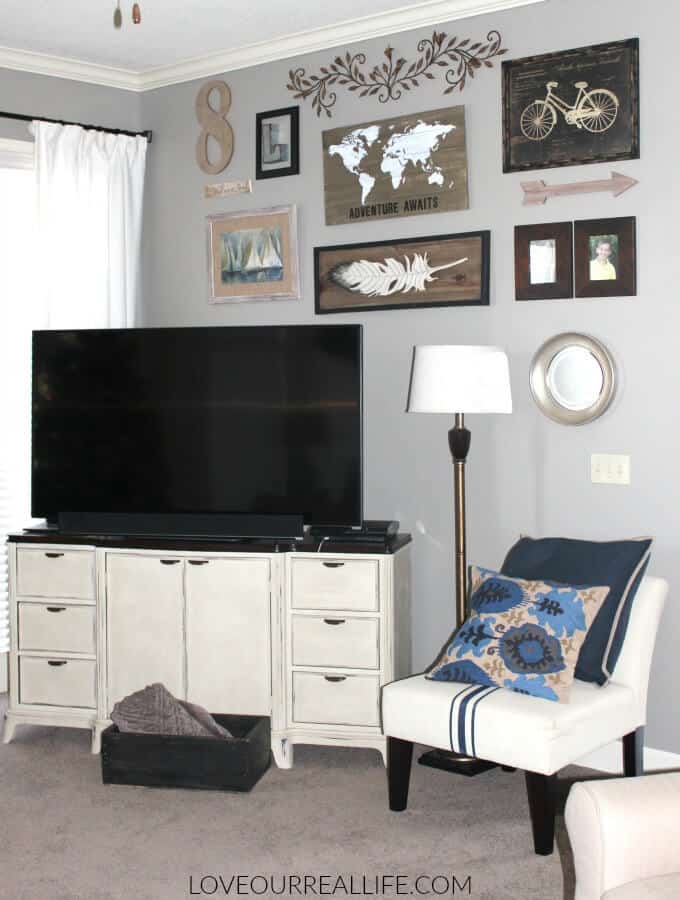
Need some help with how to create a gallery wall? I’ve got your covered with my gallery wall tutorial!
My friend, Jaclyn has great ideas for making photo collages from your pictures to display in your home!
5. Create a photo calendar
As you are sorting through your photos each month, create a folder of FAVORITES that you can use for photo calendars or other photo-based gifts.
These are great gift ideas for grandparents or other close relatives.
Whew! That was a lot of work, but I hope you have a better handle on your pictures.
Don’t forget to pop over to Morgan, Amanda, and Jaclyn’s posts. They have great tips and ideas for your photo organization needs!
Morgan: Get Those Trapped Pictures Off Your iPhone
Amanda: A Solution to Organizing Your Digital Photos
Jaclyn: Creative Photo Display Ideas
Are you motivated to take control of your digital photo clutter?
If you need a little more guidance with organization, join the Love Our Real Life community. Click on the yellow box below to sign up for the newsletter!
I have several organizational printables you will love!
Have a great day, friends!
Don’t forget to PIN THIS to your favorite Pinterest board for later!

Phew! I just need to GET STARTED! It’s never going to get anywhere unless I START! Thanks for that reminder! Excited to be linking up today with you!!
LOVE your ideas for getting pictures off of your iPhone and into photo books, Morgan! It was a pleasure linking with you today as well!
That’s my problem April, I have all my photos organized on my computer but I just leave them there. Great ideas for getting them on display for my family and friends to enjoy! Glad to be linking up with you today too 🙂
Loved your photo organization ideas, too! You ladies rock;-)
You are motivating me April. I like how you suggest to “just start”. I need to block off a few days this fall and just get my pictures organized!
YES, Jaclyn! “Just start!” is what gets me through most of my projects because I’m the ultimate procrastinator. Have a great week, friend and so glad we were able to link up today!